.
Hello Friends!!
I hope you’re doing well and enjoying this amazing month of May! By the time you read this blog post I will be in New Mexico for some time with my precious parents… and I’m planning to eat all the Mexican food! I’m really in need of some time to just sit and visit with my Dad as he hasn’t been feeling too strong and discouragement has started to set in. You know when you are a hard working rancher that never quits… and suddenly you are forced to slow WAAAAY down, it is very hard. I plan to make him laugh! Smile!
.
.
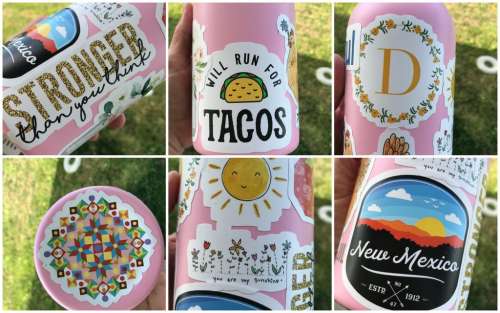
I have a young friend (younger than my daughter) that attends the same fitness classes as me and she recently gifted me a water bottle with custom stickers on it that she personally purchased and lovingly placed. It really has meant a lot to me because they are all stickers that represent ME and so I know that she really put thought into it. When she handed it to me she said “This is your emotional support water bottle”. I actually almost cried when I looked at all the super sweet stickers and that she cared enough to make it just for ME. It has made me think heavily about words this past month. Not really words that we say (although we know those are SO important) but words that we read. Words that are an emotional support.
.
But before we get started on my blog post today I need to tell you the giveaway winner from my post last month on self-care is:
Eileen Burke!
I put together a super fun package of all little home sewn items and it is winging its way to Eileen as I type this. I found that in putting together the little package was a form of self-care for me and I certainly hope receiving it is the same for Eileen. Thank you to all of you that entered my giveaway; I wish I could’ve sent a little package to each of you! (And if you haven’t read all the comments on the blog post, you need to. They were SO GOOD!!!)
.
.
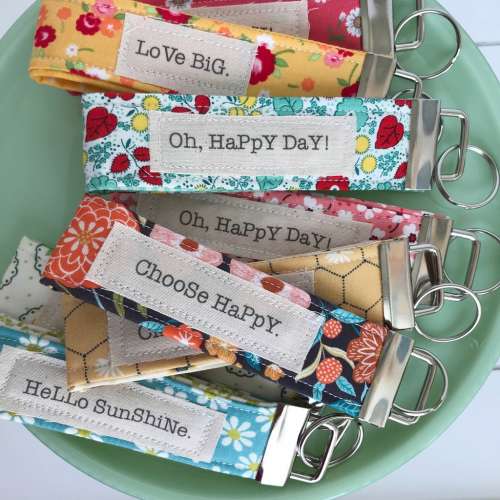
So back to words of encouragement… my simple blog post today is a project that you can make quickly and inexpensively and you can customize it with the words that you think your gift recipient would love and would be encouraged by! This project is fabric key fobs and I’m serious when I tell you they are SO easy. You literally can make one in minutes. So lets get started with this fun project!
.
.
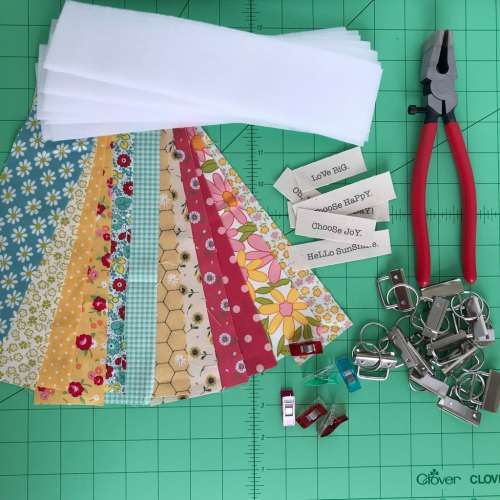
You will need to purchase a few supplies but they are not expensive AND you can use them for many key fob gifts! Here are my list of supplies with links on where to purchase:
- Fabric scraps cut to: 2 inches x 10 inches (you will need 2 for each key fob)
- Fusible fleece batting cut to 2 x 10 inches (you can purchase this at Hobby Lobby, Joans, or even Walmart. You only need about 1/4 yard to make a lot of key fobs.)
- Key Fob Kit: I purchased this kit from Amazon for under $17. It includes the pliers as well as 42 sets of hardware!
- Words printed on fabric (details in post below)
Here is a little tip for you before we get started: if you intend to make more than one of these fabric key fobs, I recommend doing it in a sort of production line! it is so much faster. I made ten of them in under an hour.
.
.
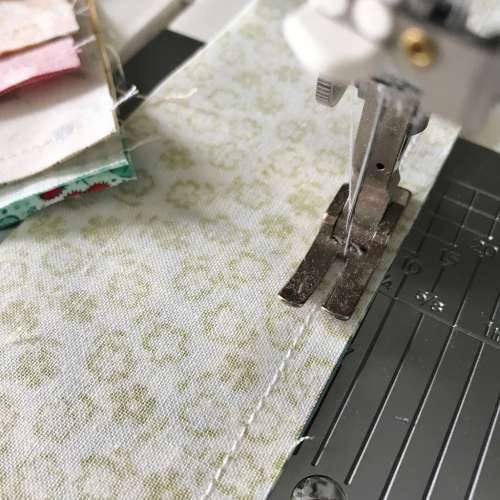
Step One: Sew two strips of fabric right sides together on the long edge, using a 1/4 inch seam allowance.
.
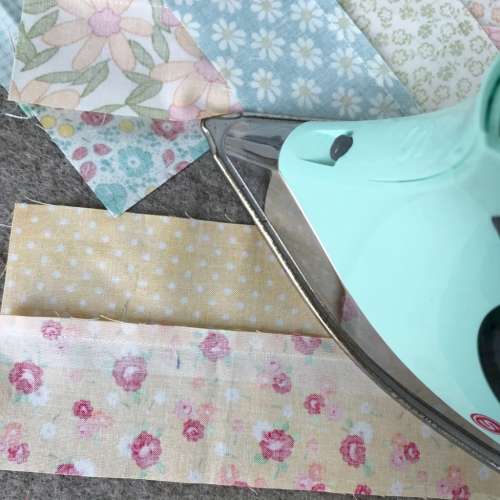
Step Two: Press the seam open. (I know the picture above shows that I am pressing the seam to one side, but it really does give a better finish if the seam is pressed open.)
.
.
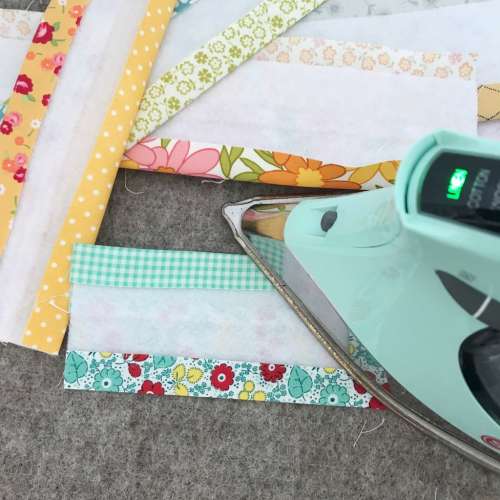
Step Three: Place a piece fusible fleece exactly in the middle of the fabric, fusible side down. Iron in place.
.
.
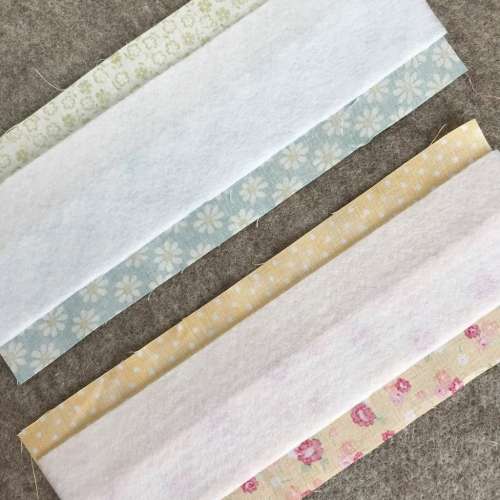
Step Four: Iron the long edge of extended fabric over the fusible fleece. Do this on both long edges.
.
.
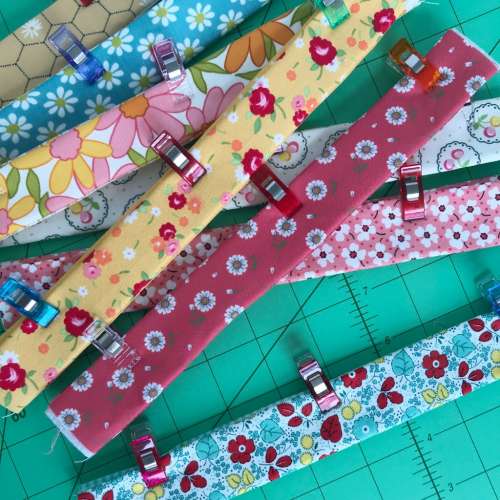
Step Five: Fold each long fabric strip in half, with the seam creating one of the edges. I use Clover Wonder Clips to hold in place but you can use a couple pins.
.
.
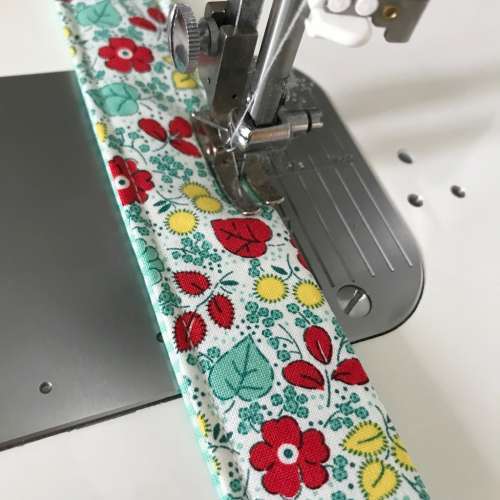
Step Six: Sew 1/8 inch topstitch along each long edge.
.
.
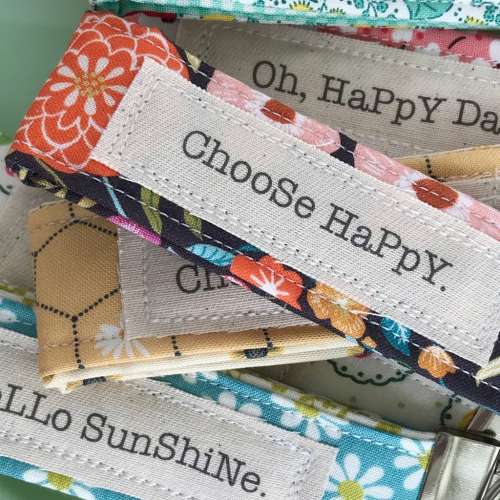
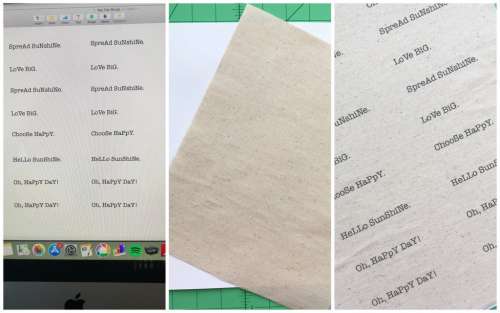
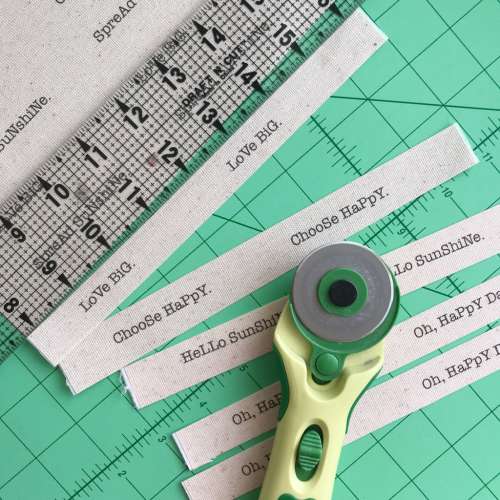
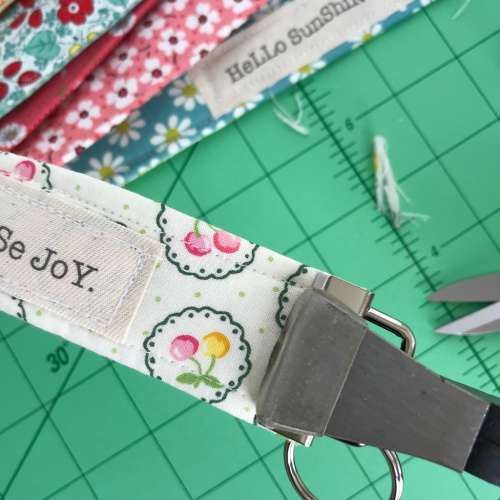
Step Seven: Now we are going to add some fun words! This was a very simple project that required my computer, printer and a little heavier scrap of fabric. Mine was almost a canvas. I simply cut my fabric to the size of a sheet of paper: 8.5 x 11. I used a little tab of glue to attach the top edge to a piece of cardstock (doesn’t matter the color of paper, you won’t be using it after you print). Then after you have determined your words and put them into a word processing program simply print them on the fabric paper you have created. Its so simple. (I do recommend before printing on your fabric that you do a draft print on your paper first.) AND as a bonus here… for anyone that would like to use my words I’m attaching a PDF file where you can simply print them without all the hassle of formatting!
Click here to pull up my PDF file: Key Fob Words
.
.
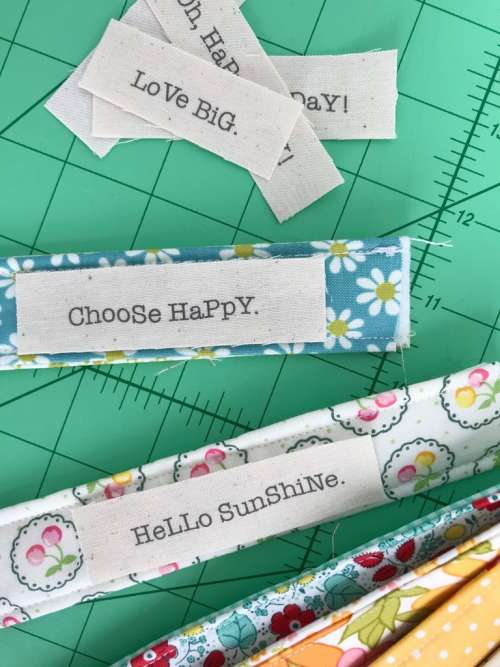
Step Eight: Cut all your words to approximately 3/4 inch by the length of the word or phrase. One thing I’d like to say here is that they do not have to be cut perfectly. It’s okay if they aren’t exactly centered, etc.. It makes them a little unique if they aren’t perfect!
.
.
Step Nine: Fold your key fob in half with short sides together and form a little crease at the fold. Now unfold the key fob and place your word approximately one inch from that fold.
.
.
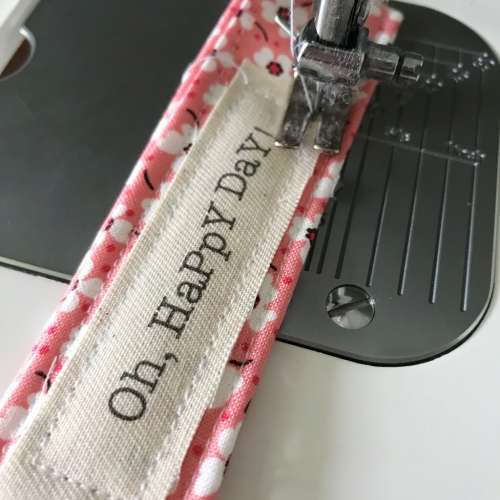
Step Ten: I do not pin the word in place, I just simply hold it with my finger and sew it. It’s okay if it slips a little. Sew it very close to the edge, going around the fabric two times.
.
.
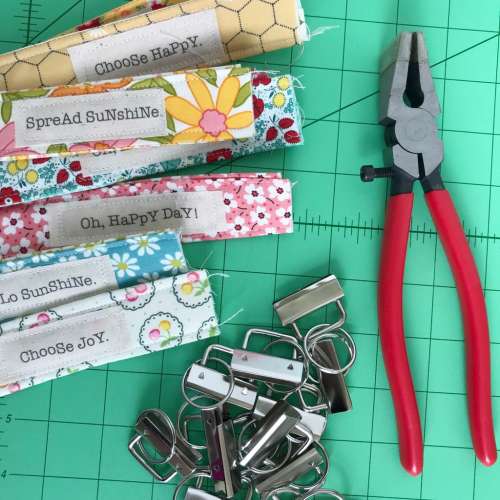
.
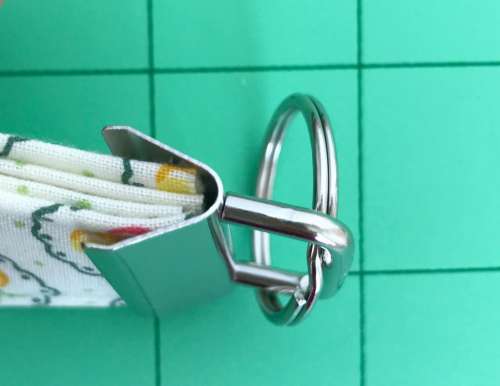
Step Eleven: Now for the fun part! Fold your key fob in half again (short ends together) and trim off the edges so they are nice and straight. You will place those two short ends into the opening of the hardware. You will notice that there are two little jagged hooks inside that opening… make sure those are on the back side of the fob (the side without the words).
.
.
Step Twelve: Use your pliers and simply squeeze the fob opening closed. I squeeze pretty tightly but it doesn’t take much!
.
.
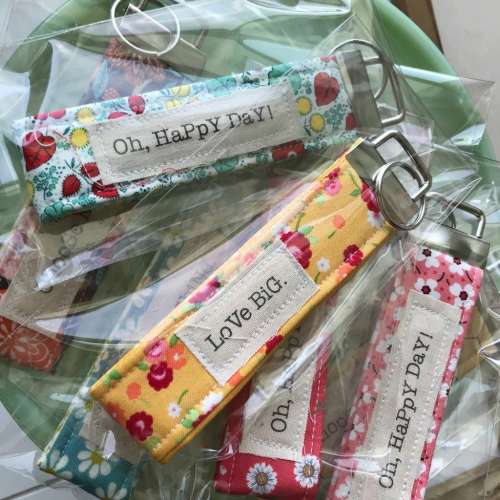
And now… YAY!!! You are done! I place each of my fobs in a little plastic sleeve and they are ready to go when I need a simple, quick gift to offer words of encouragement and bring sunshine to someone’s day.
.
I would absolutely LOVE to see pictures of the key fobs you make and I’d love to hear all about it! Leave a comment and let me know how it goes; or email me a picture at redfeedsack@gmail.com. If you have Instagram, post a picture and tag me on IG here.
.
Until our gravel roads cross again… so long.
Dori
.


I am so going to try some of these!! I bought a selection of “fat quarters” a while back & haven’t done a thing with them yet!! Now I know what to use some of them for!! Thanks much for your caring, loving heart & for all that you share here ♥️
Hi Cyndie!
Yes!!! You need to cut into the fat quarters!
Hugs,
~ Dori ~
Hi Dori!
I love the words of encouragement! What a great idea and they will fit nicely into a card to send in the mail as well. As I was reading your post, I thought of another thing … you could make these and hang them around different places for strangers to find (similar to painted rocks). It would make their day!
I’m going to make a bunch. As always, thanks for these great ideas!
Carol
Hi Carol,
YOU are brilliant!!! I love the idea of leaving them for people to find. I think I just might try that! Let me know if you do too!
~ Dori ~
Thank you so much for your words of encouragement! I always enjoy reading what you write and watching you love your family and others so well. Thank you, Dori❤️❤️
Hi Diane,
Thank you for reading my blog and encouraging ME to keep writing!
~ Dori ~
Sweet project. Love the bright fabrics.
Hi Judith,
Happy fabics right? 🙂
~ Dori ~
Leave a little opening and pop s chapstick in it@ Love these. Thank you for the idea.
Hi Myra,
Great idea!
~ Dori ~
Hello Dori, Thank you for your post! Thank you for sharing your thoughts, events and the fun craft idea. I am sending prayers for your Dad….have a wonderful time visiting with your folks and especially in making your Dad laugh 🙂 Blessings, Tammy
Hi Tammy,
Thank you for thinking of me. It was a good trip. And we did laugh!
~ Dori ~
These are so cute, Dori! And a great scrapbuster project! Thanks for sharing!
Hi Susan, yes! The best scrapbuster project!
I love this, but what kind of printer do you have that will print on fabric? I’m quite certain mine would not.
Hi Pat, I just use a generic (inexpensive HP) printer. I don’t have any problem printing onto the fabric as long as it has the fusible interfacing on the back side. That makes it stiffer so that it doesn’t hang up in the printer.
– Dori –
Does the ink fade or come off? How do you make it permanent? These are SO cute, and I’m definitely going to try this.
Hi Vanessa,
The ink might fade after washed a bunch of times! But I’ve not had a problem with it. It seems very permanent to me!
~ Dori ~