
.

.
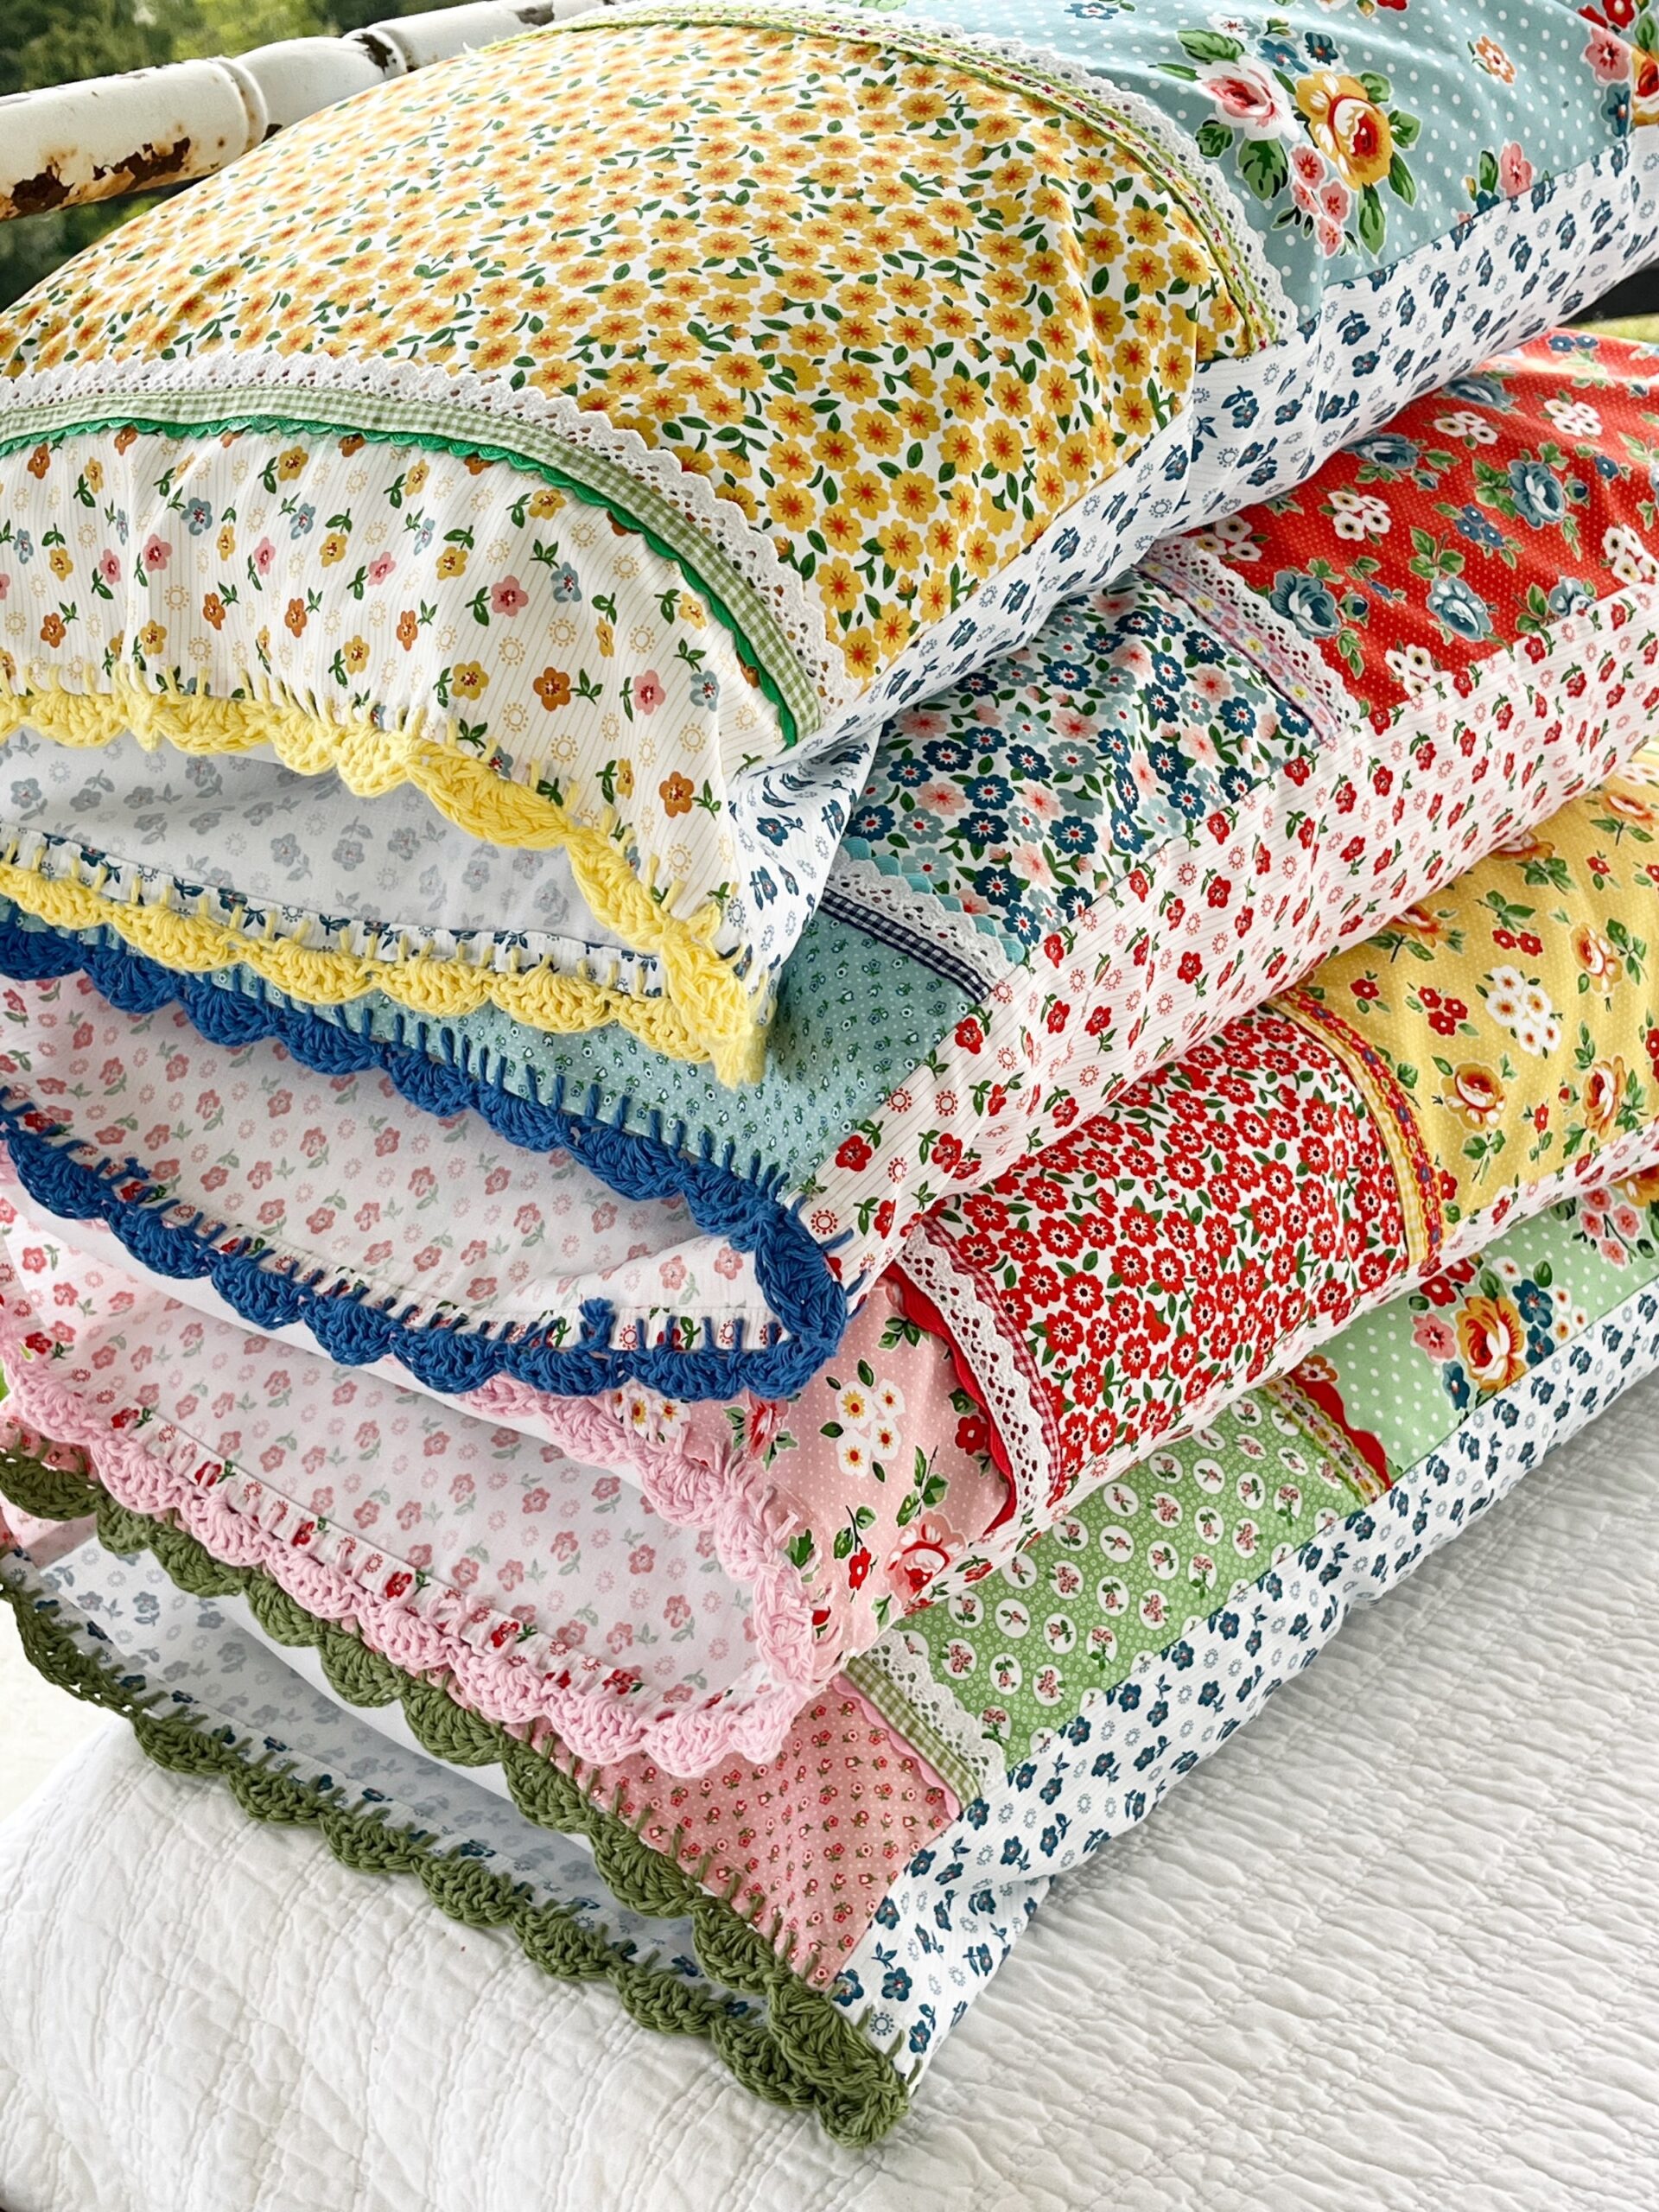
Hello my Farmgirl friends! I recently made some of the sweetest pillowcases and shared them on my personal blog with a tutorial. I’ve had so much interest in those pillowcases as well as my tutorial, that I decided it needed to be shared here too.
.
.
I’ve seen similar pillowcases to these on Pinterest through the years and have planned to duplicate them many times. But the problem is that I never found fabric that I really loved! When this new fabric collection called Flower Market came out, I knew instantly that this was the fabric for the pillowcases!
.
So, lets get started!
..
Gather Materials:
- four different fabrics of choice for each pillowcase
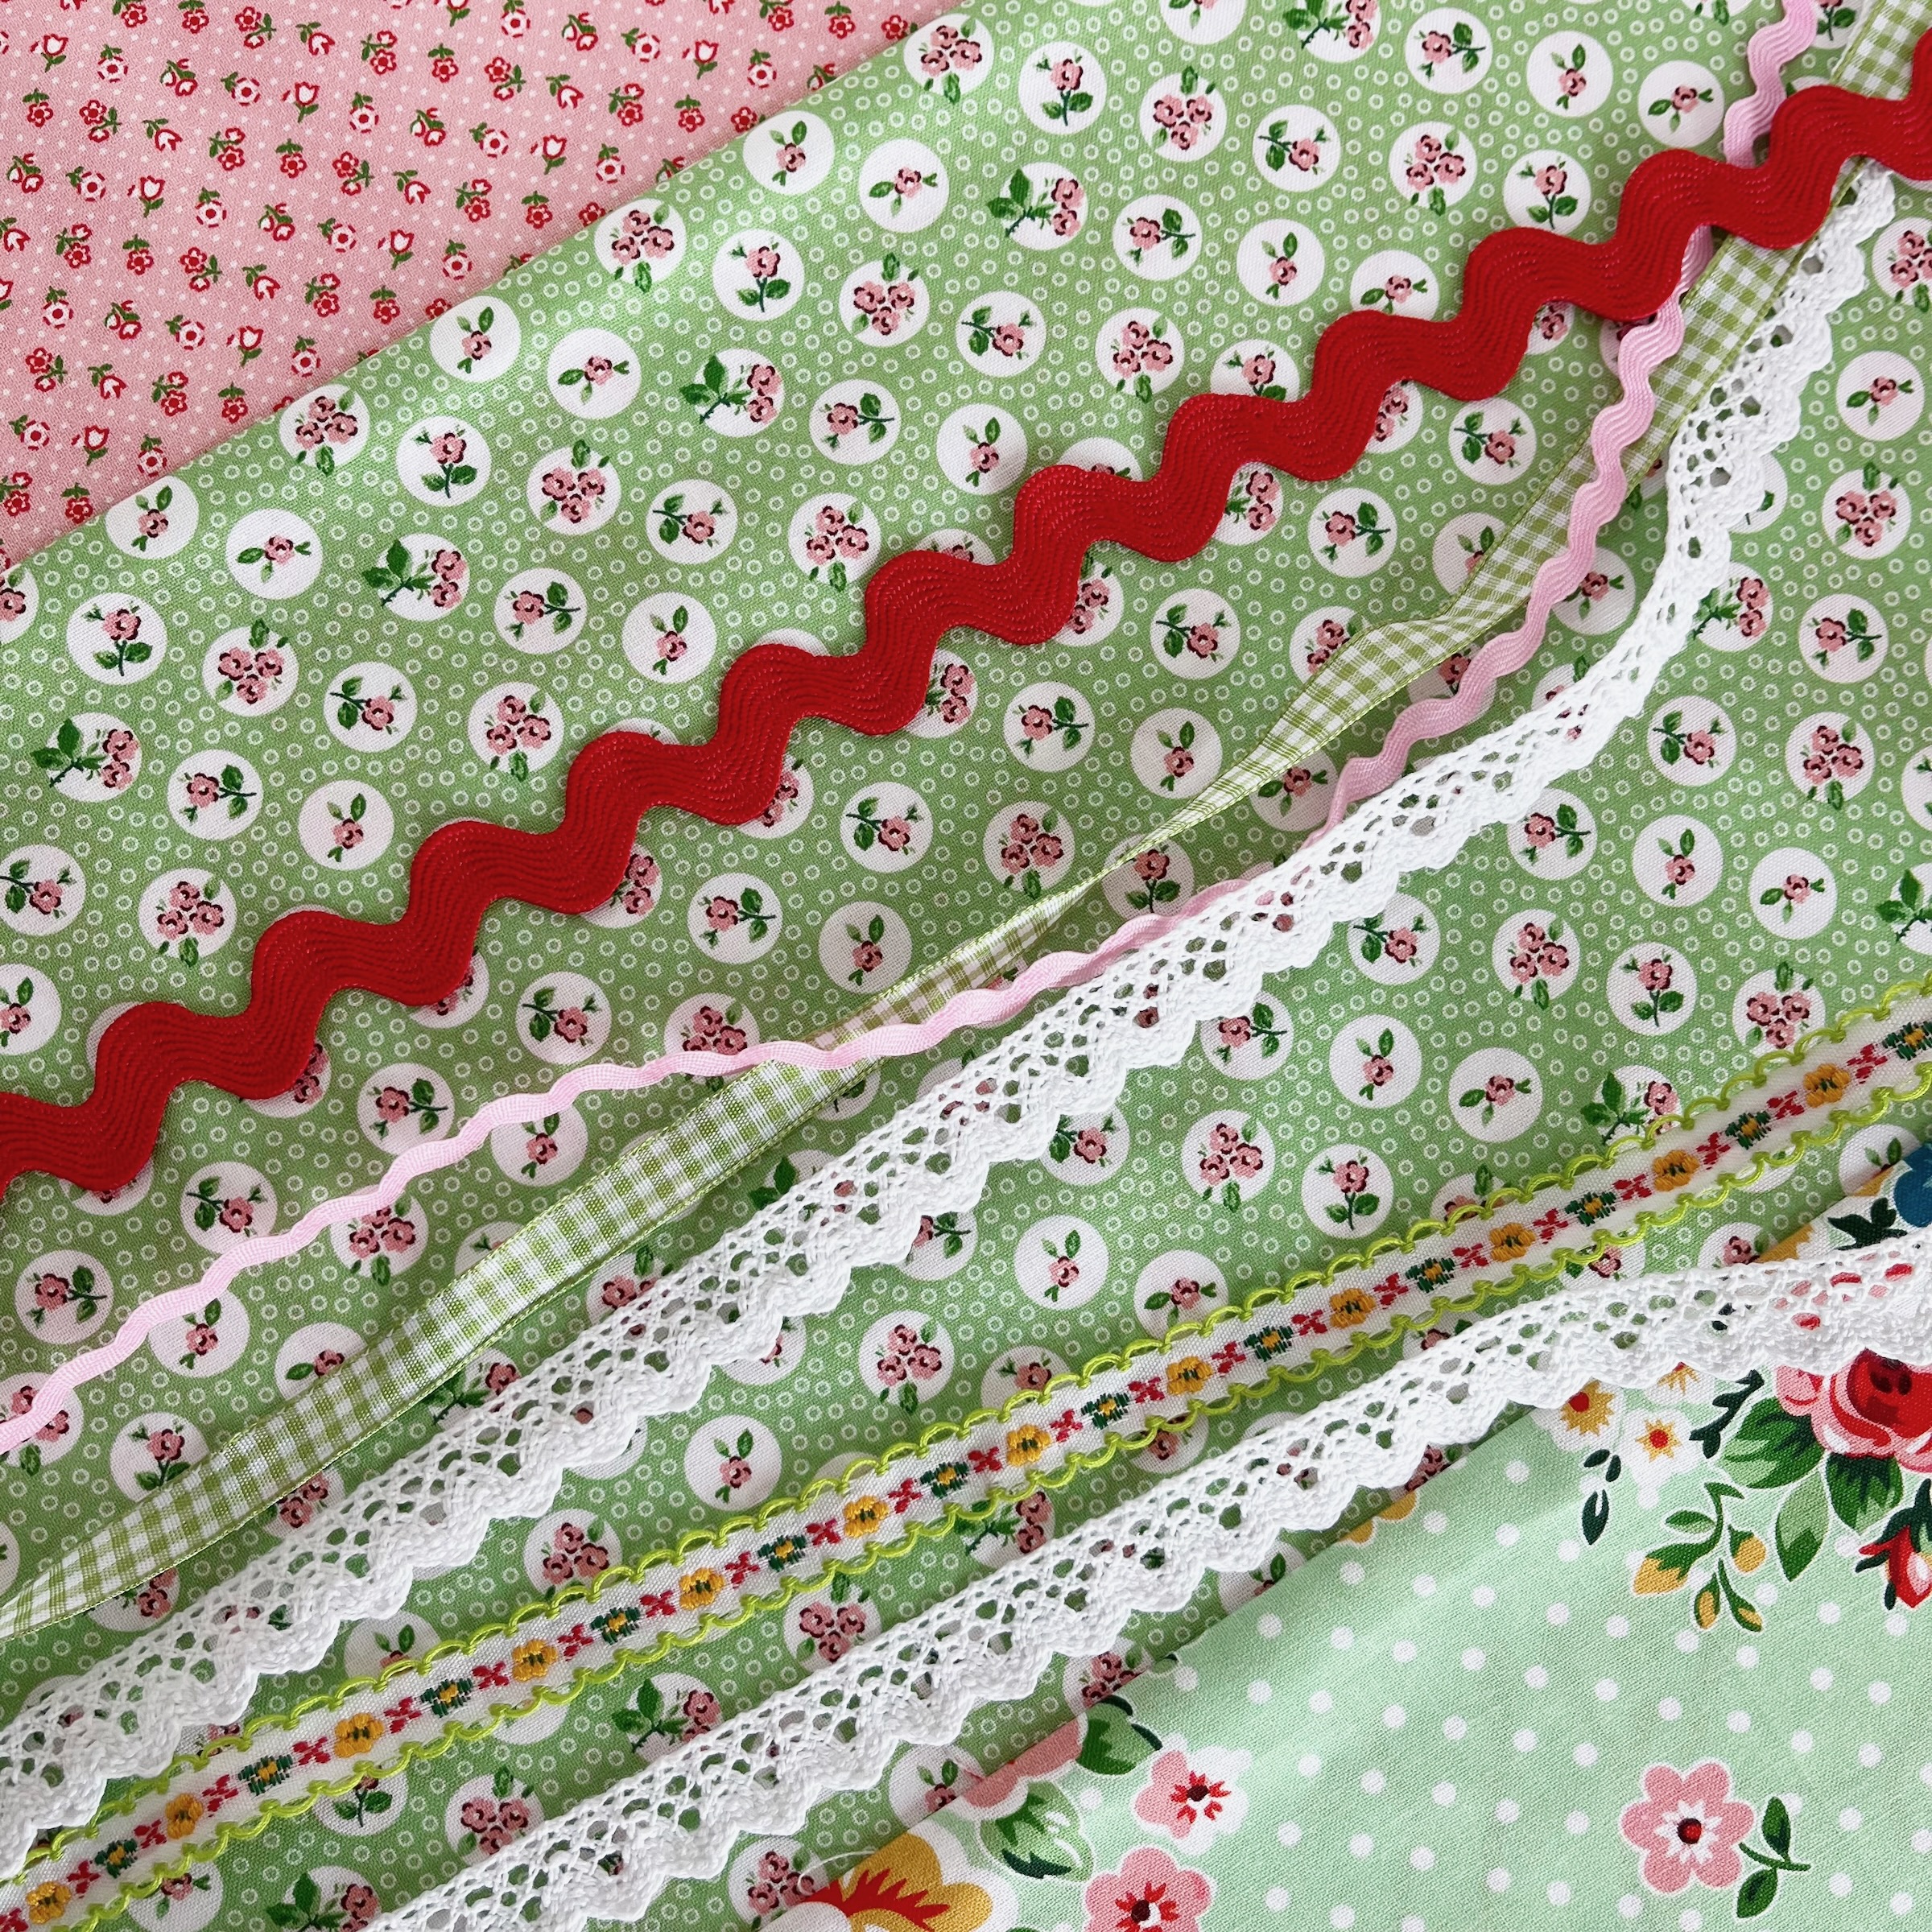
- lace, ribbon, rick-rack, any trim of choice
- matching yarn
- yarn needle with a sharp point
- crochet hook (size H) side note here: do not worry if you don’t crochet…there are workarounds!
- sewing machine
- basic sewing supplies
- rotary cutter and ruler
.
.
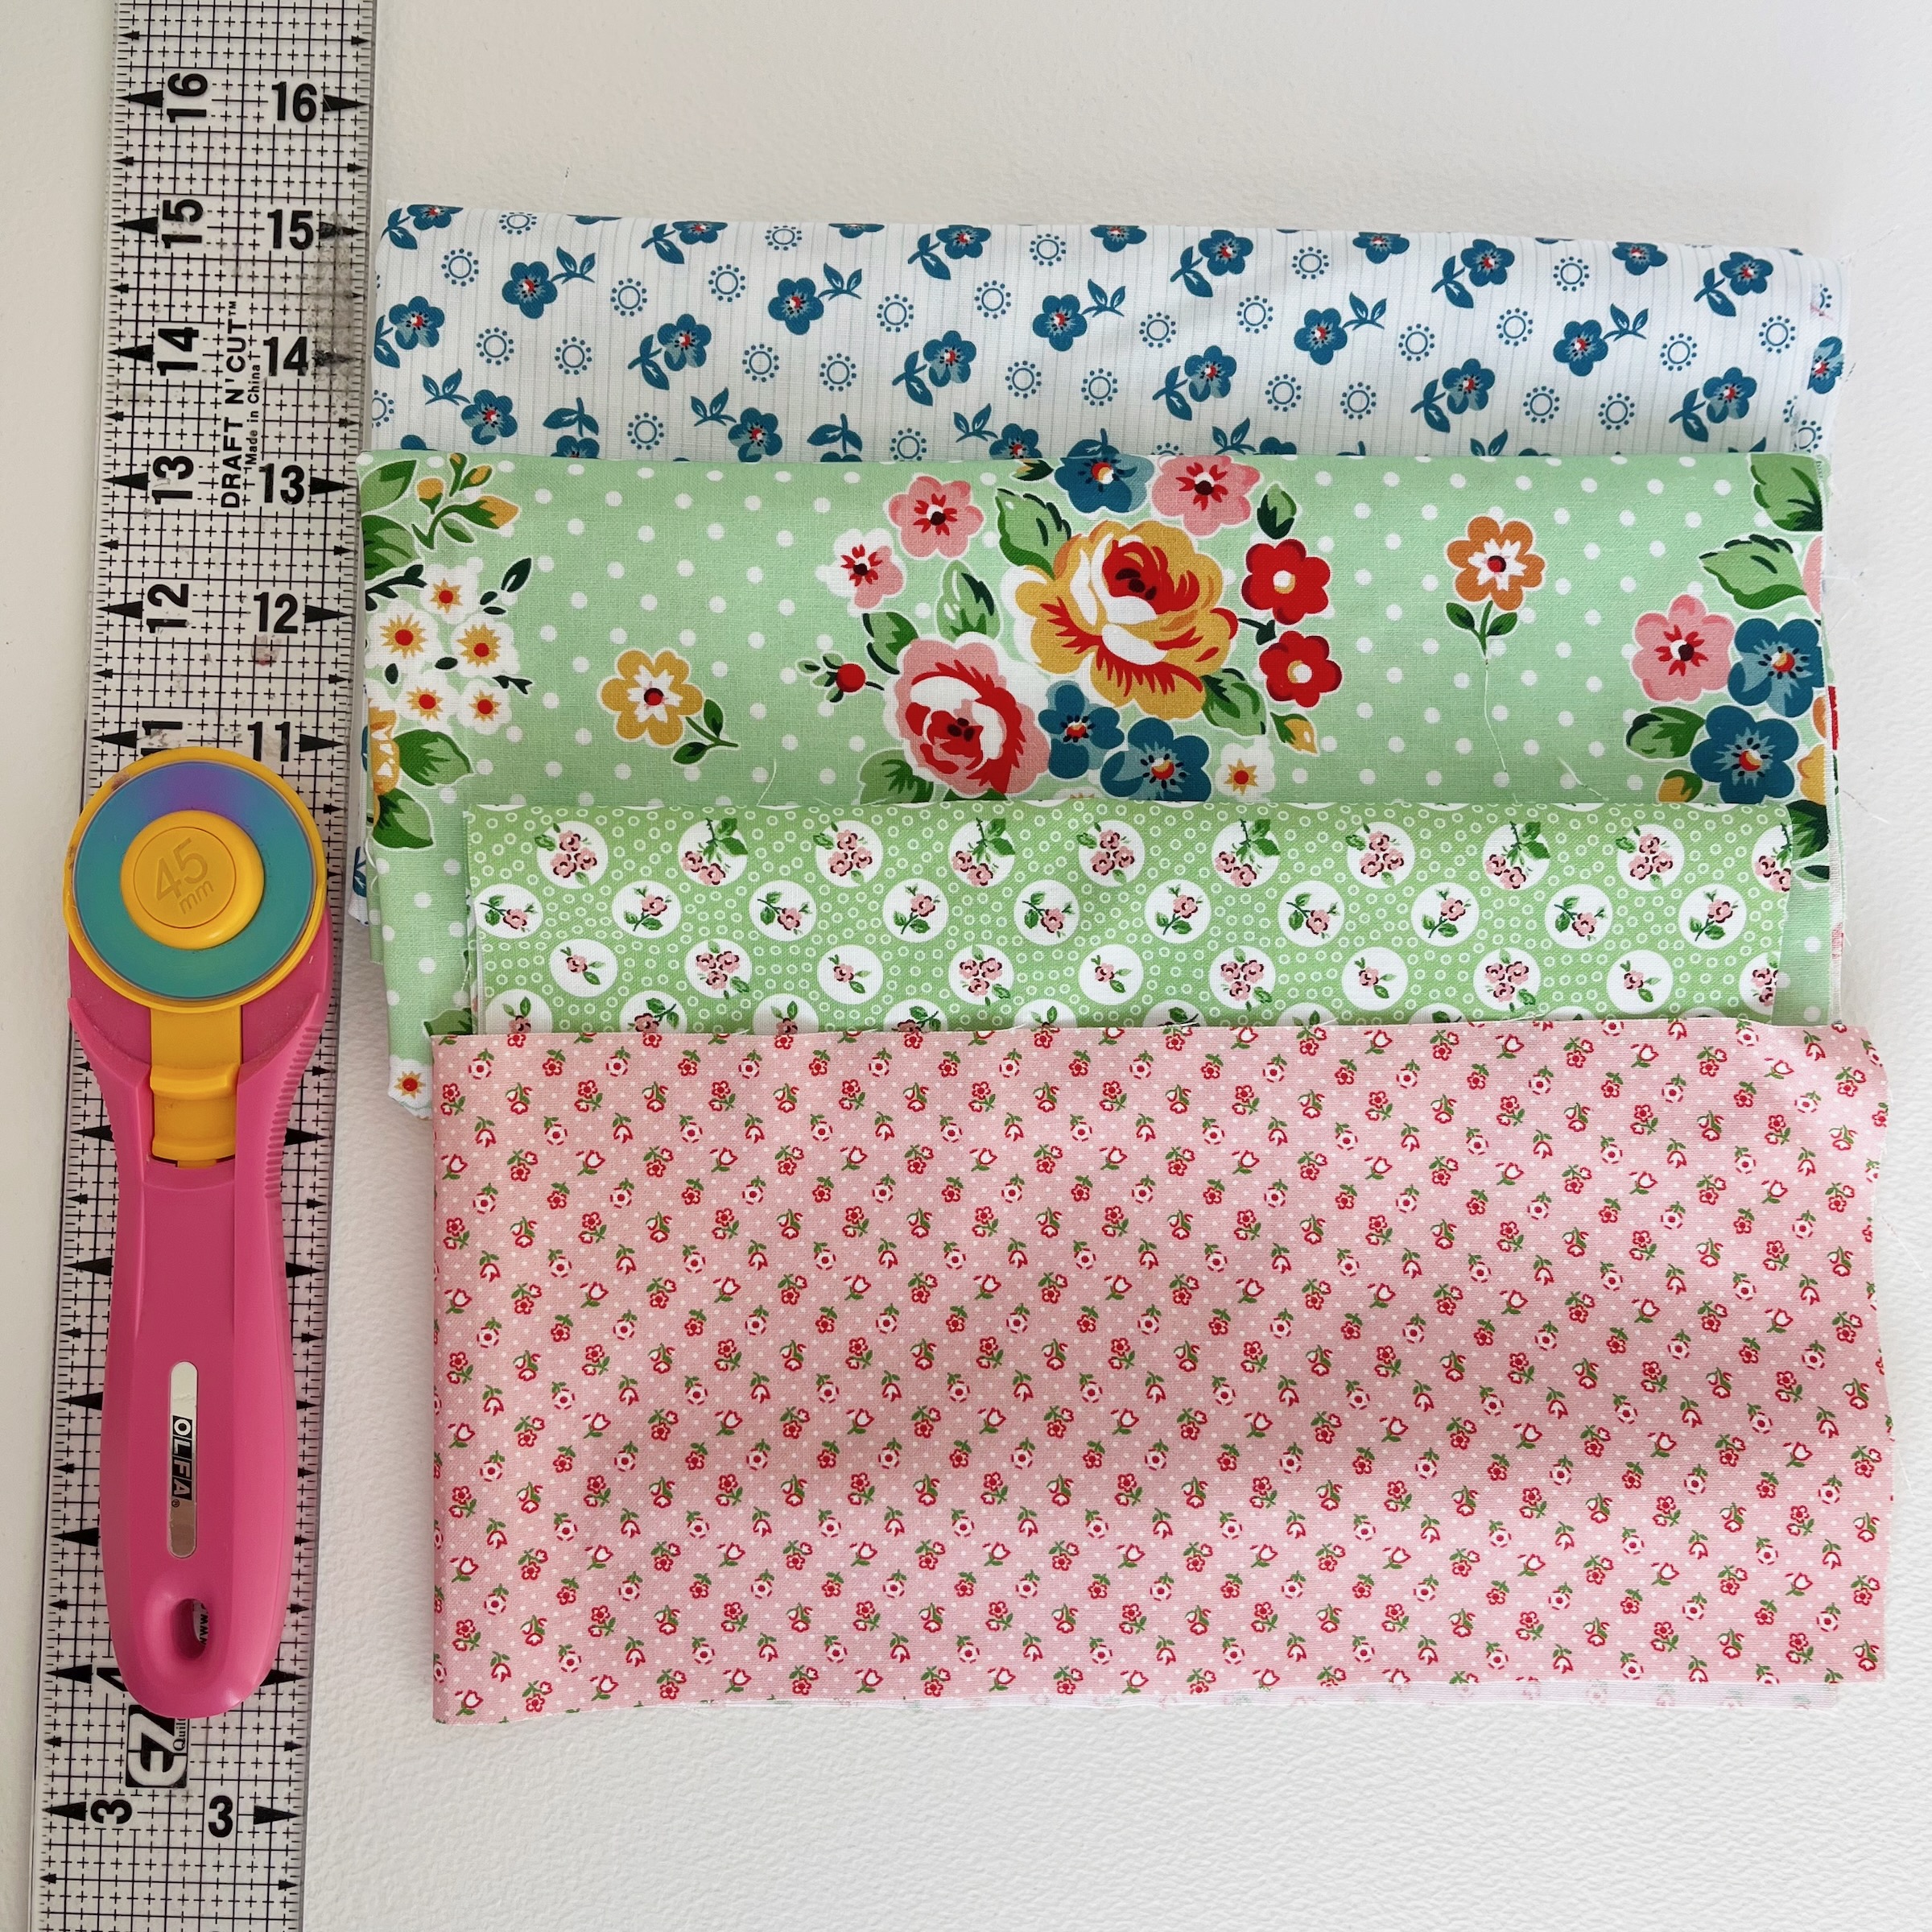
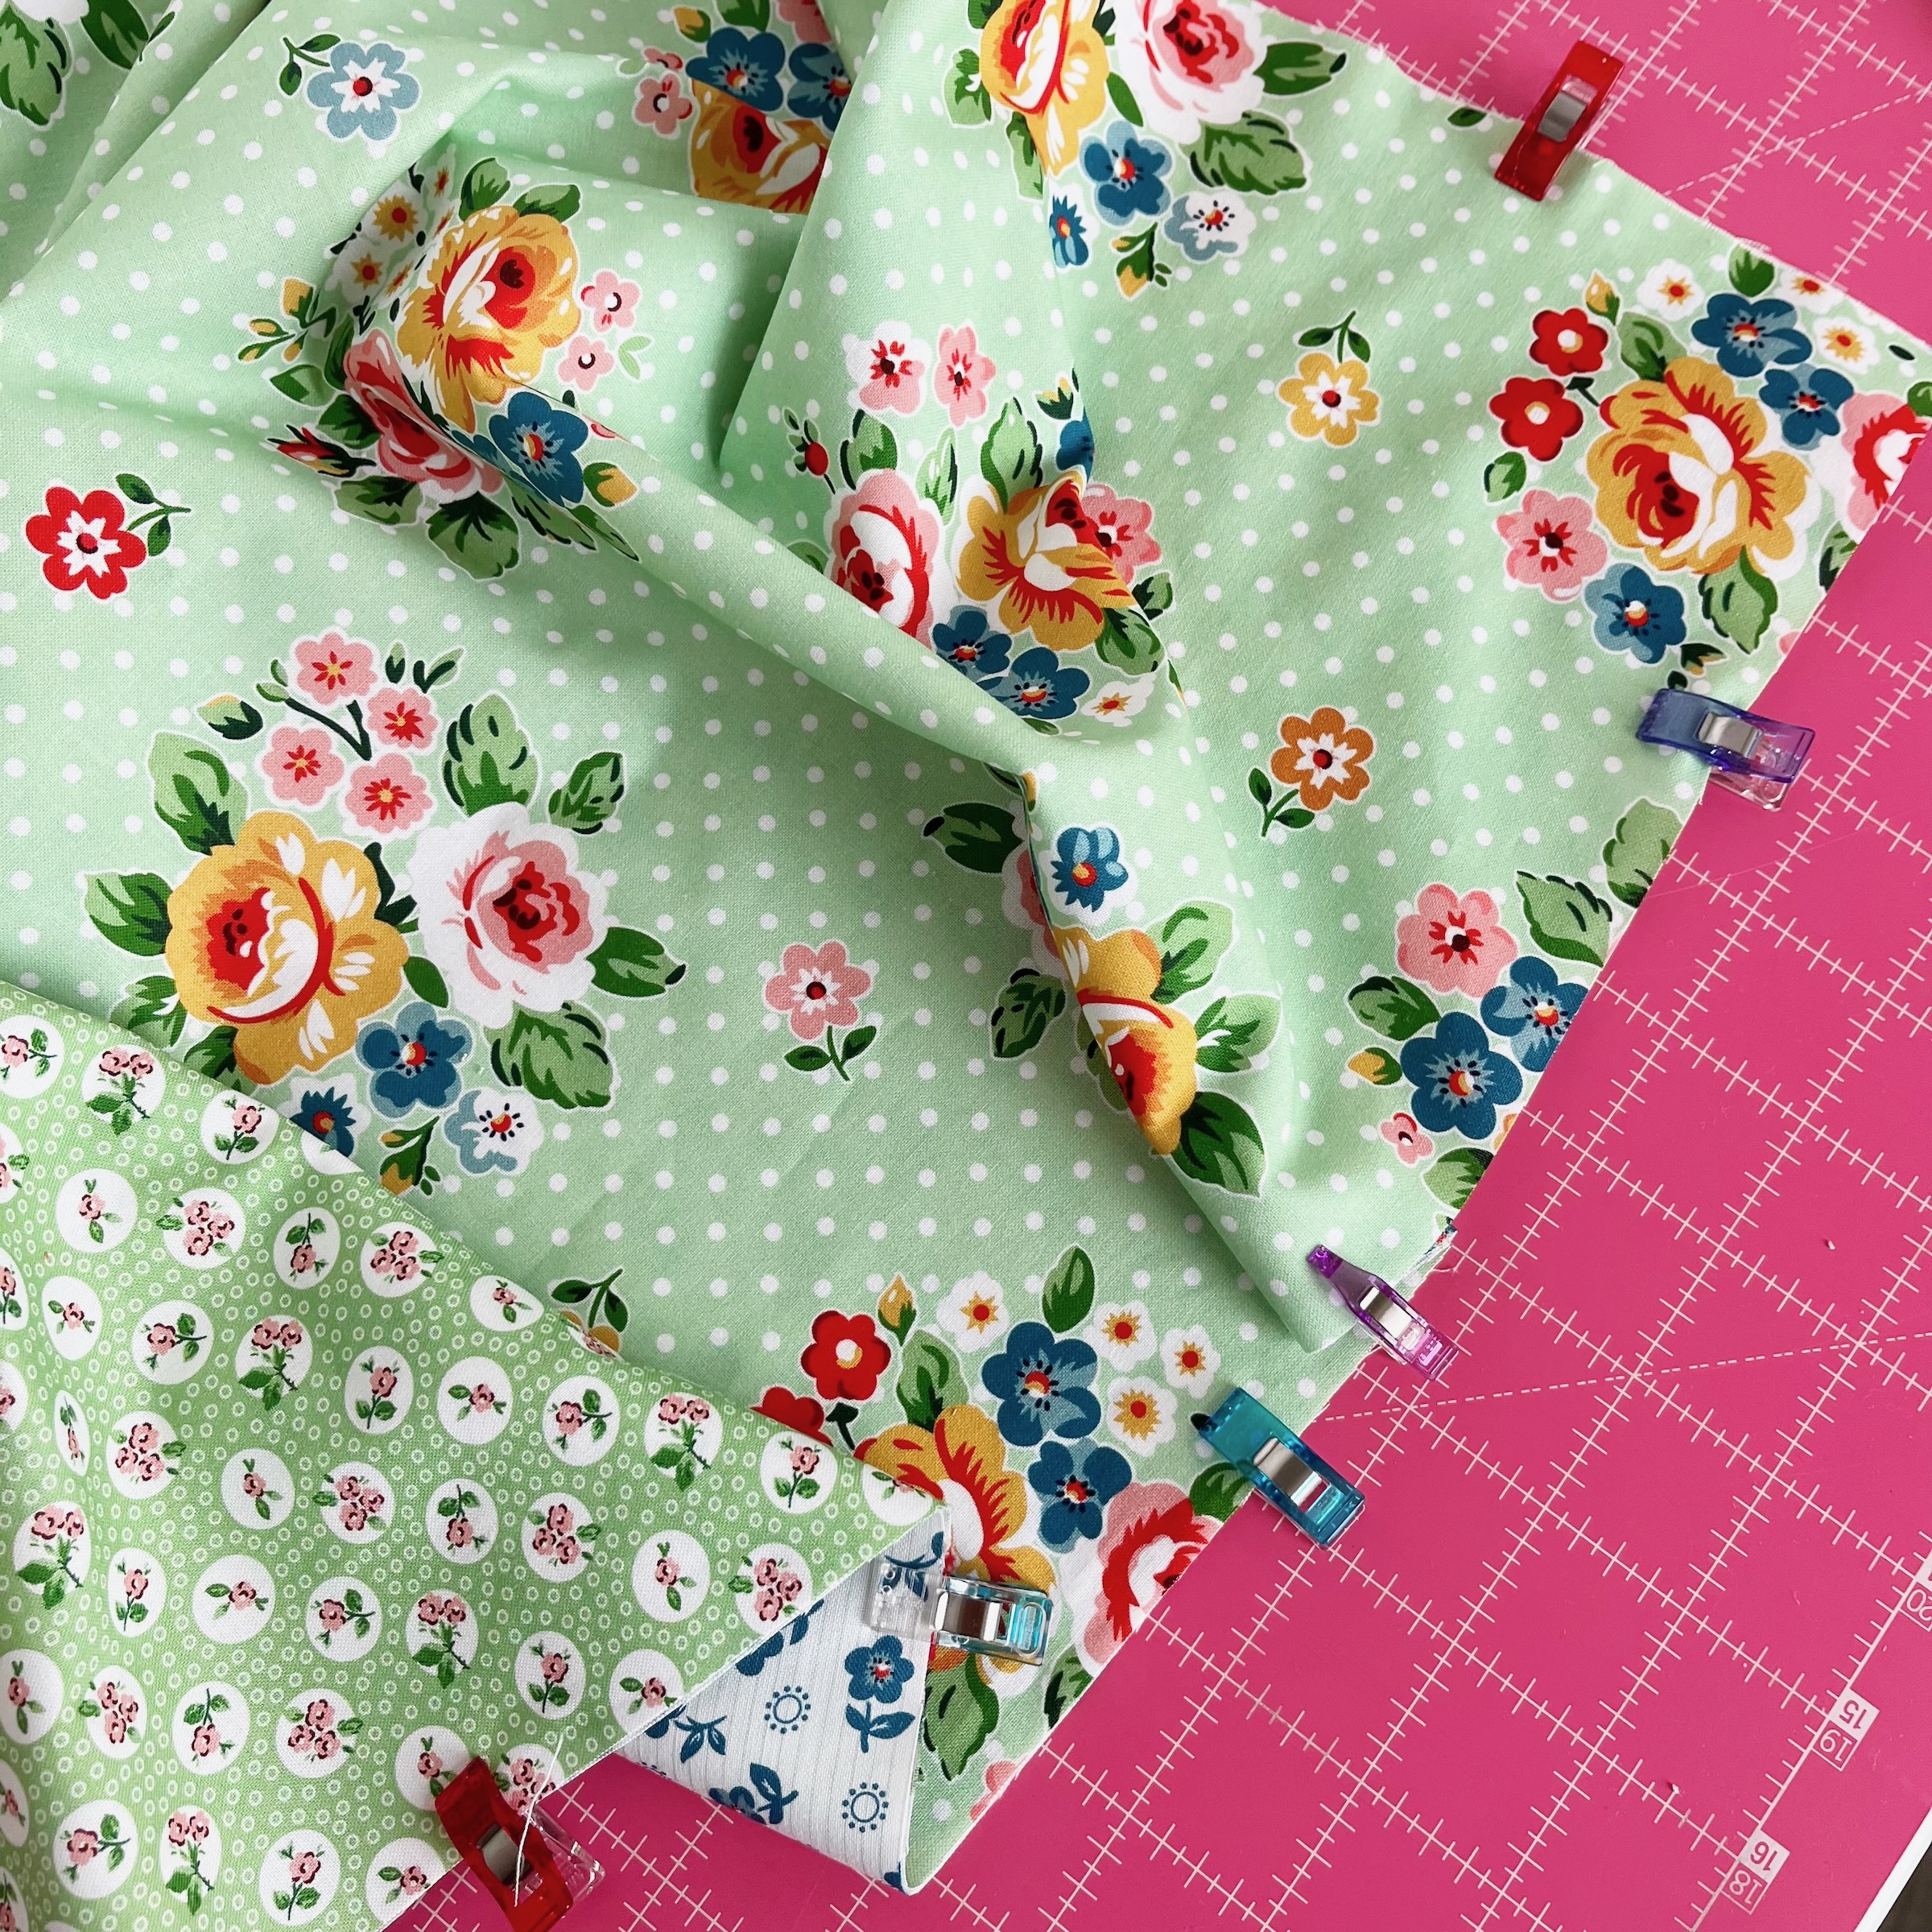
Step One: Gather your four fabrics. Tips on your fabric selection: they don’t have to match or go together exactly. I definitely did not want a “matchy-matchy” look. However, using a “collection” of fabrics that are different but yet compliment each other is very nice.
Step Two: Use a ruler and rotary cutter to cut your four pieces of fabric to the following sizes:
- backing piece: 31″ x 21.5″
- piece A: 18″ x 21.5″
- piece B: 9.5″ x 21.5″
- piece C: 5″ x 21.5″
Now, here’s a really great thing about these pillow cases. There are NO raw edges on the inside. I love this part. So we are going to sew French seams… if you’ve never done them before and have always wanted to learn then today is your day!!! Follow my instructions carefully:
.
.
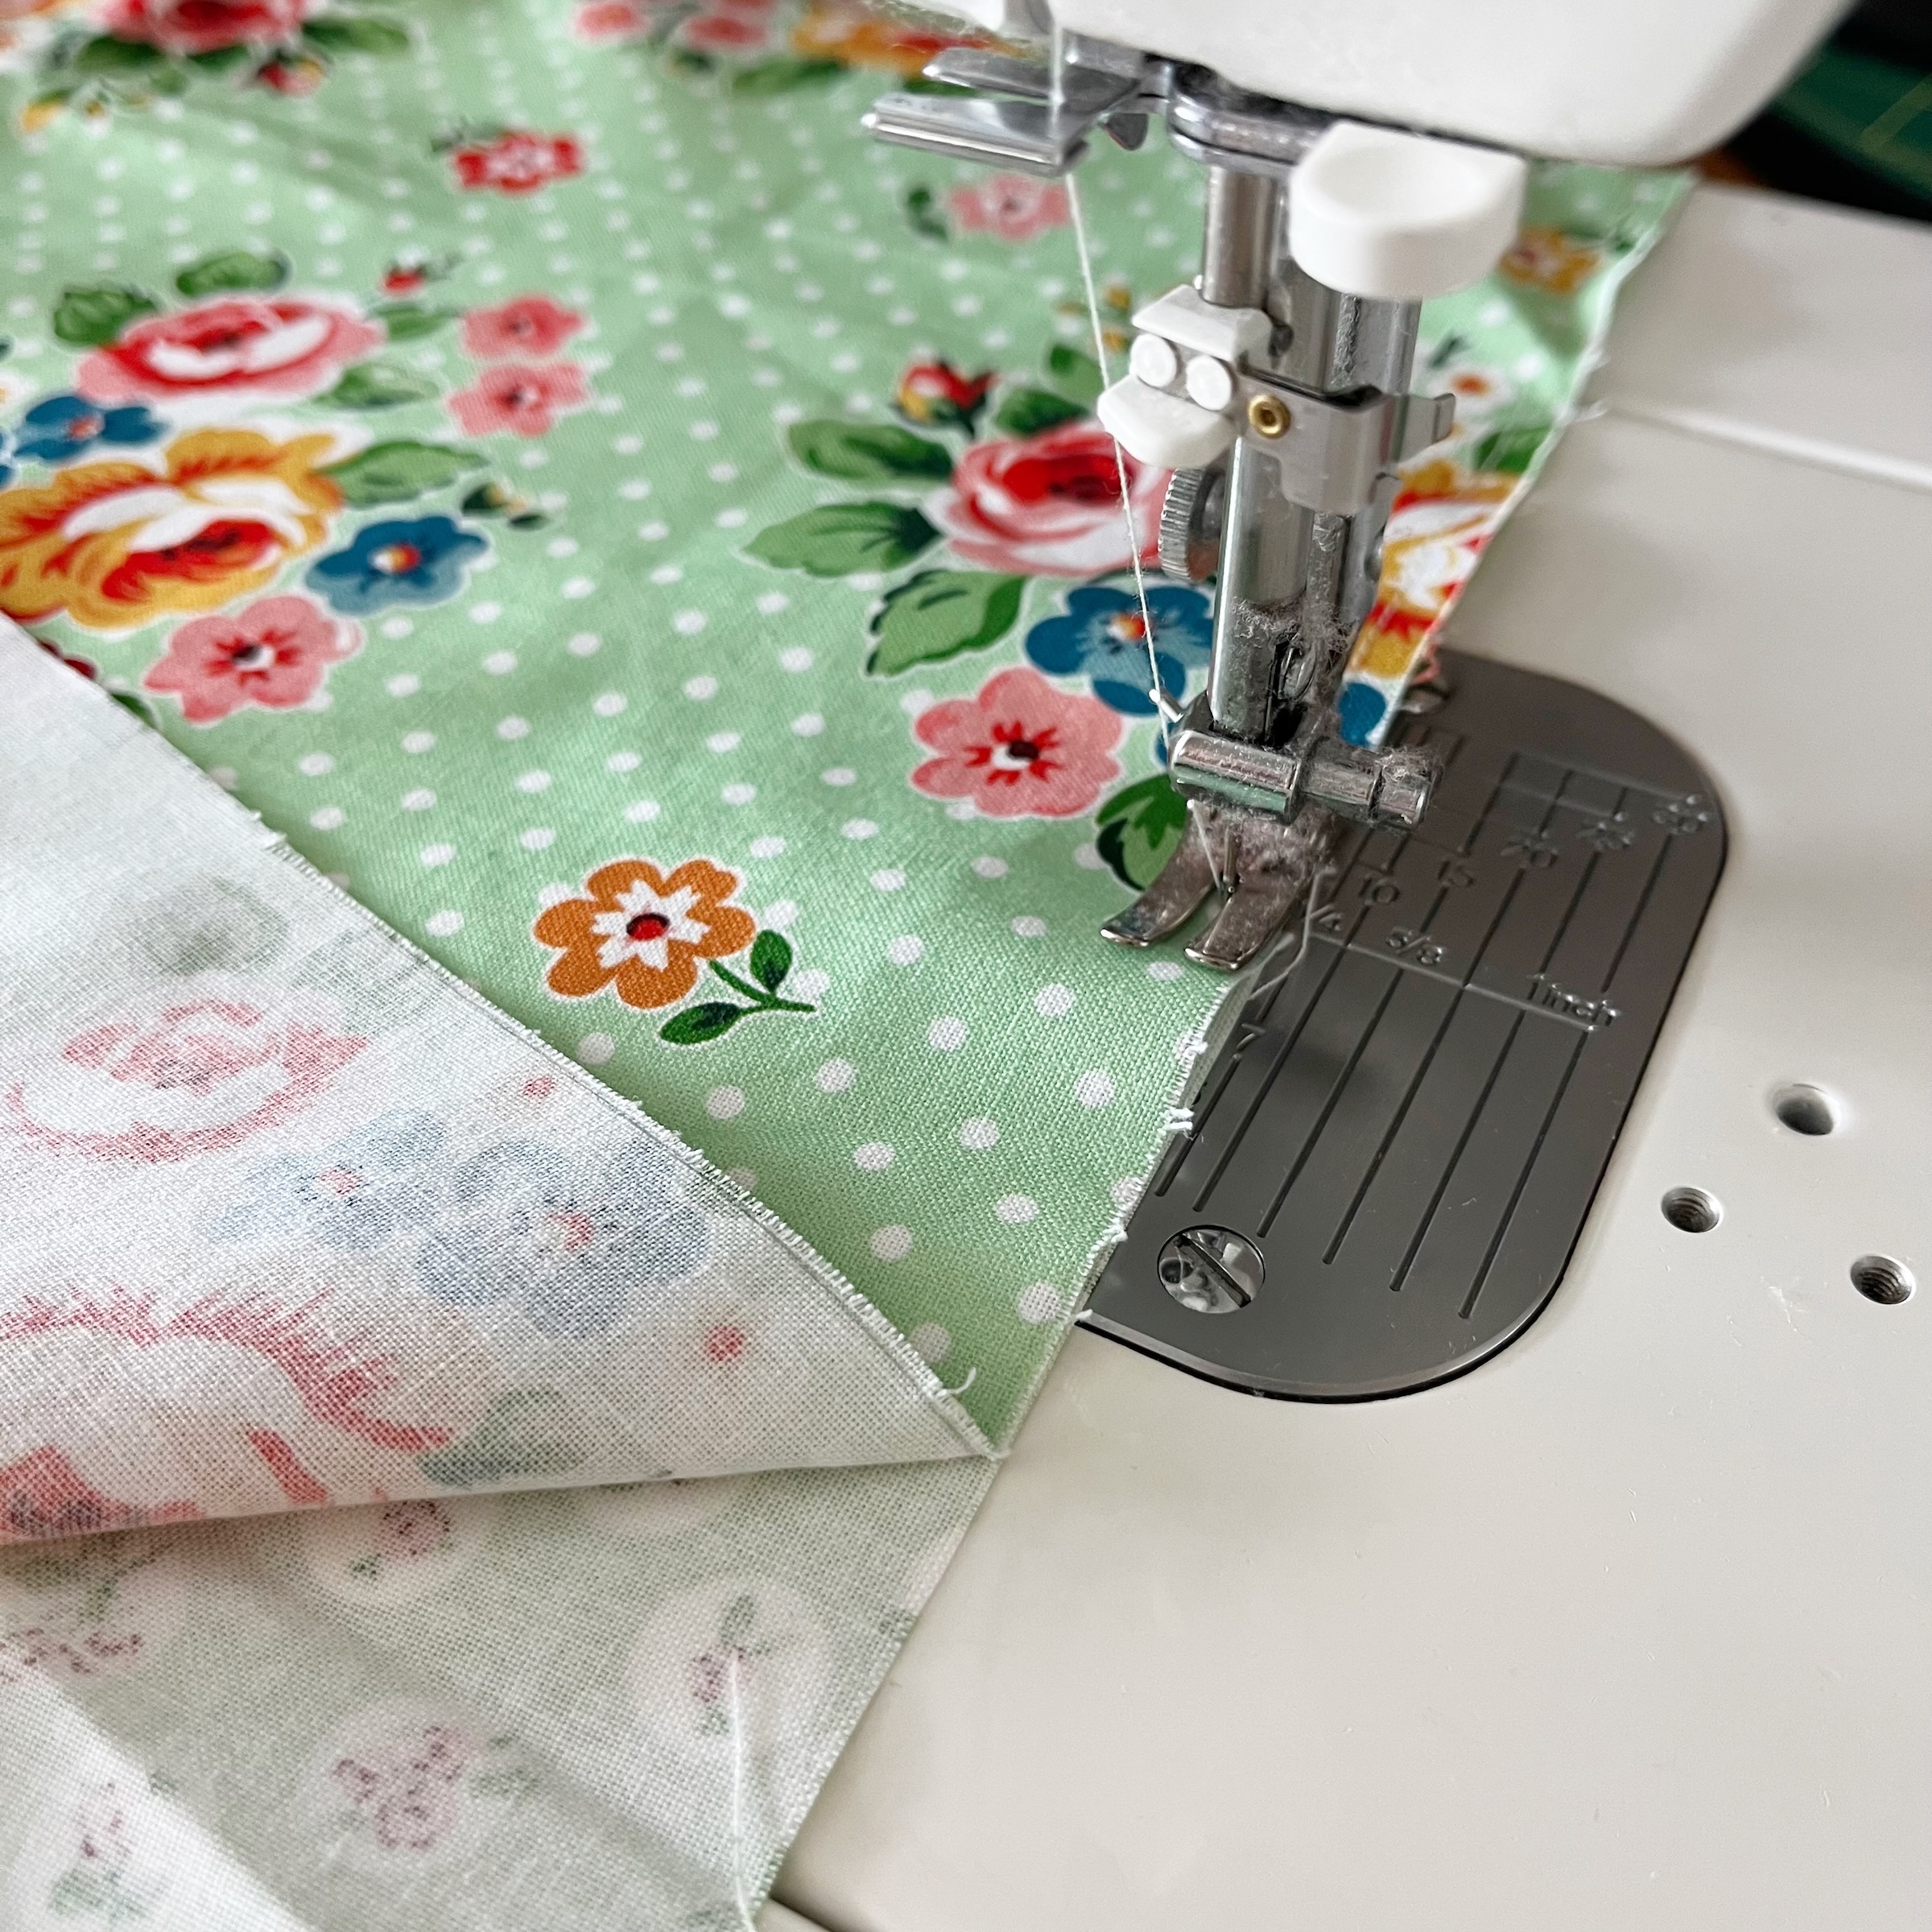
Step Three: Lets sew the three smaller fabric pieces together using a French seam. Sew fabric piece A to fabric piece B. Sew along the 21.5″ edge, WRONG sides together. (Did you catch that? WRONG sides together!) I sew with a scant 1/4″ seam. Which technically means LESS than a 1/4″.
.
Step Four: Now, turn those two fabrics RIGHT sides together, fulling encasing that 1/4″ seam. I pressed the seam to make it nice and flat. Now you will sew them together again but this time your seam will need to be at least 3/8, because you will want to make sure to completely enclose the first seam.
.
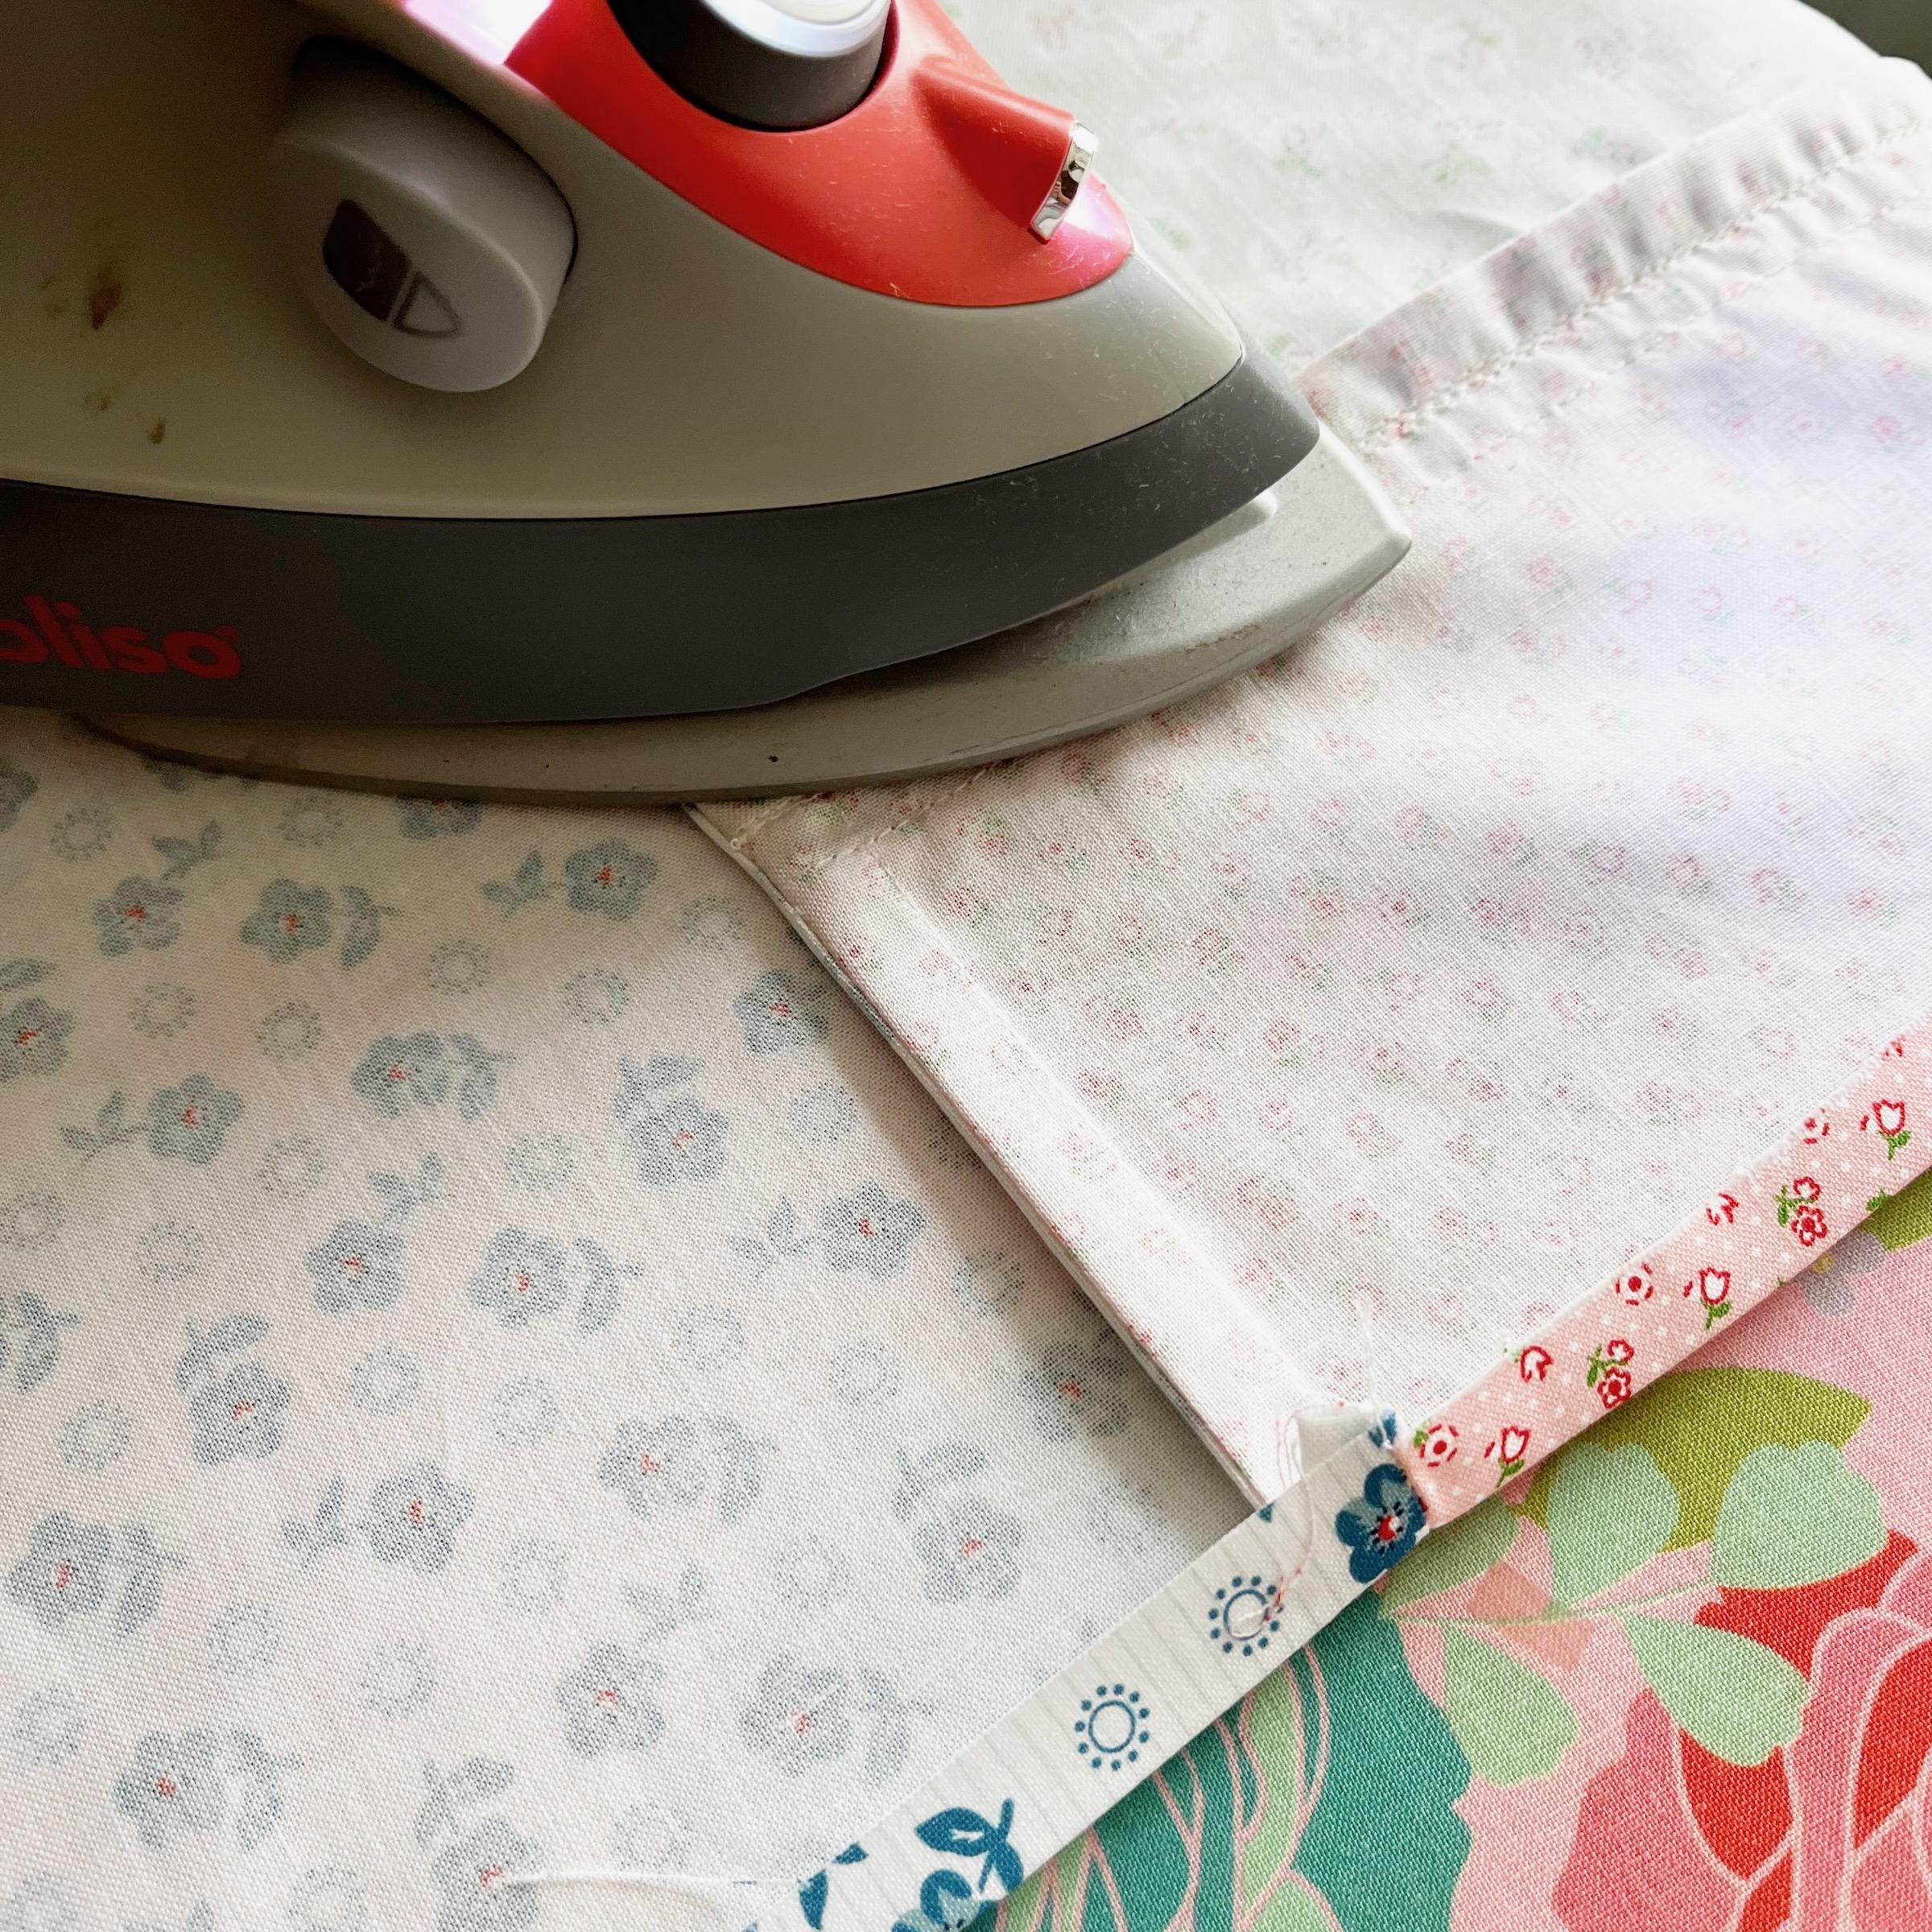
Step Five: Repeat the above steps but now attach fabric piece C to fabric piece B (which of course is already attached to fabric piece A). Then lay it out on the ironing board and press those seams down very well. Don’t they look beautiful not having any raw edges showing?
.
.
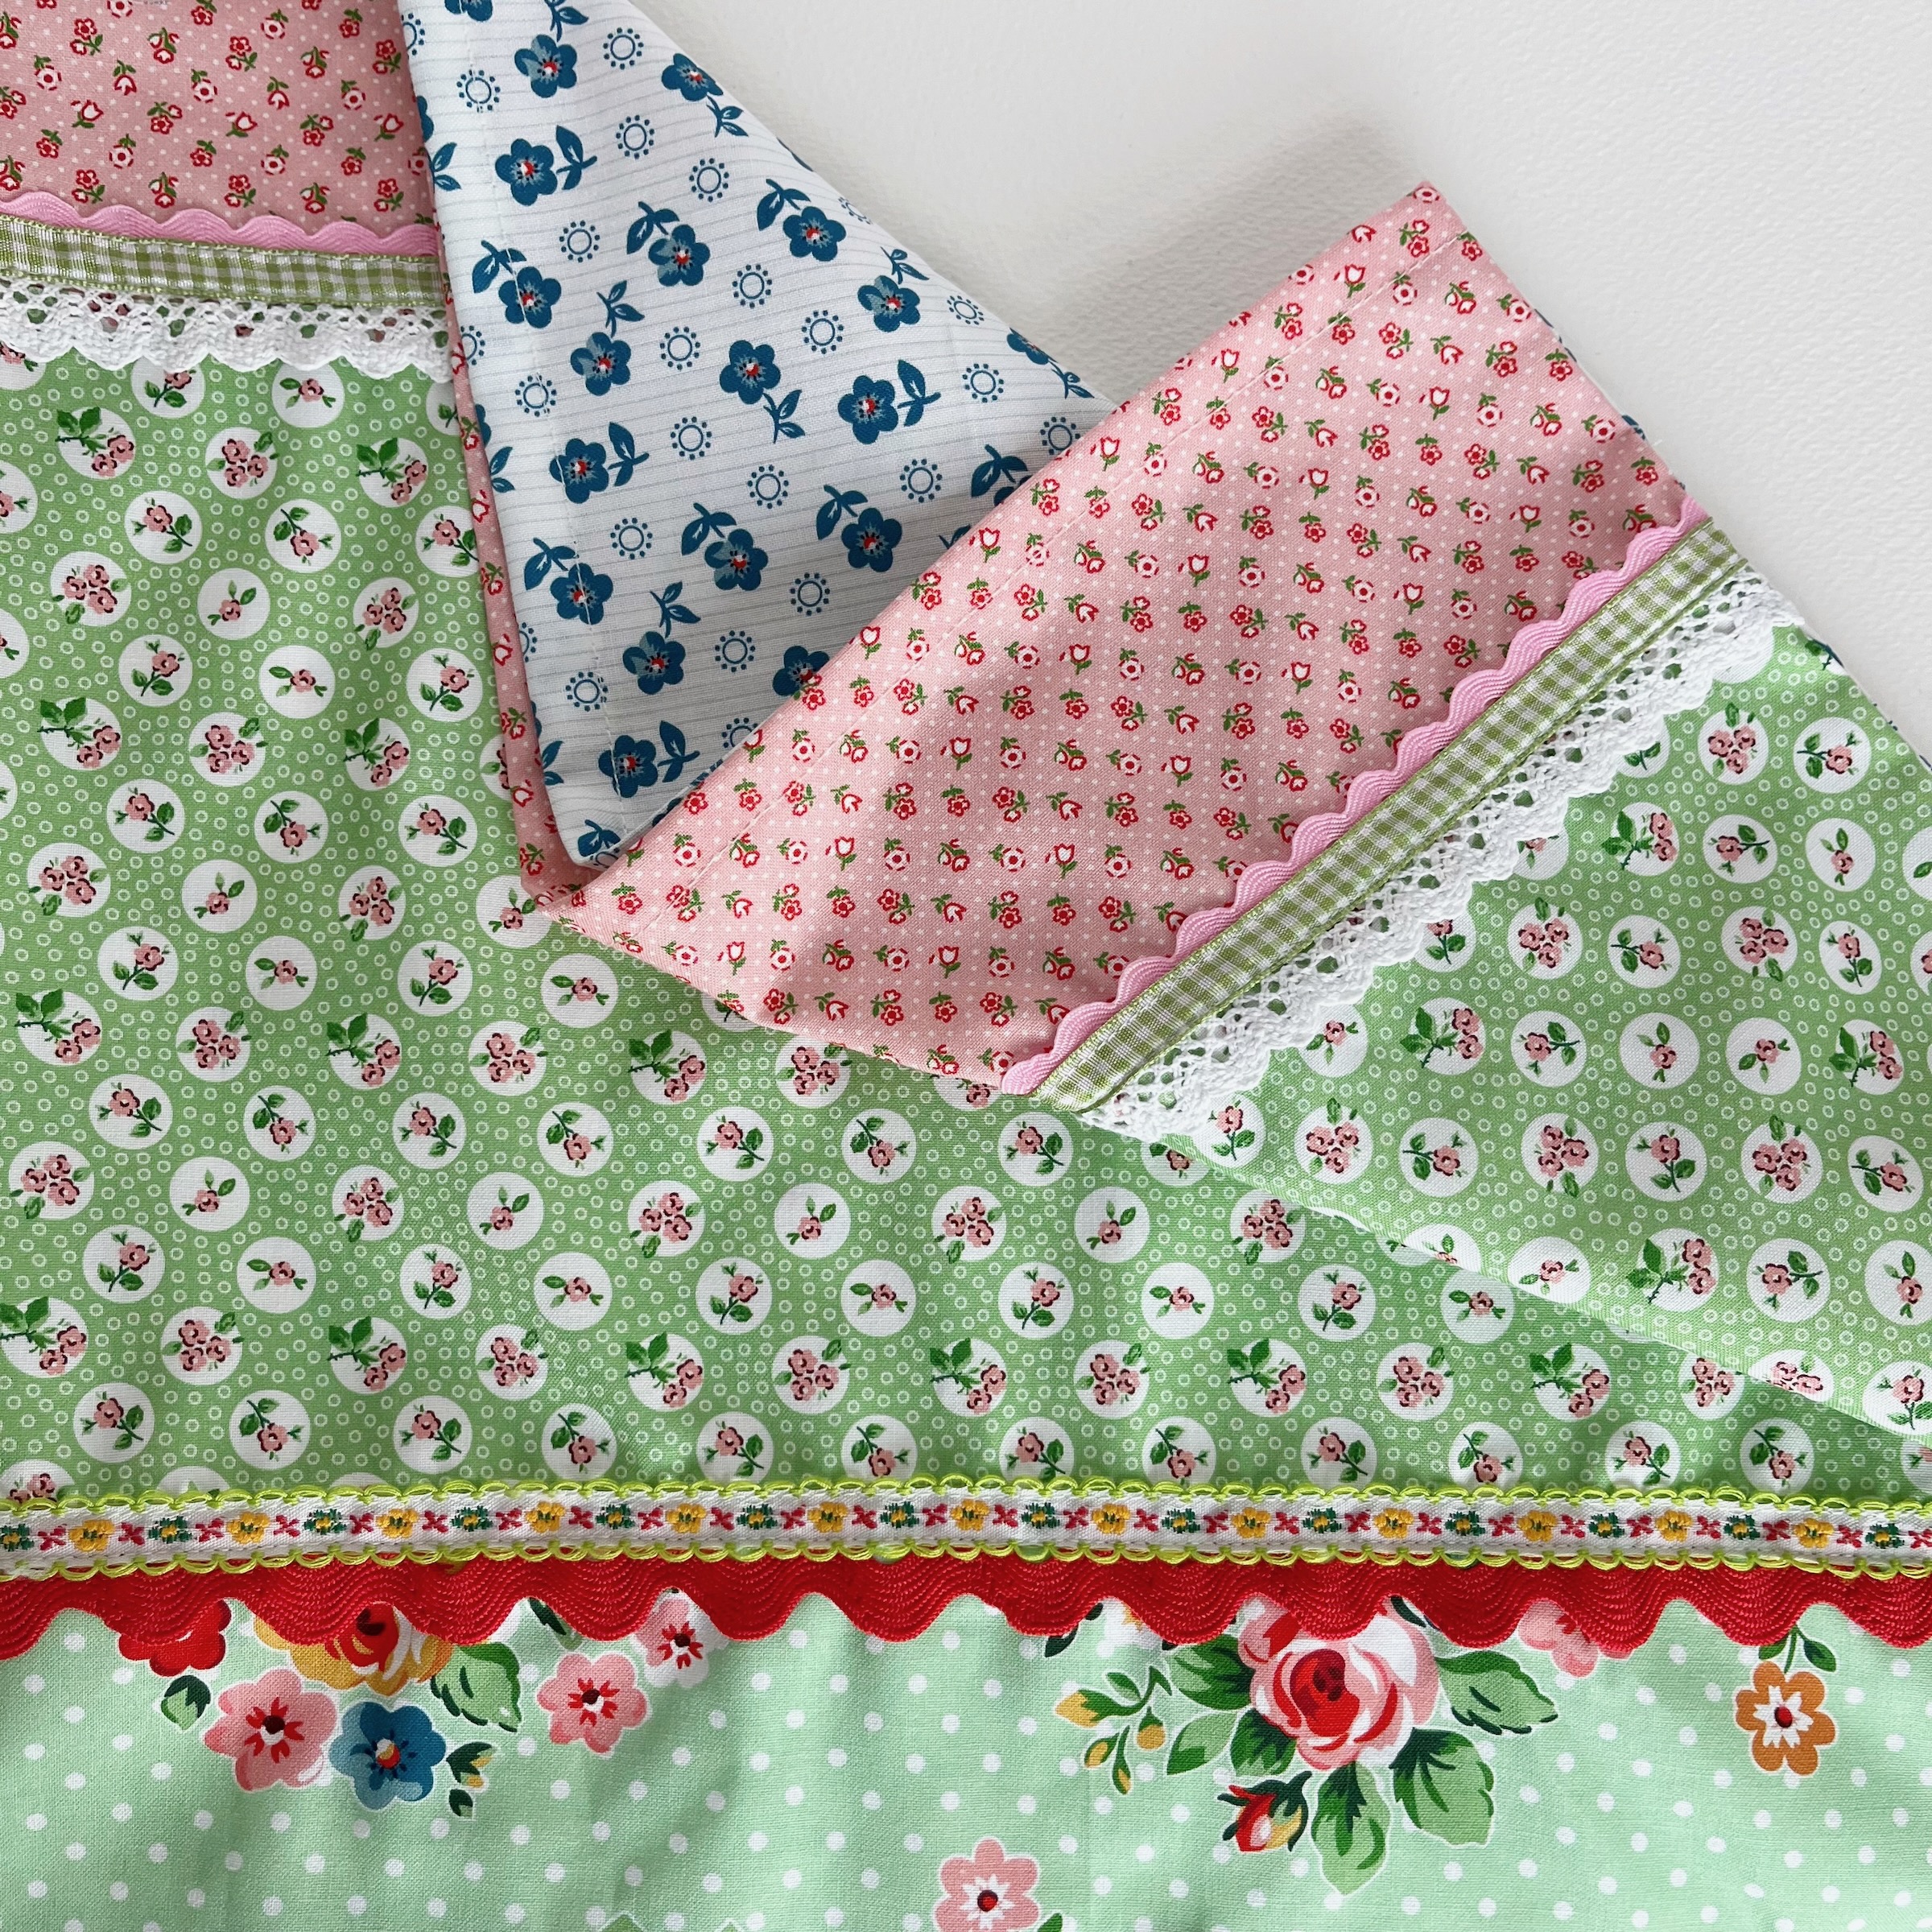
Step Six: Gather all your lace, ribbon, and other trim. Lay them out on your front panel and choose what you think you’d like to use.
.
.
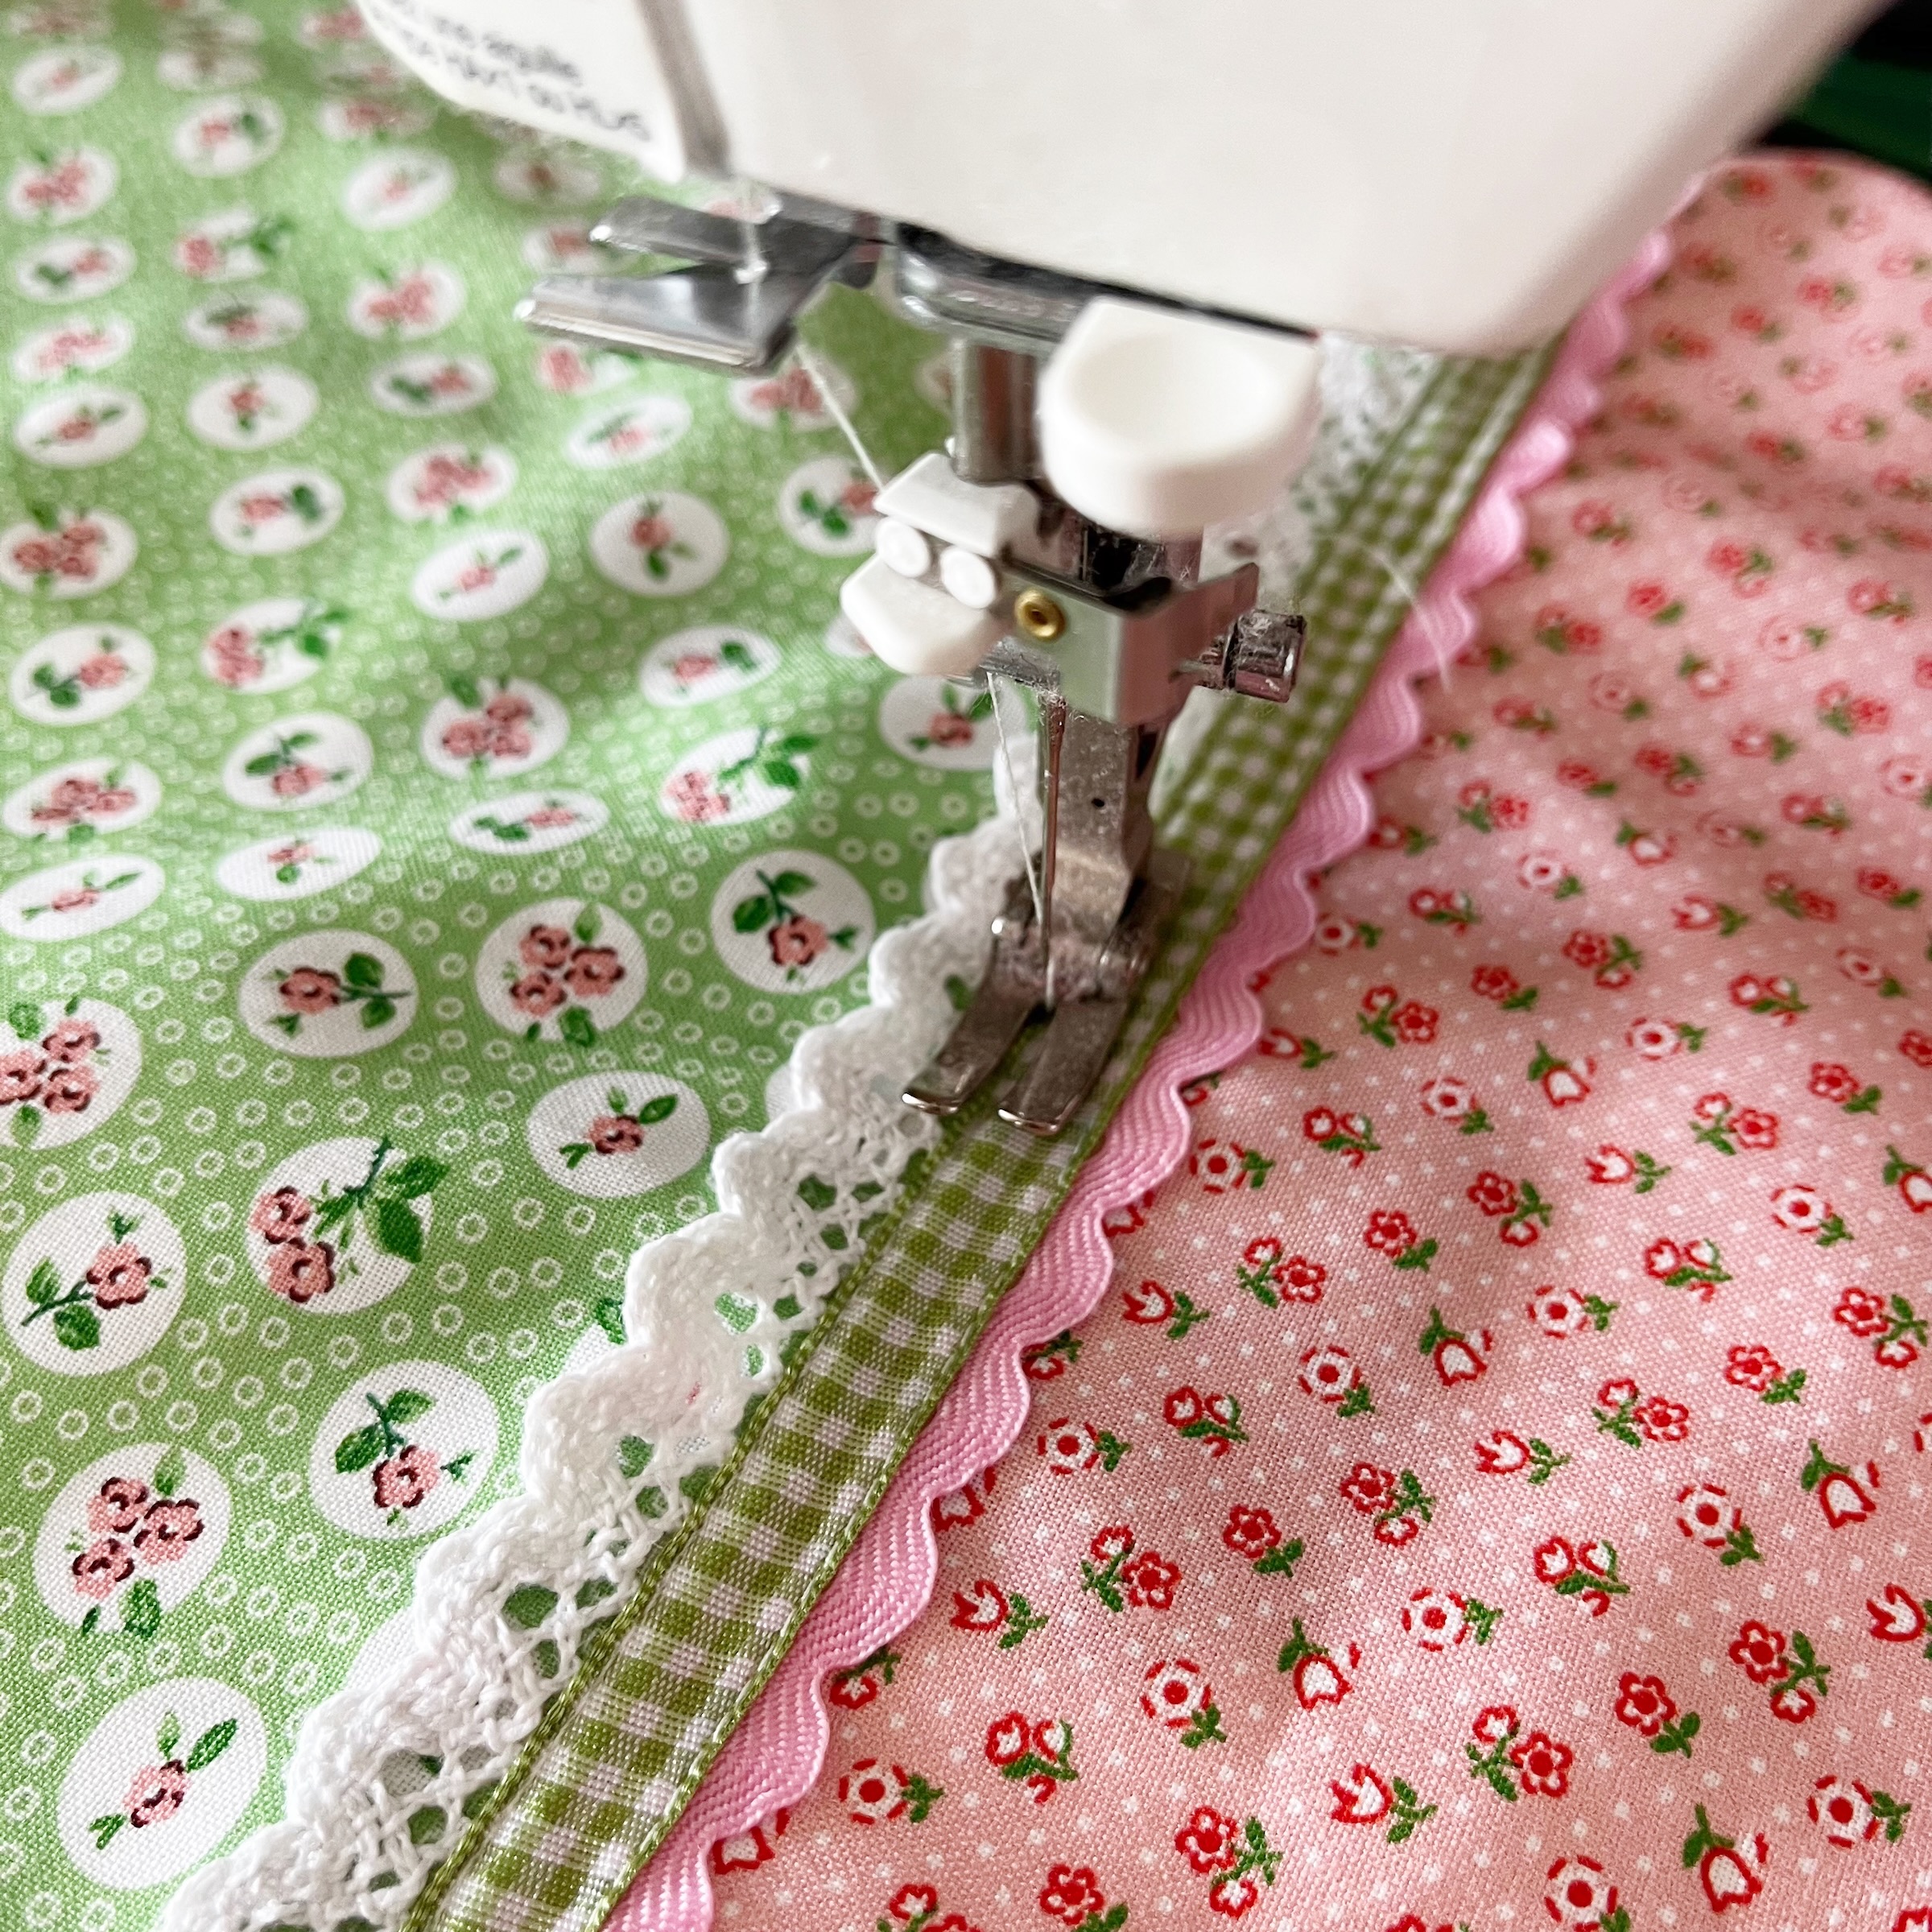
Step Seven: I chose to sew the trim pieces along the seam where the fabrics A, B, C joined. Obviously you can do it however you want. I also kind of layered a few different trims… it gave it a real nice effect!
.
.
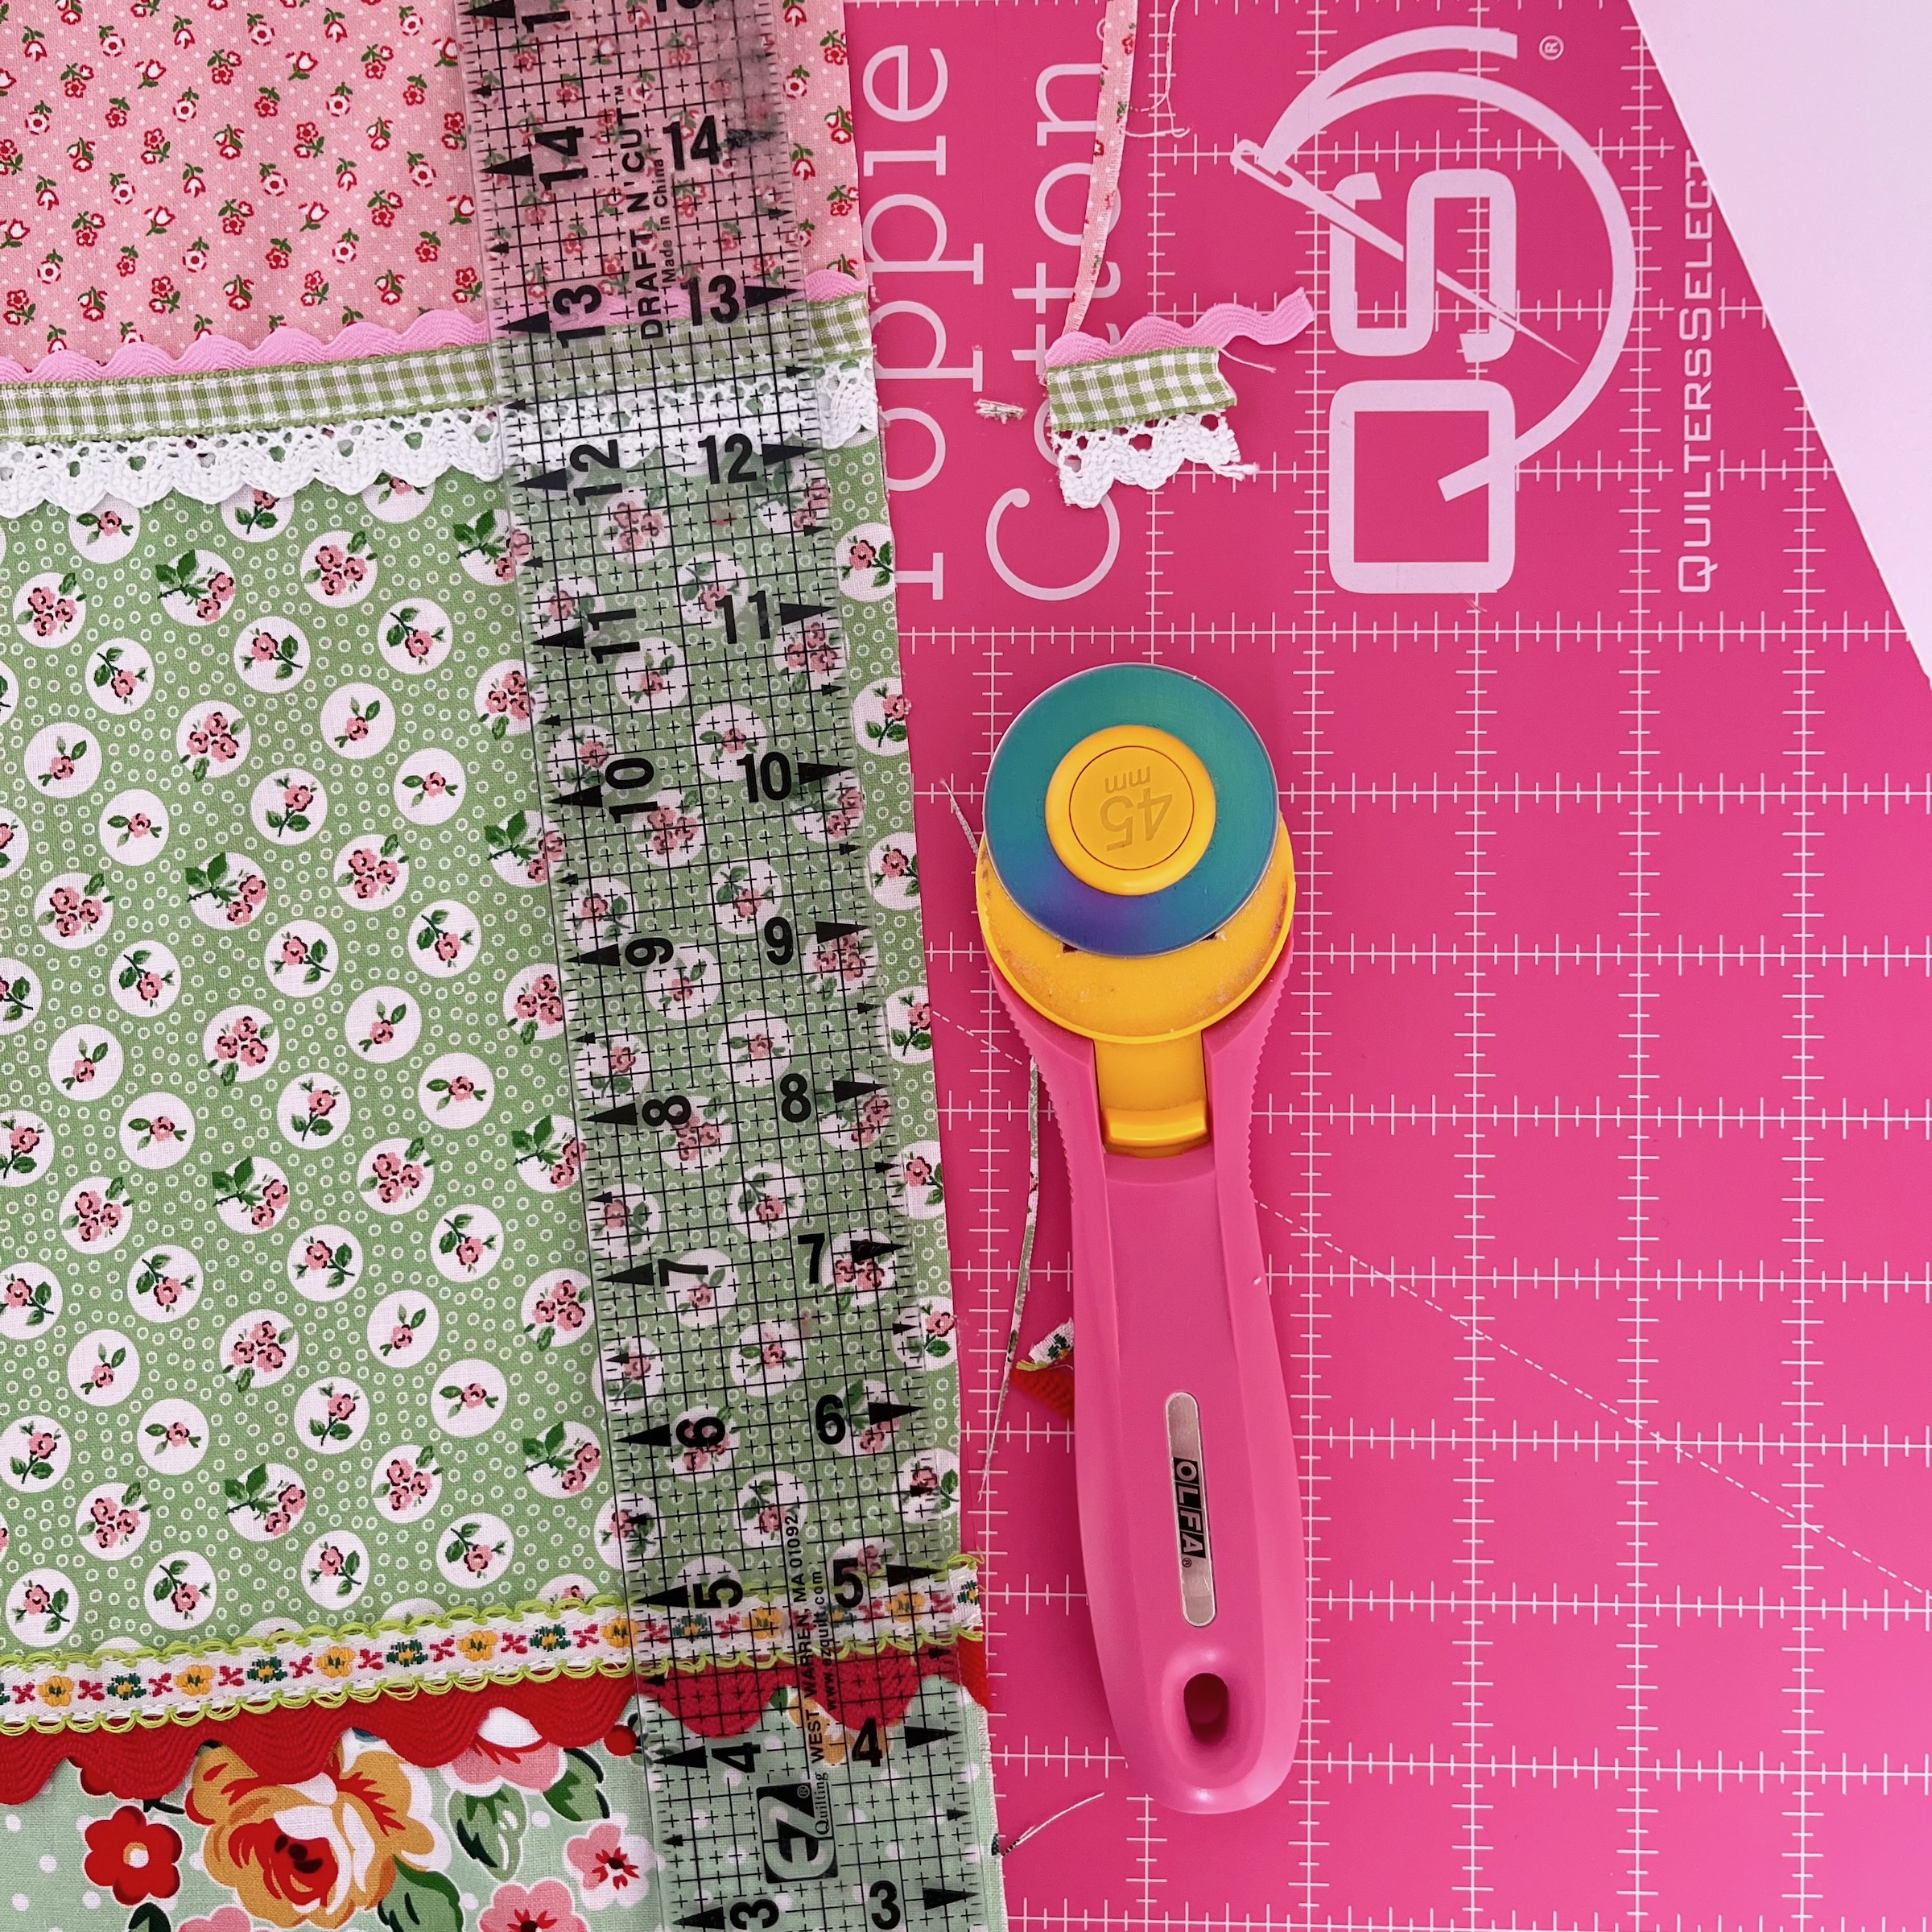
Step Eight: Once you have completed sewing your trim pieces, press your front panel. Lay it on your cutting mat and using a ruler and a rotary cutter, cut each long side until there are no pieces of trim hanging over the edge and it is nice and straight.
.
.
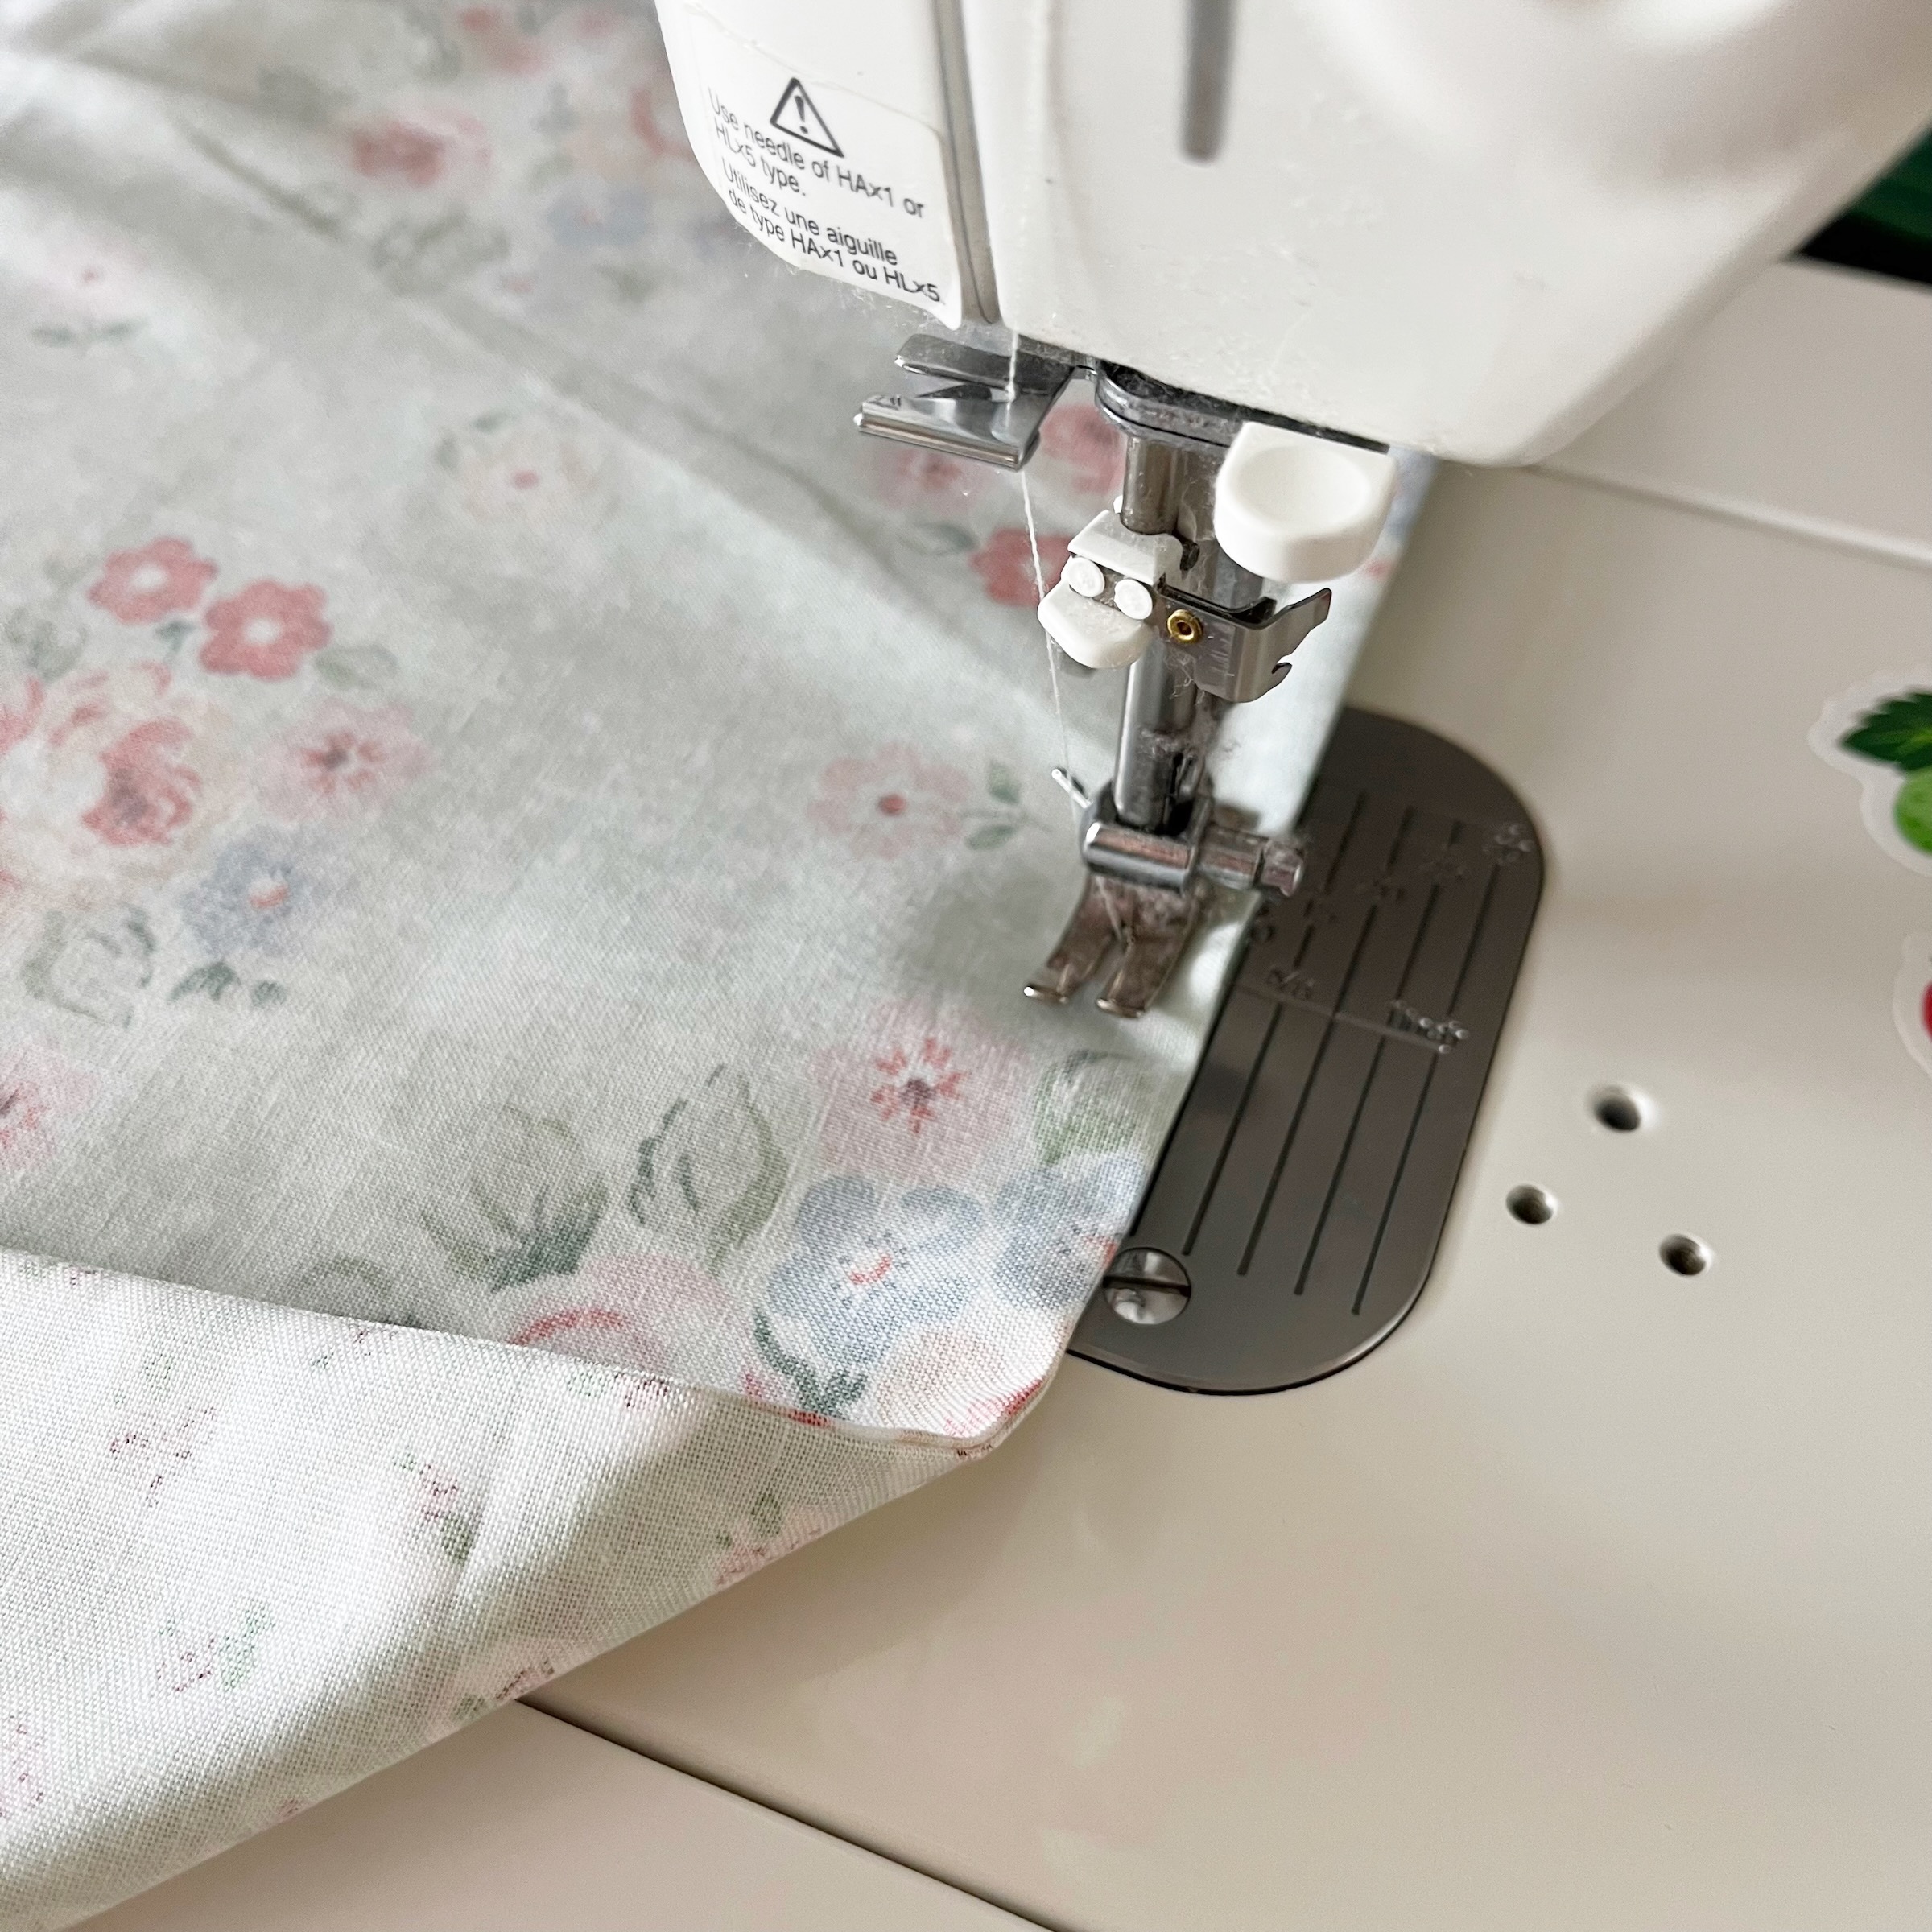
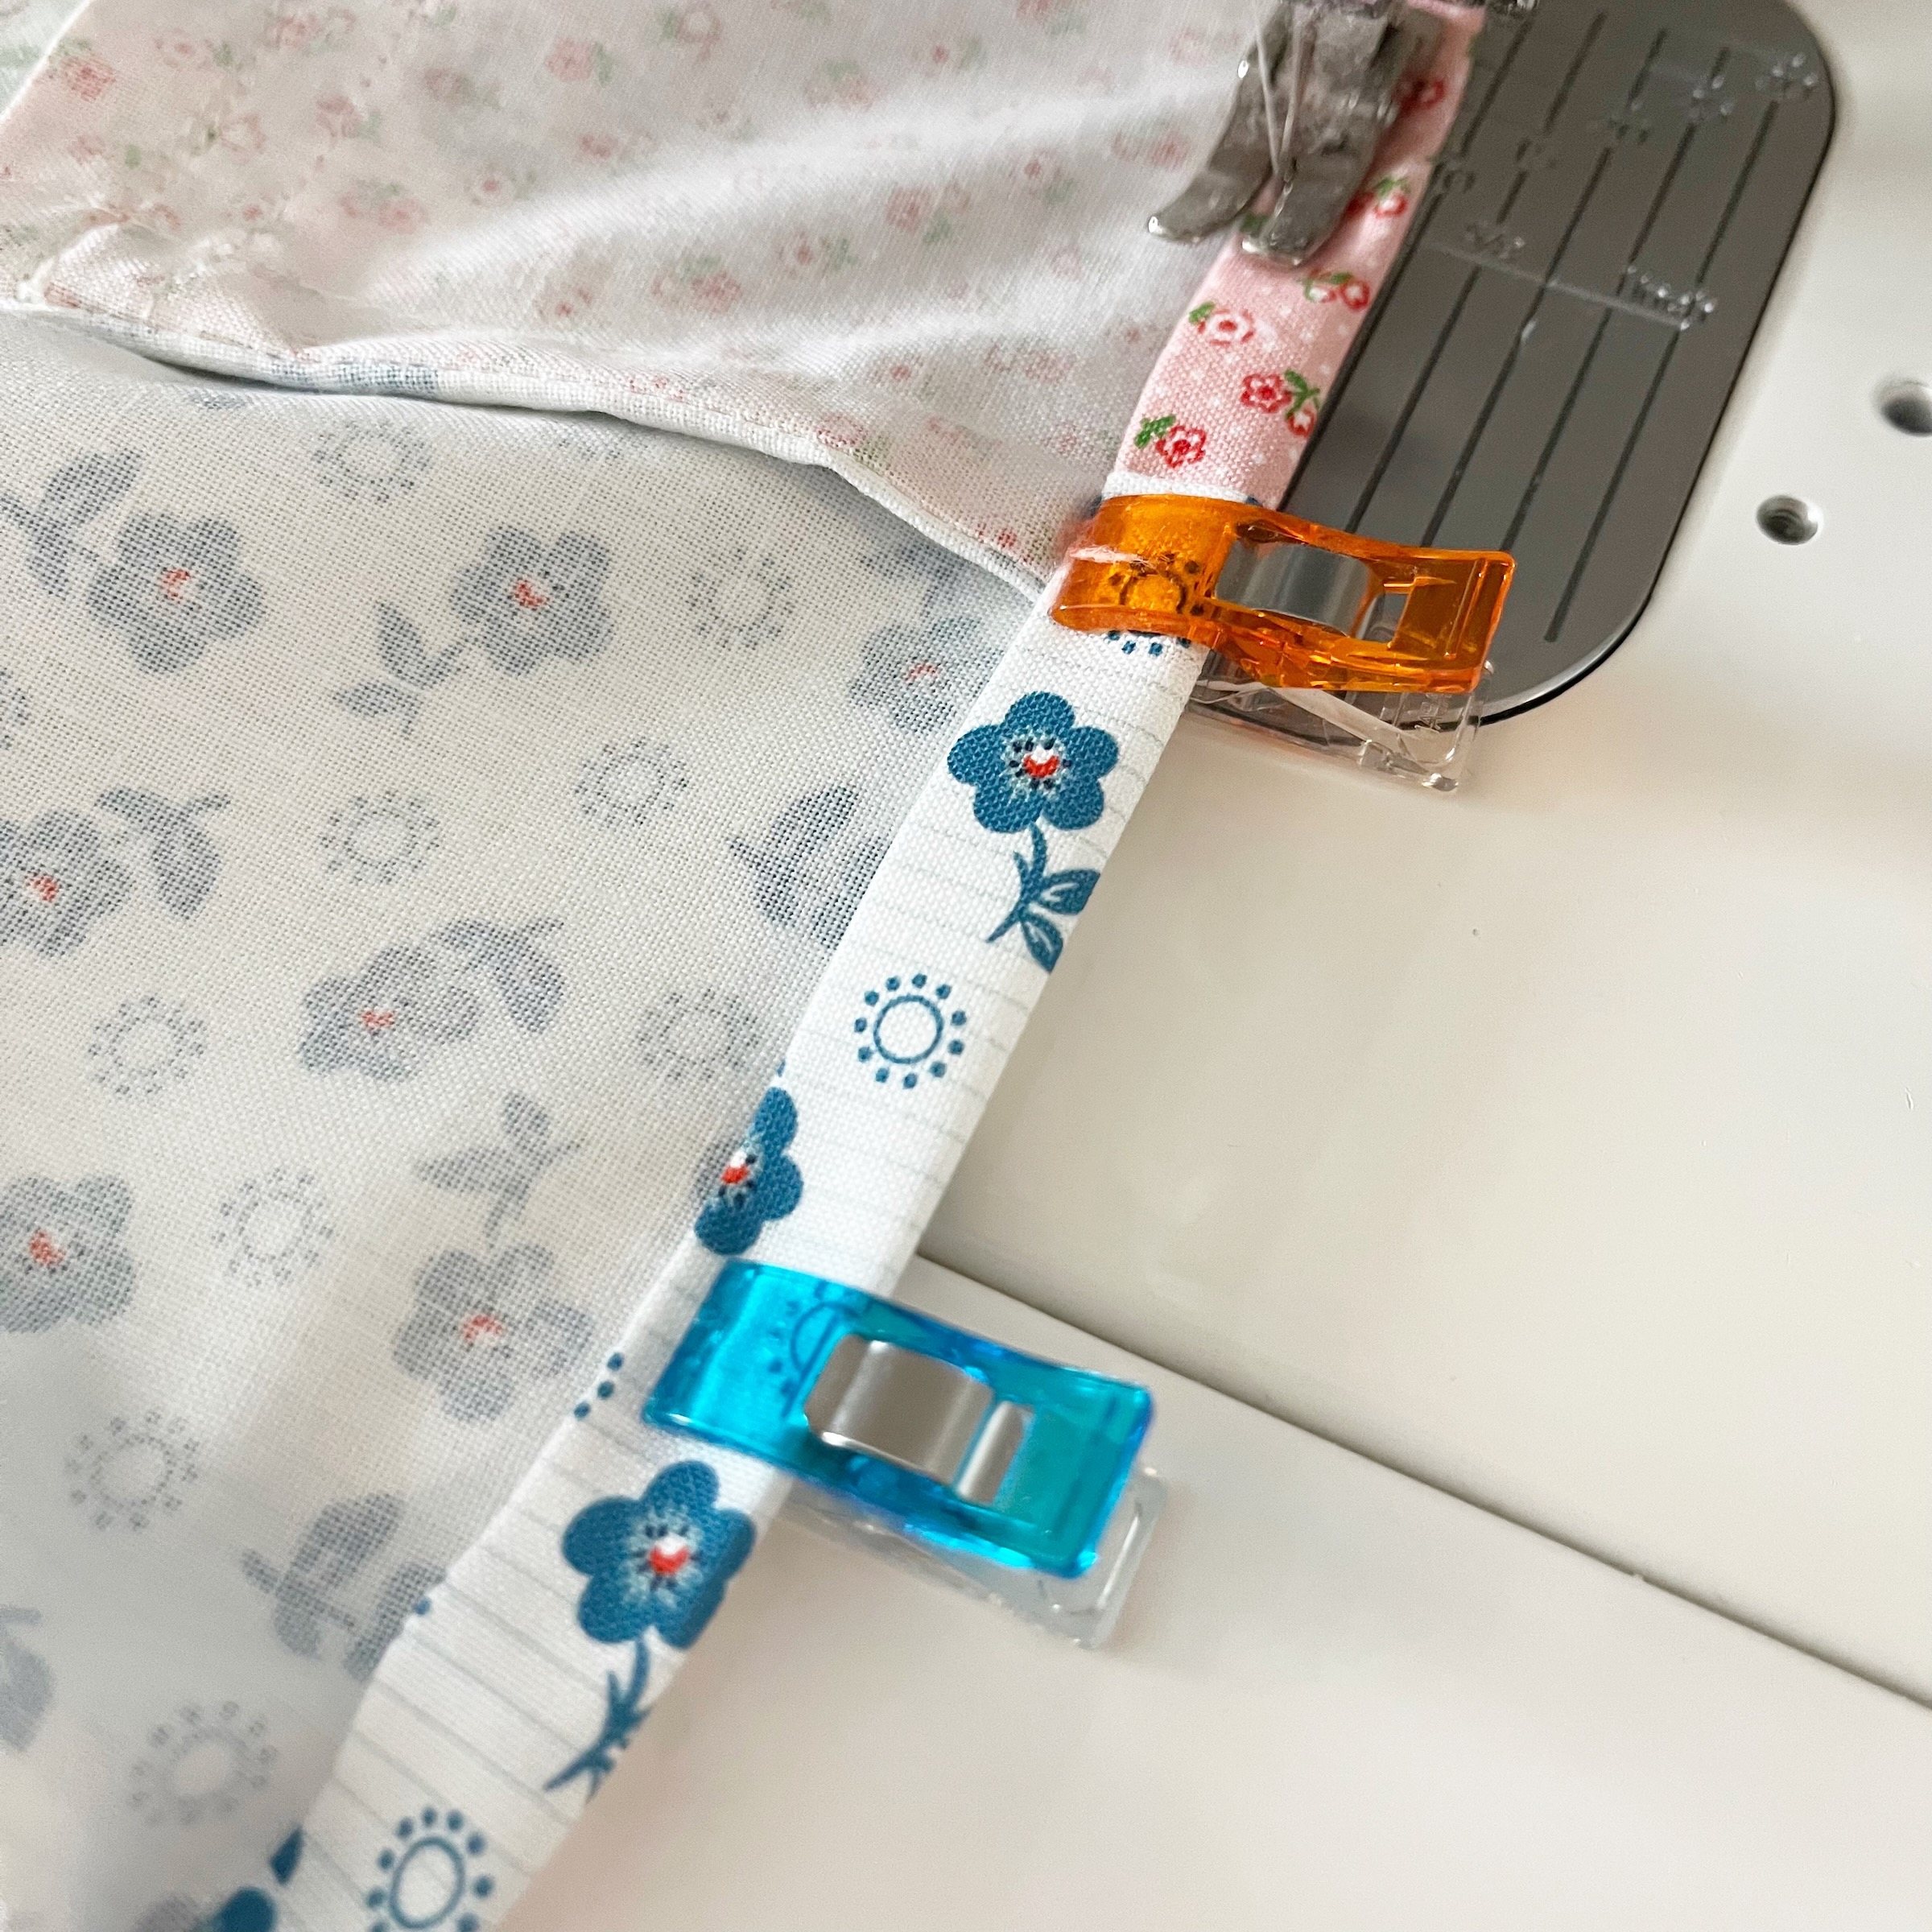
Step Nine: Now let’s attach the back to the front panel. Do this the same way you did steps 3 and 4. Do the French seam on the bottom edges first and then complete the side edges. I use sewing clips (or pens) to hold the two large pieces of fabric in place so that they didn’t slip. Sewing French seams does require good straight, smooth seams. Once you’ve completed the French seam on the bottom of the pillow case, repeat the process on both sides.
.
.
Step Ten: You have a pillow case now! Take it to your ironing board and on the top (opening) edge, iron the front side to the back about 1/4″. Press it well and then fold it over one more time and press again. Use clips (or pins) to hold it in place. Sew a stitch right along side that edge all the way around.
.
.
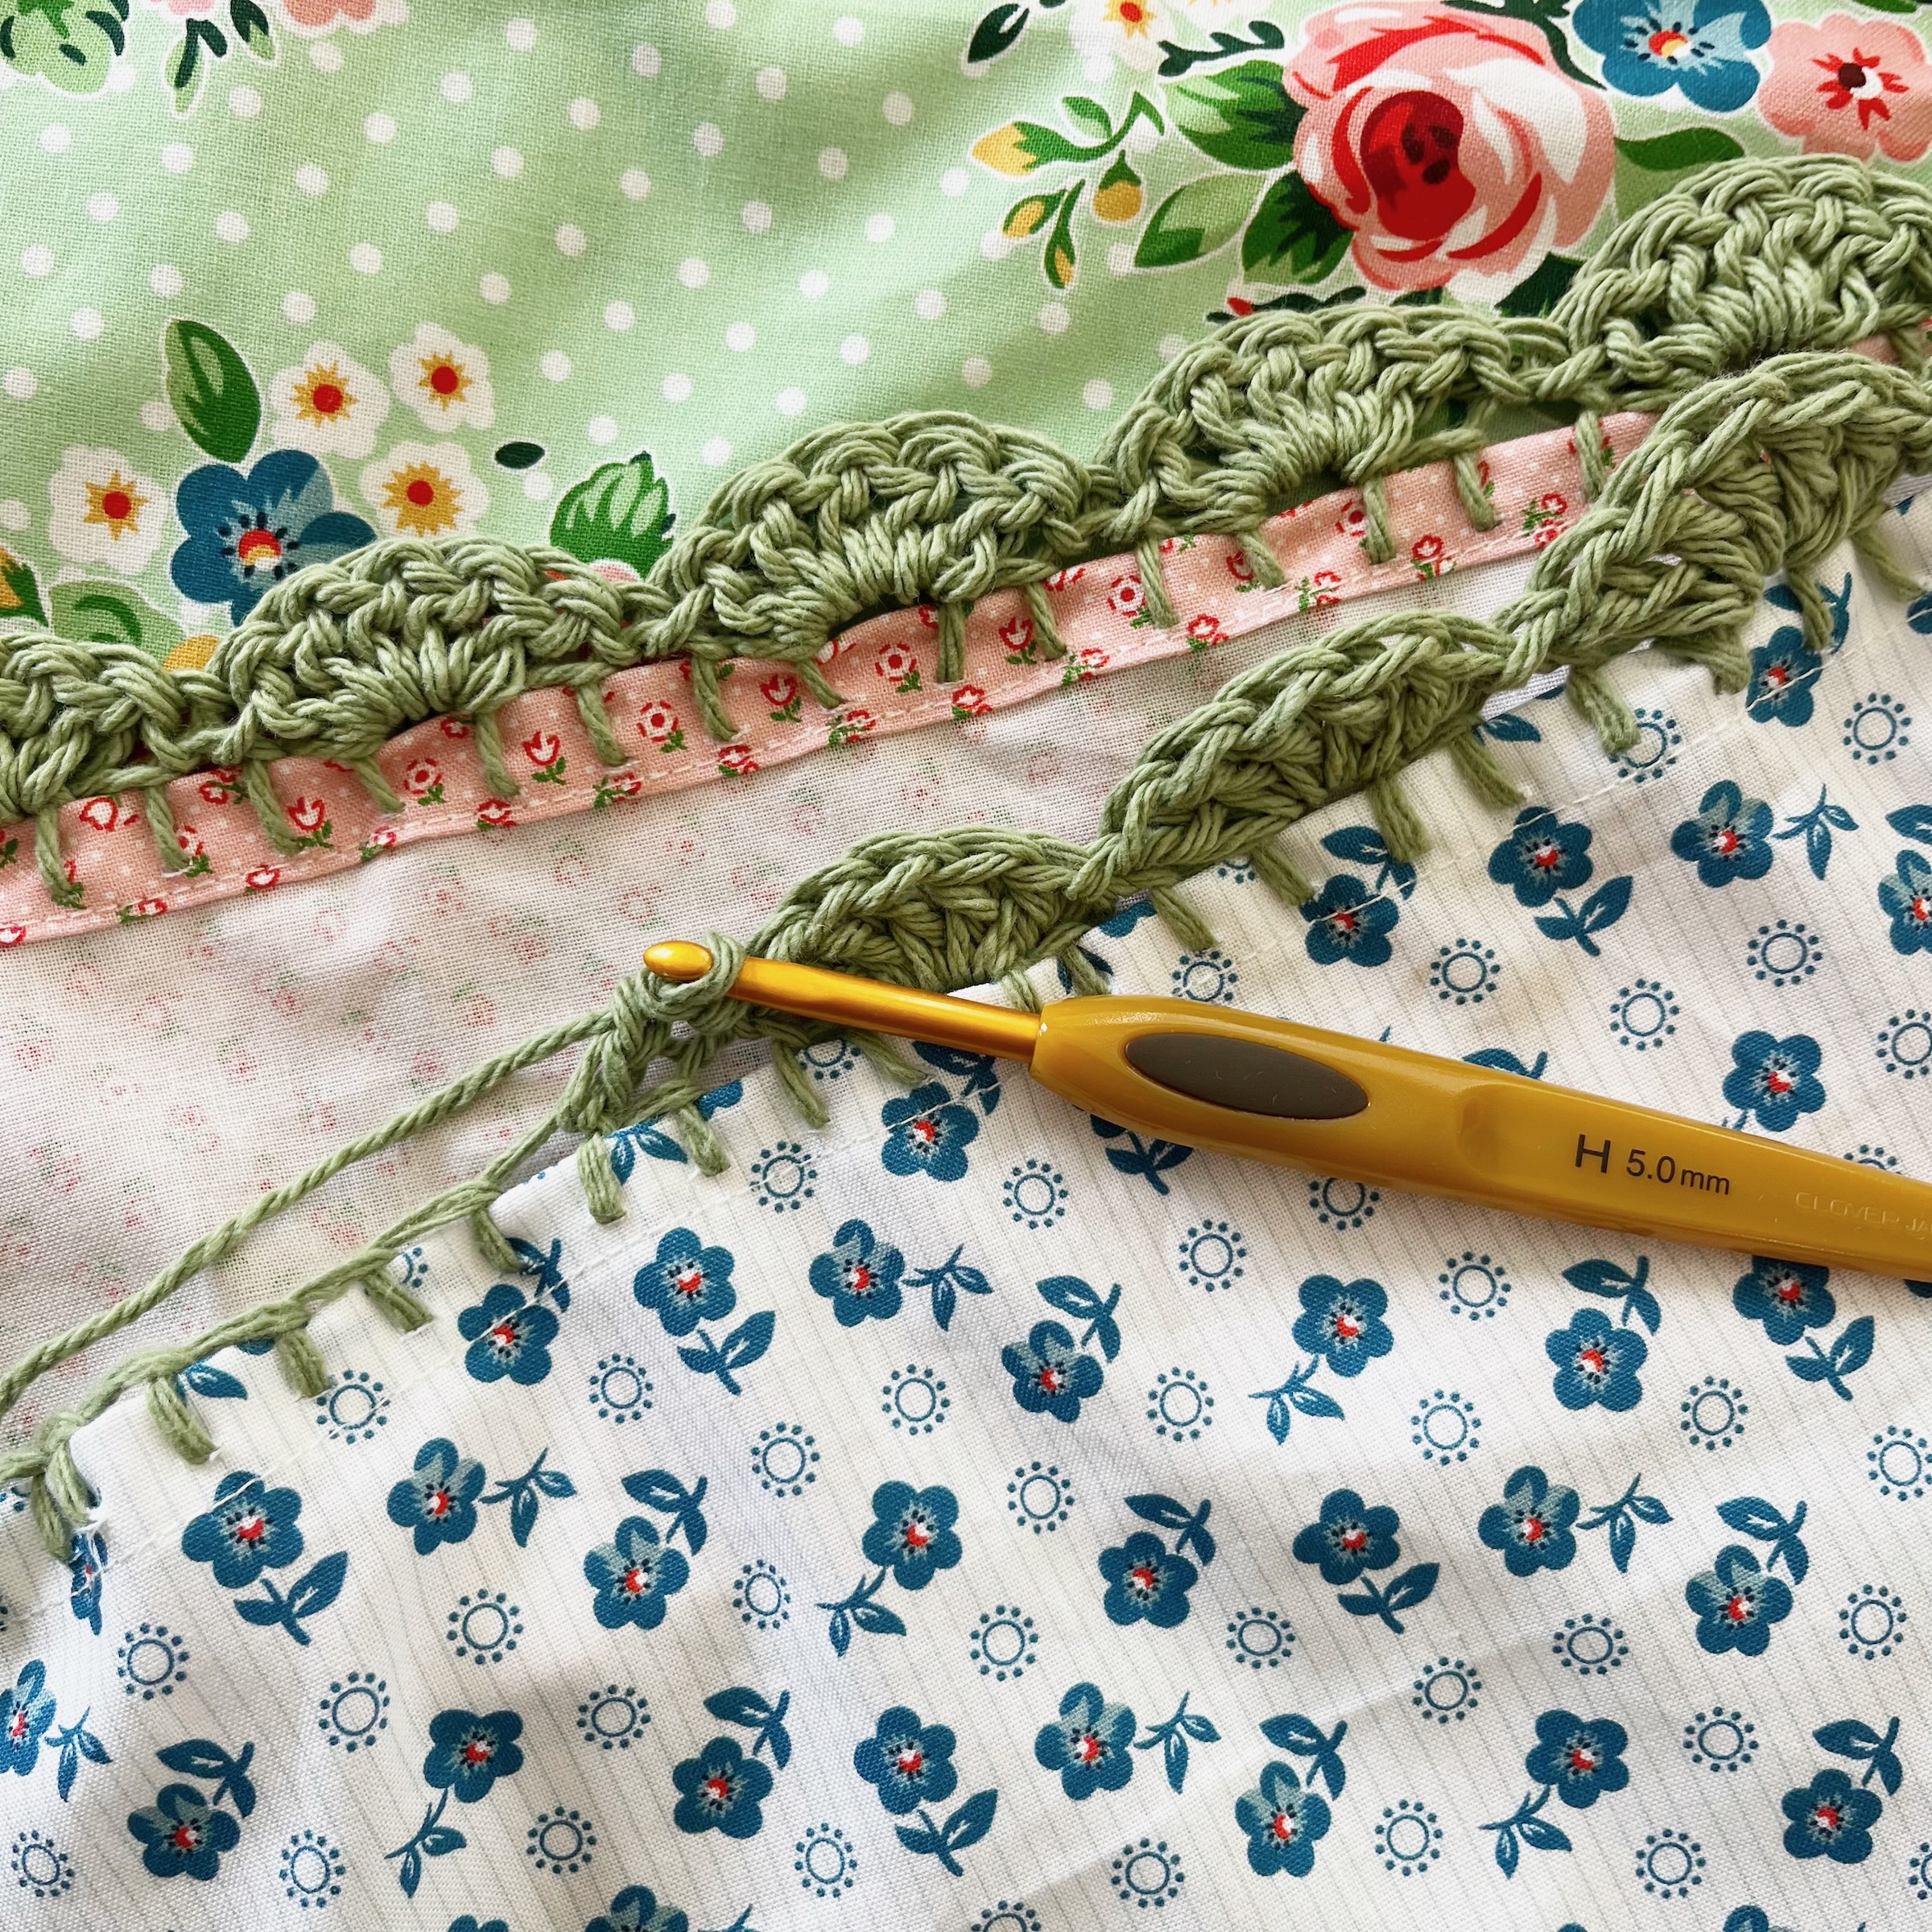
Note: Your pillowcase is technically complete at this time! However, if you would like to add any trim to that final opening this is the time to do it! I chose to crochet a scallop edge to mine and wow do I love it! If you crochet, this will be a breeze for you! If you are an “every now and then” crocheter (like me) you might need to watch a few YouTube videos to remember how to crochet a scallop! And if you don’t crochet at all, then sew on some other form of decorative trim!
.
.
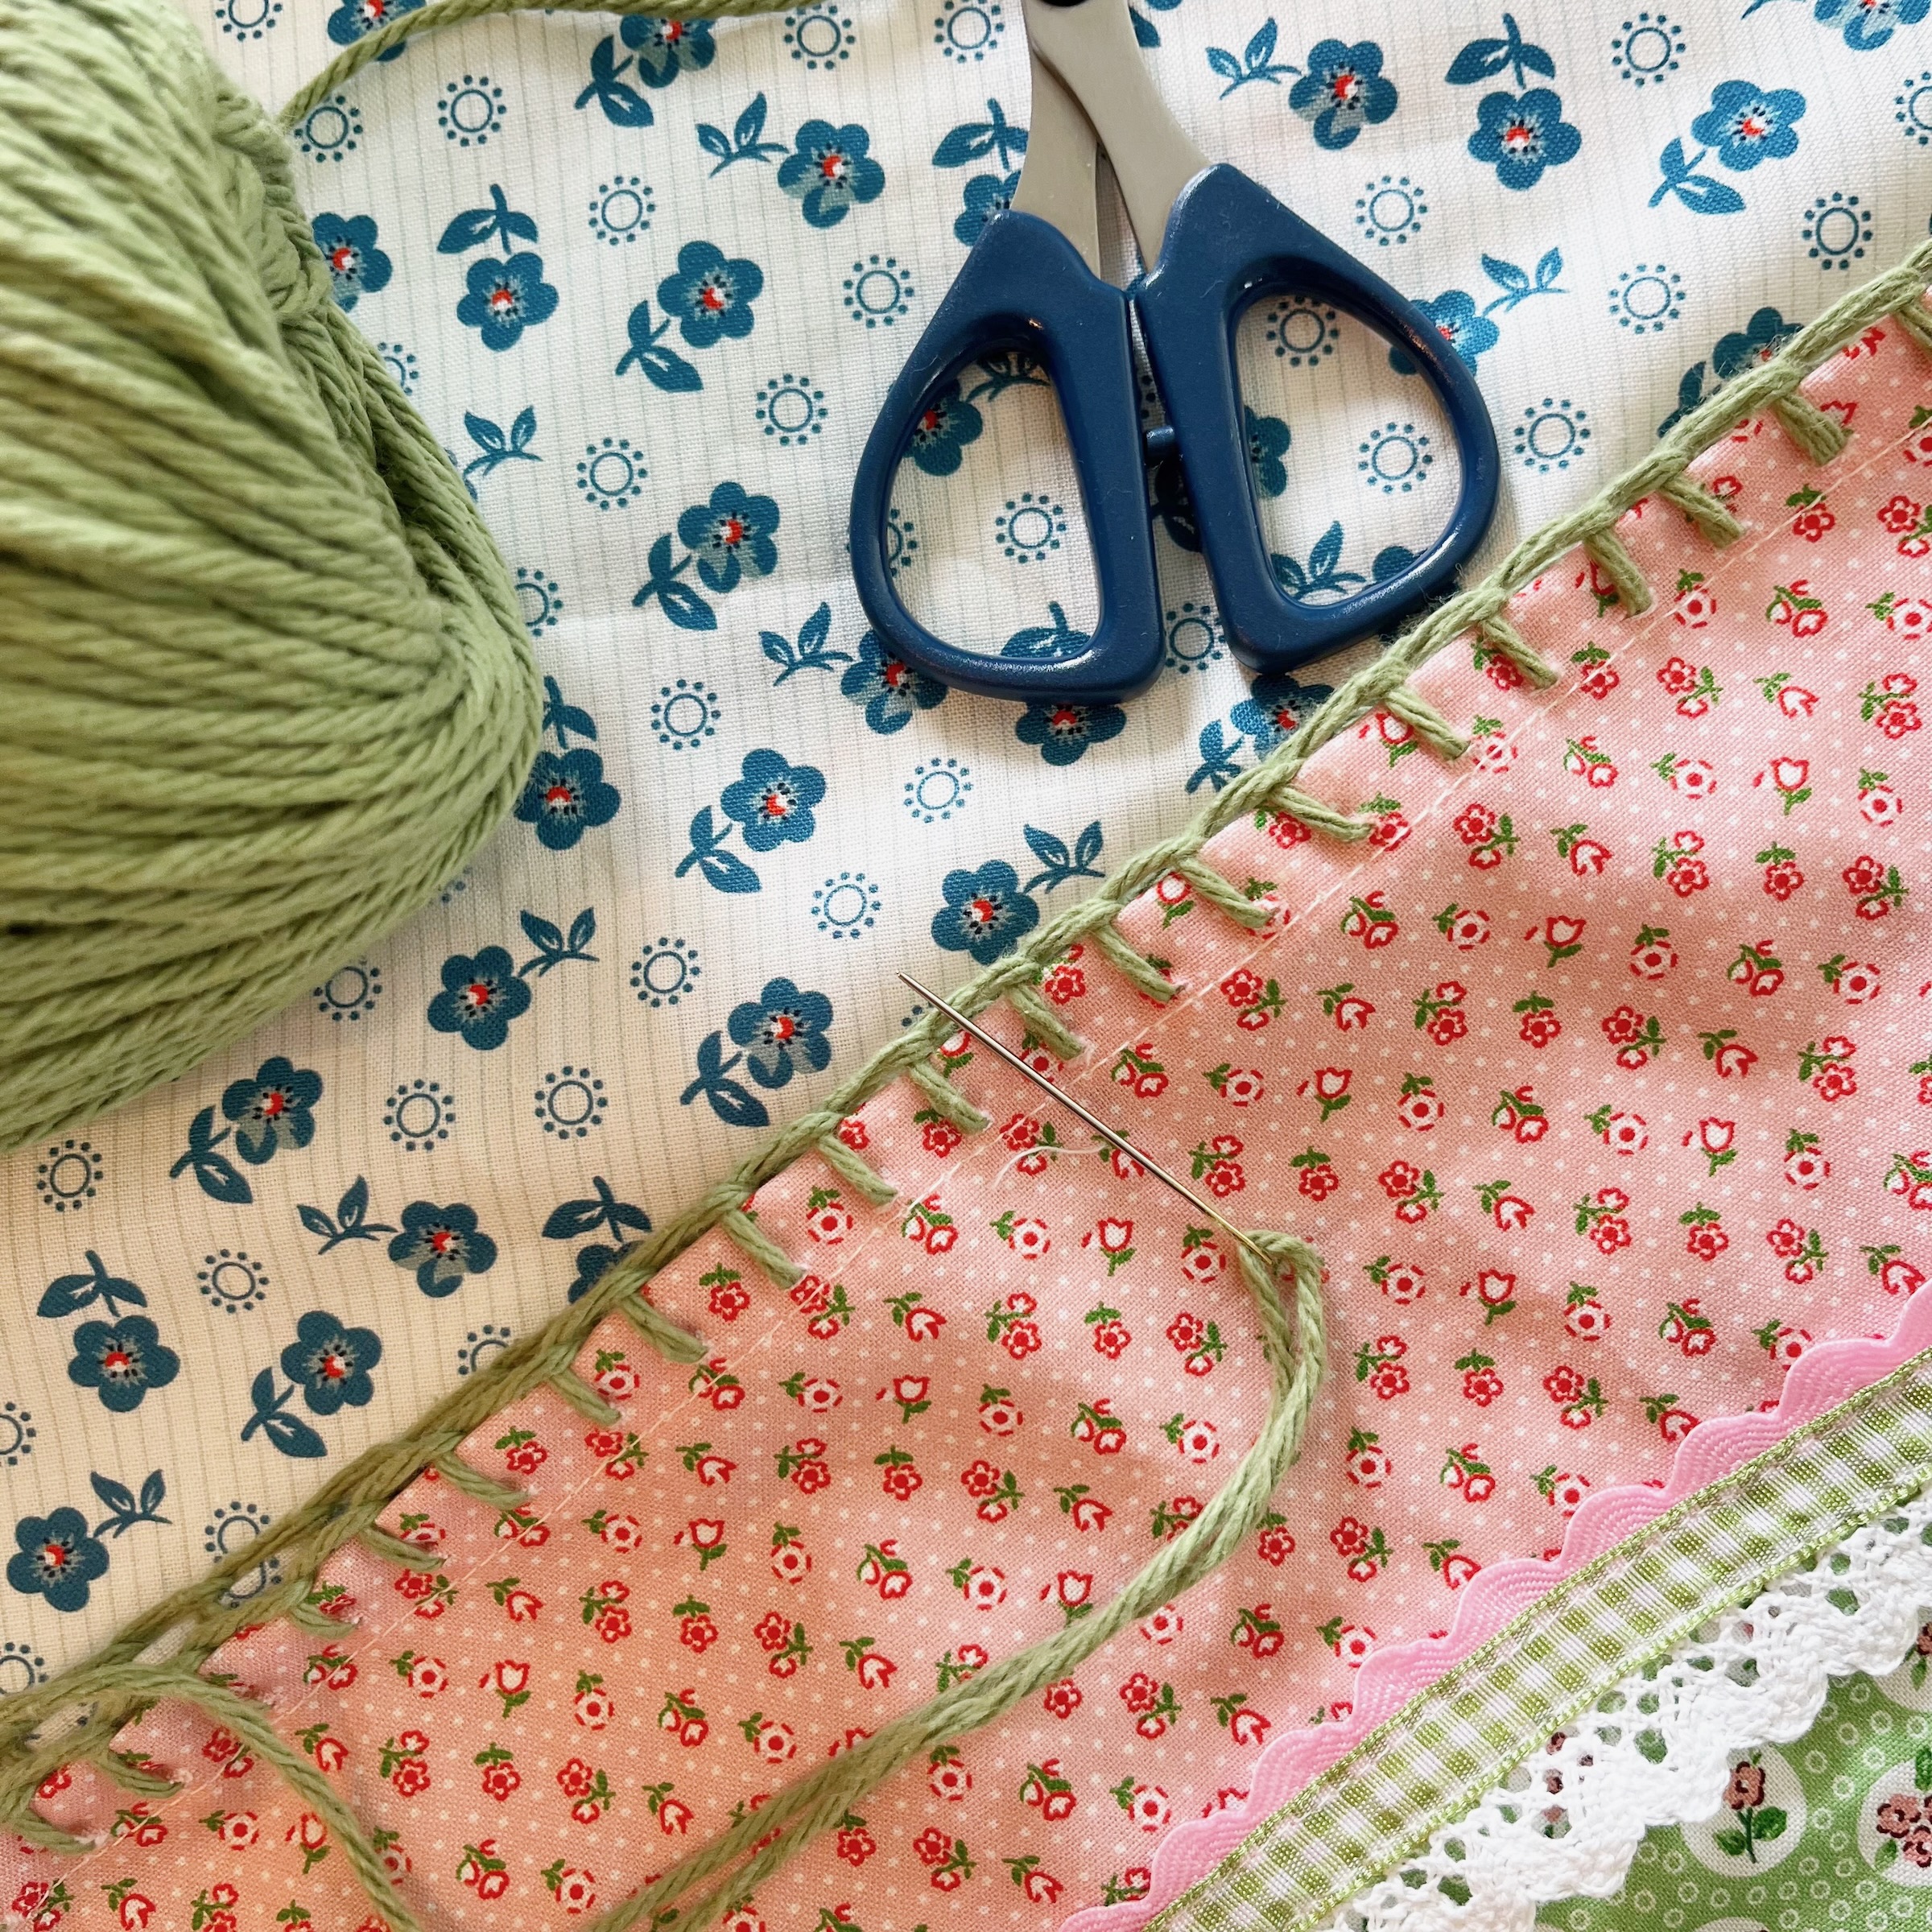
Here is how I added my crochet edging:
I used a needle that had a large enough eye for yarn, but had a very sharp point and I sewed a blanket stitch along the entire edge. I probably should’ve marked the distance between stitches, but I actually just kind of eyeballed a 1/4″.
.
.
Once I did that, then it was ready to crochet the scallop edge! Like I said, I’m a total beginner at crochet and definitely cannot teach it! But this at least shows you how I did it!
.
.
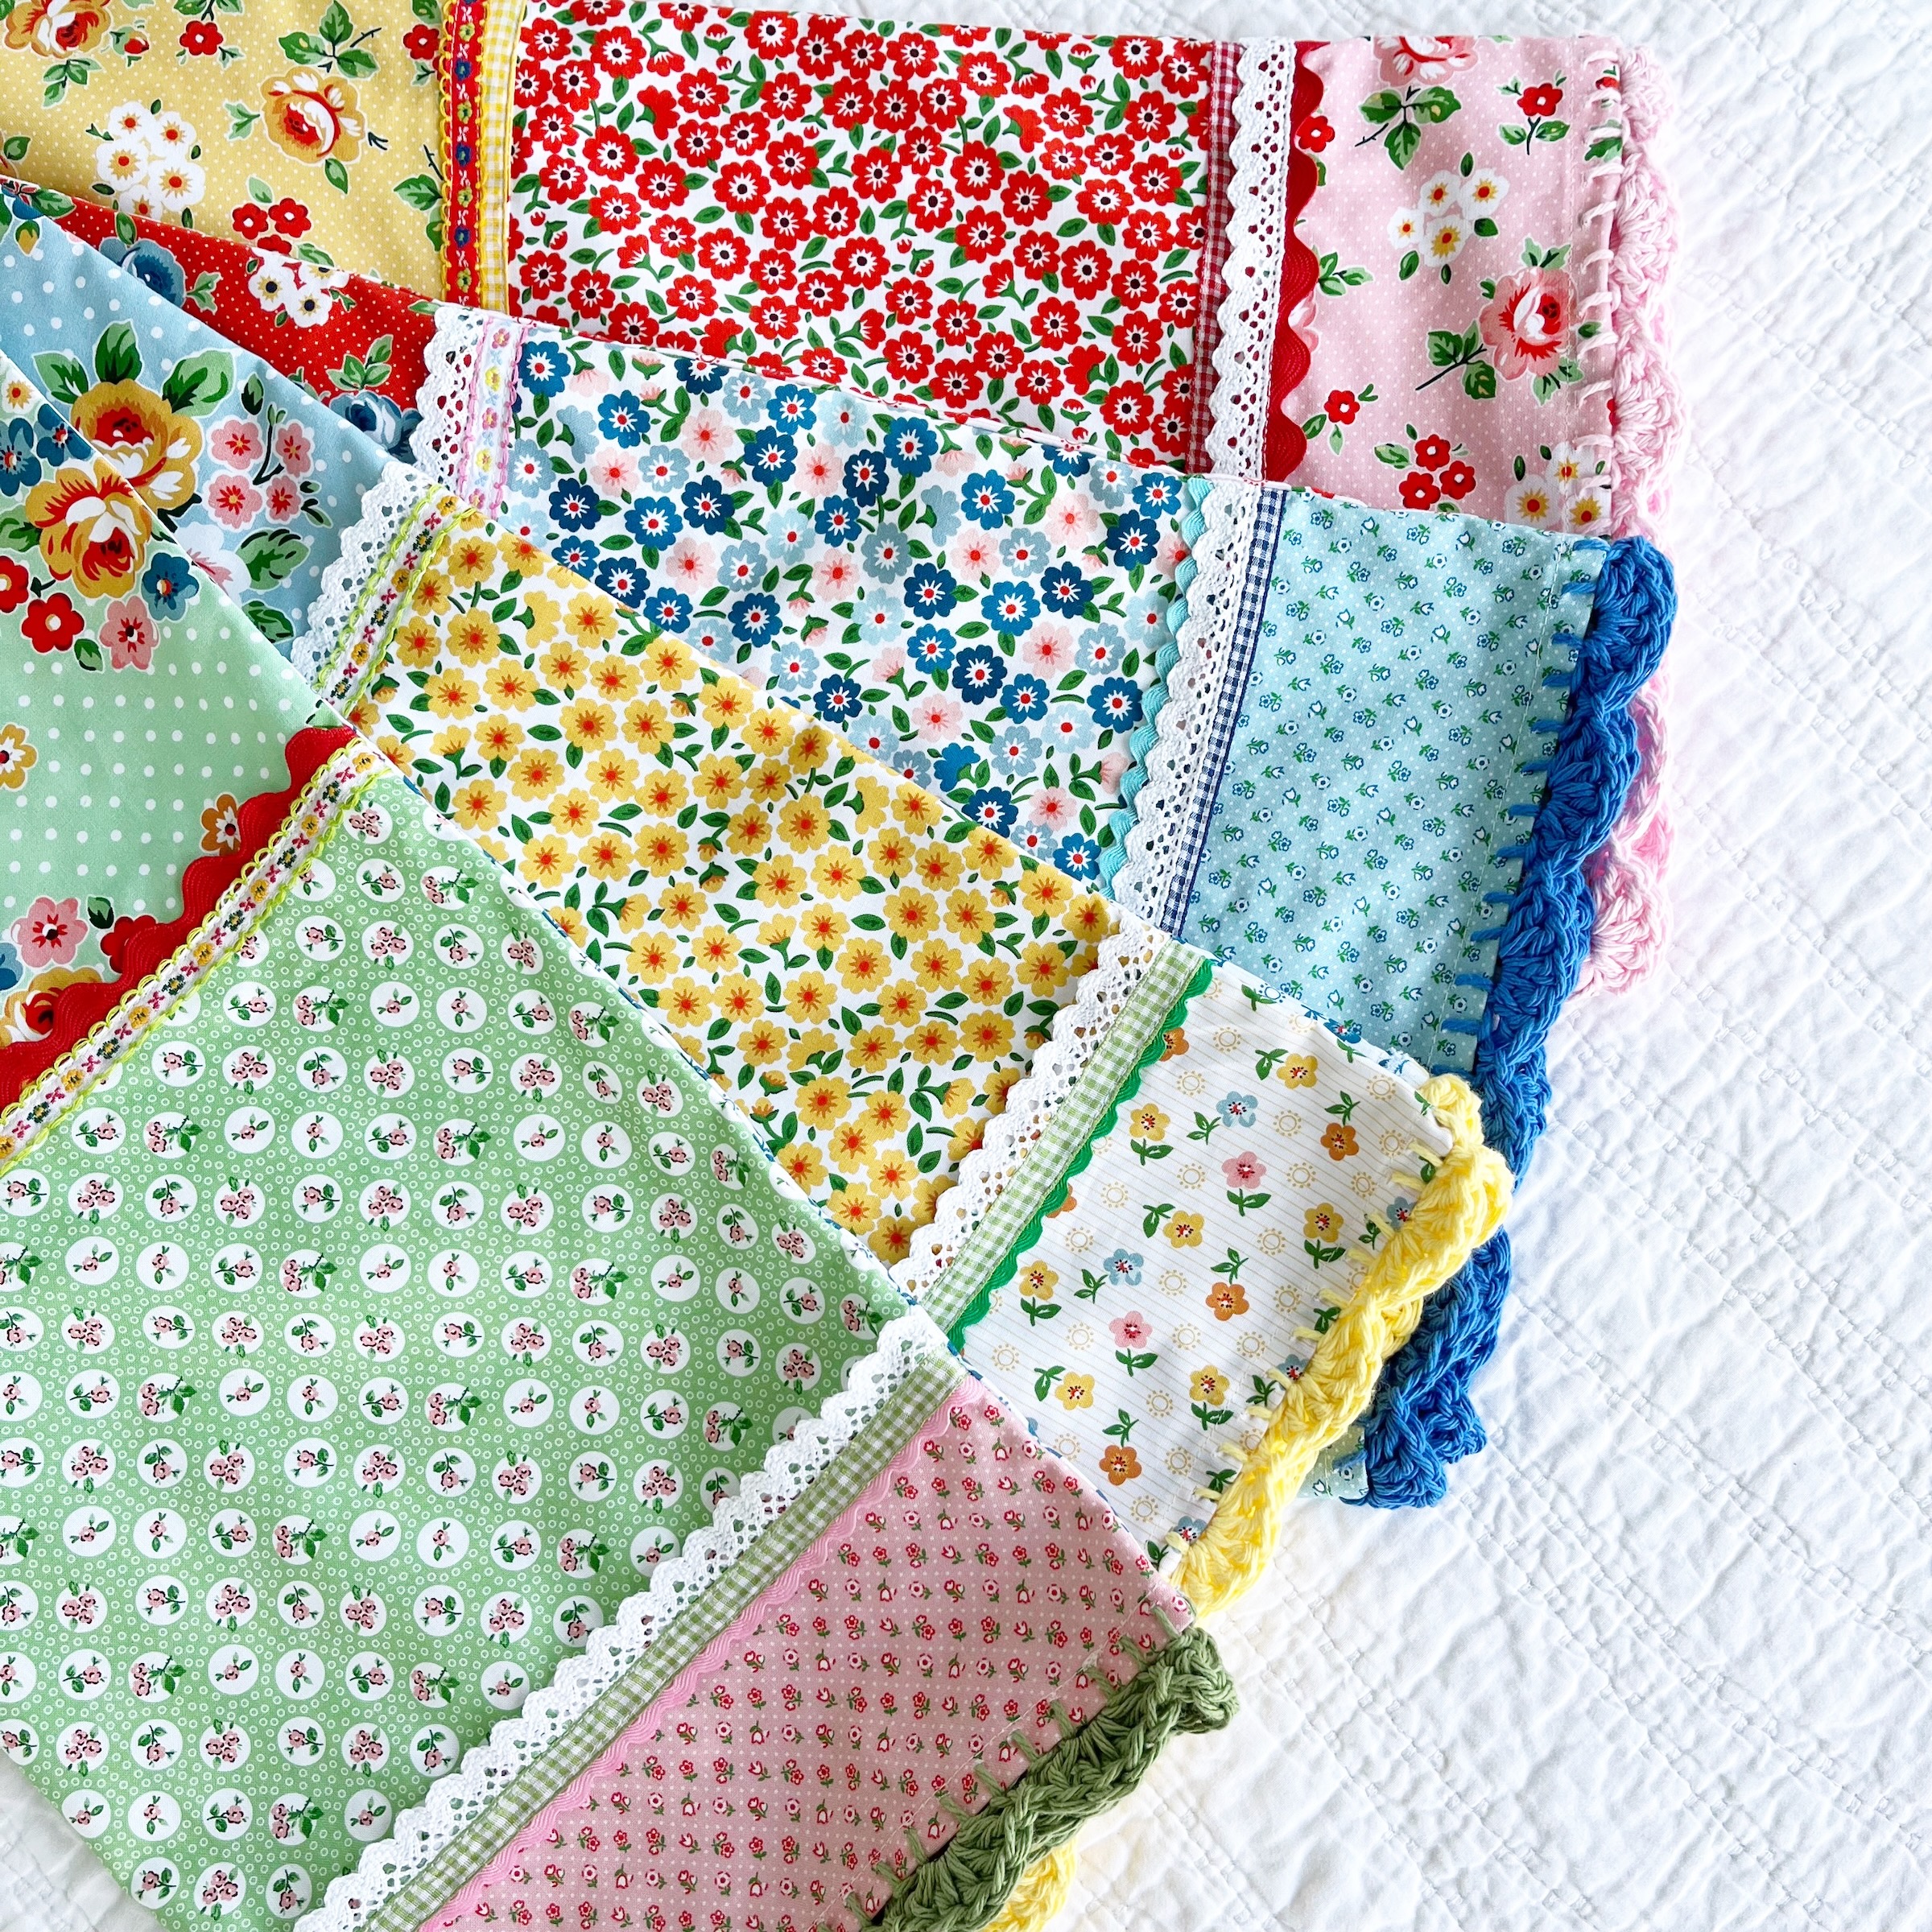
Now that you’ve made one pillowcase… keep going!!!
.
.
.
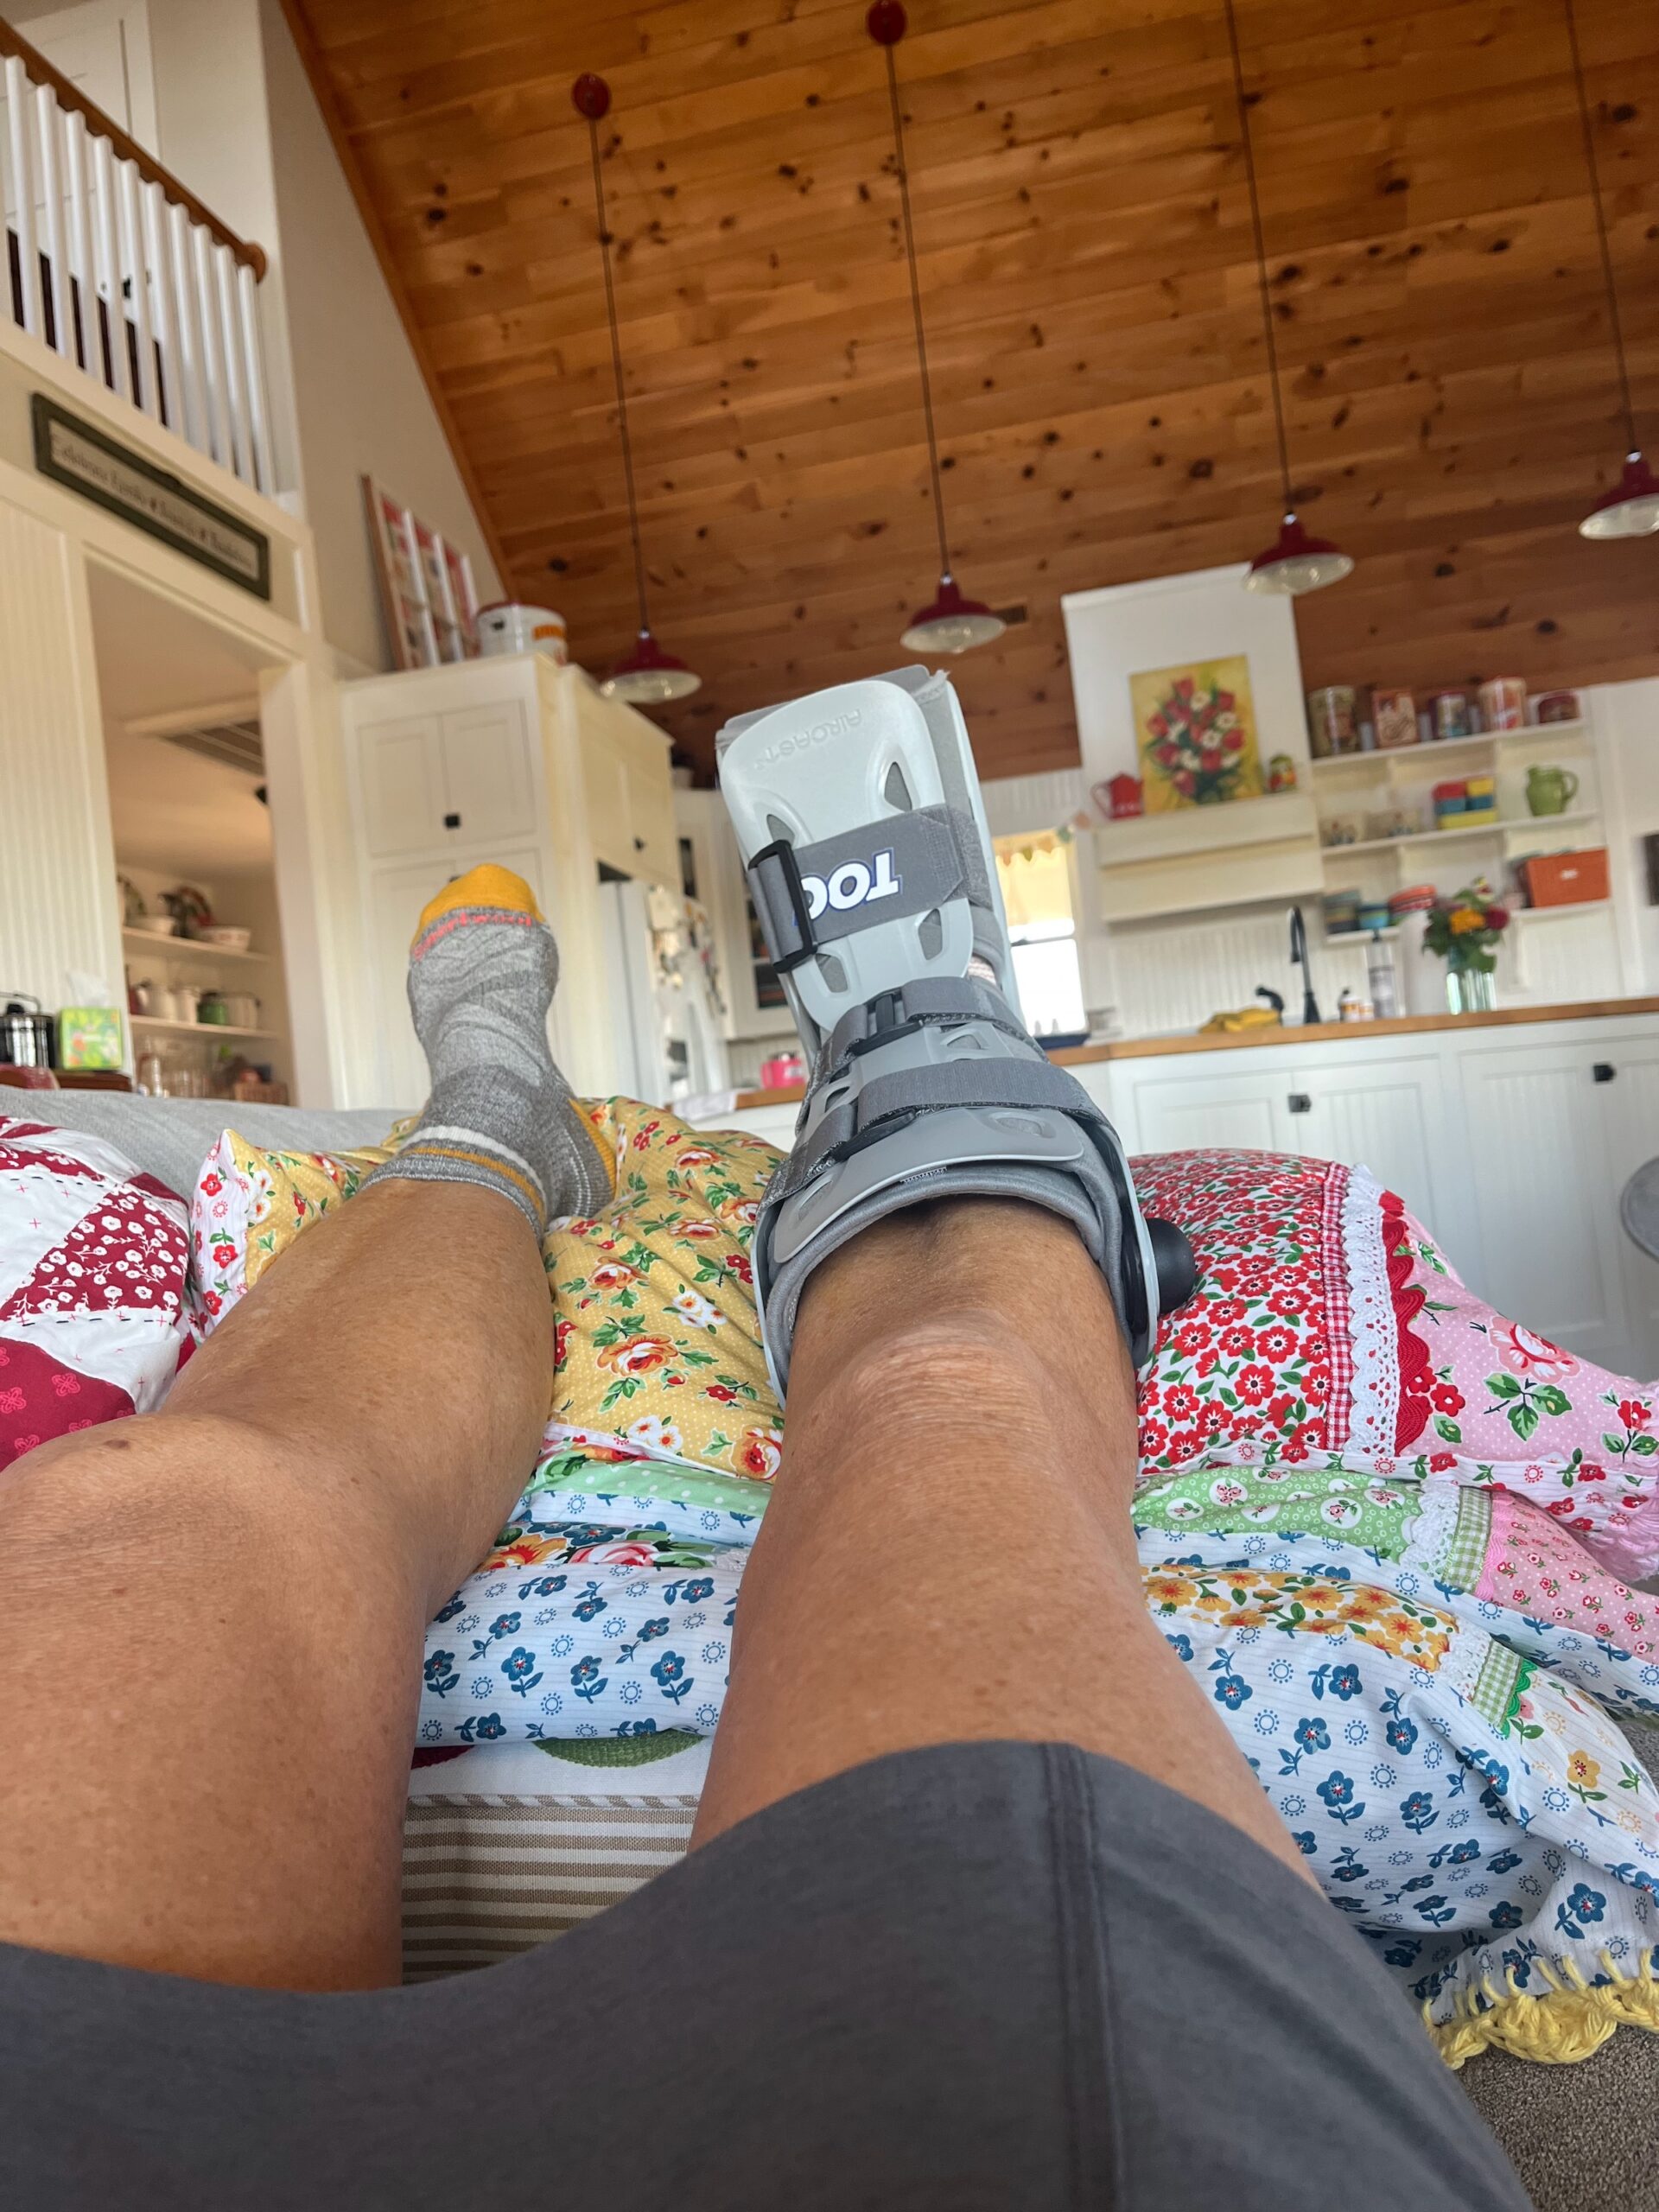
I’m laid up right now from foot surgery… I have a great little “crib” (smile!) set up on my couch where my foot has to elevated above my heart and I’m loving my four gorgeous pillows with my boot propped on them!!! At least THAT makes me happy, even if the air cast boot doesn’t!
.
Happy fall, my Farmgirl friends!!!
.
Until our gravel roads cross again… so long.
.
Dori


I love the pillowcases you’ve created. Absolutely beautiful!
I’m seriously thinking of making a few for Christmas gifts.
Lovely fabric.
These are beautiful! I’m adding to my future project list.
Those pillowcases are SO pretty! Thanks so much for sharing the instructions here. I’m definitely going to dive into that project. I was so shocked when your last picture came into view. Owie! Take good care of yourself and heal fast.
Those are just beautiful . . . definitely my “style”!
Hope you heal quickly!
CJ
Pre-wash any of this fabric you want to use for a pillowcase and then test it on your face. Many of these fabrics are scratchy and miserable next year your skin.
Hi Karen,
Thank you for that advice. I do only purchase and sew with very high quality quilting cottons; but pre-washing for something like this is a great suggestion. Some fabrics would be absolutely miserable to sleep on!
~ Dori ~
Oh dear, I just saw your foot. I have no idea what happened to you, but I do know that because glyphosate is coming out of the car exhaust (from corn ethanol being added to gasoline), and is in all the food and water you do need to take glycine powder. Glycine is an amino acid that is in your food and your body uses to make connective tissue, which is muscle, ligament, bone, fascia (that net under your skin that used to be called cellulite). Glycine powder is inexpensive, sweet tasting, just put the dose in your mouth and chase it with water. If you need more information, see the work by Dr. Stephanie Seneff, who has been studying glyphosate for over 15 years. She reads and correlates everything written on it. Wonderful colors in your cases!
Hi Karen,
Thank you for the info. I will look into that! I’ve had a bone graft from my heel to my big toe so I’m certainly interested in anything that is going to cause me to have stronger and healthier bones.
~ Dori ~
They are really so cute. Nice work!!
Hi Tina,
Thank you!
~ Dori ~
These pillowcases are the cutest. I love them. Get well soon for your foot
Hi Stacey,
Thank you! I love them too.
I’ve got an 8 week road to recovery on my foot… but I’m doing good! Thanks for the get well wishes!
~ Dori ~
Love them!
Hi Sharon,
Thank you!!!
~ Dori ~
I love this pillow cases. I have admired this type of cases my whole life. Thank you for bringing attention to them.
Hi Melanie,
I’ve admired these forever too! I really love them… make yourself one!!!
~ Dori ~
Dori, you are so talented those pillow cases look just so pretty! It is nice to see the bright cheery colors, since we are going into stick season now in Vermont. Your bunting hanging in my window keeps a smile on my face. I wish you well with your recovery.
Hi again Sheila!!!
These colors are so gorgeous aren’t they??? They make me really happy! I’m so glad you are enjoying your bunting. In front of a window is the best place to hang them I think!!
Hugs,
~ Dori ~
Dori,
Your pillow cases are so beautiful! I love the combinations that you choose! Prayers for continued healing on your foot! 🙂