..
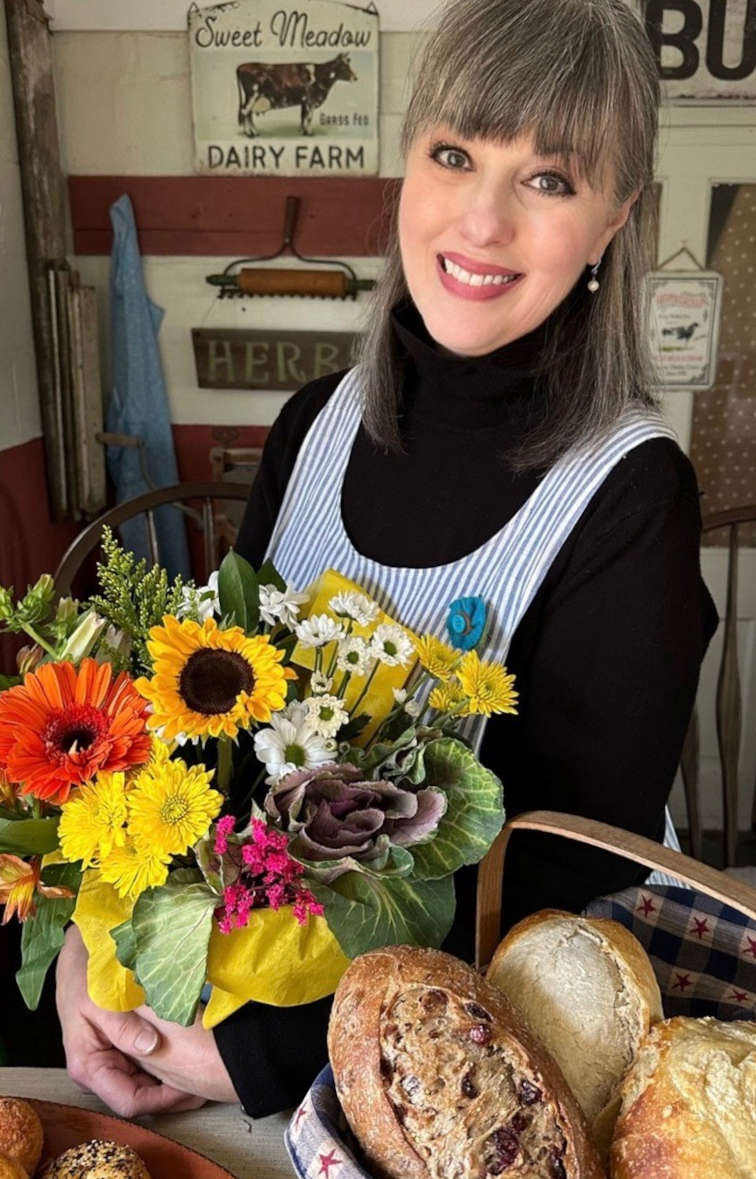
Hello Farmgirl friends!!!
.
Last month, I wrote about Jina… the friend I finally met in person! I keep thinking of the sweet little gift she brought me that makes me smile every time I see it, and it got me thinking about tiny little home made things that bring a smile to someone else.
So this month I made two darling little fabric buntings that I am gifting to two of you that commented on my blog post last month! The winners are:
.
Sheila LaPoint and Cindi J
.
I’ve sent an email to each of you so I can get your address to mail these to… please check your inbox!
.
.
.
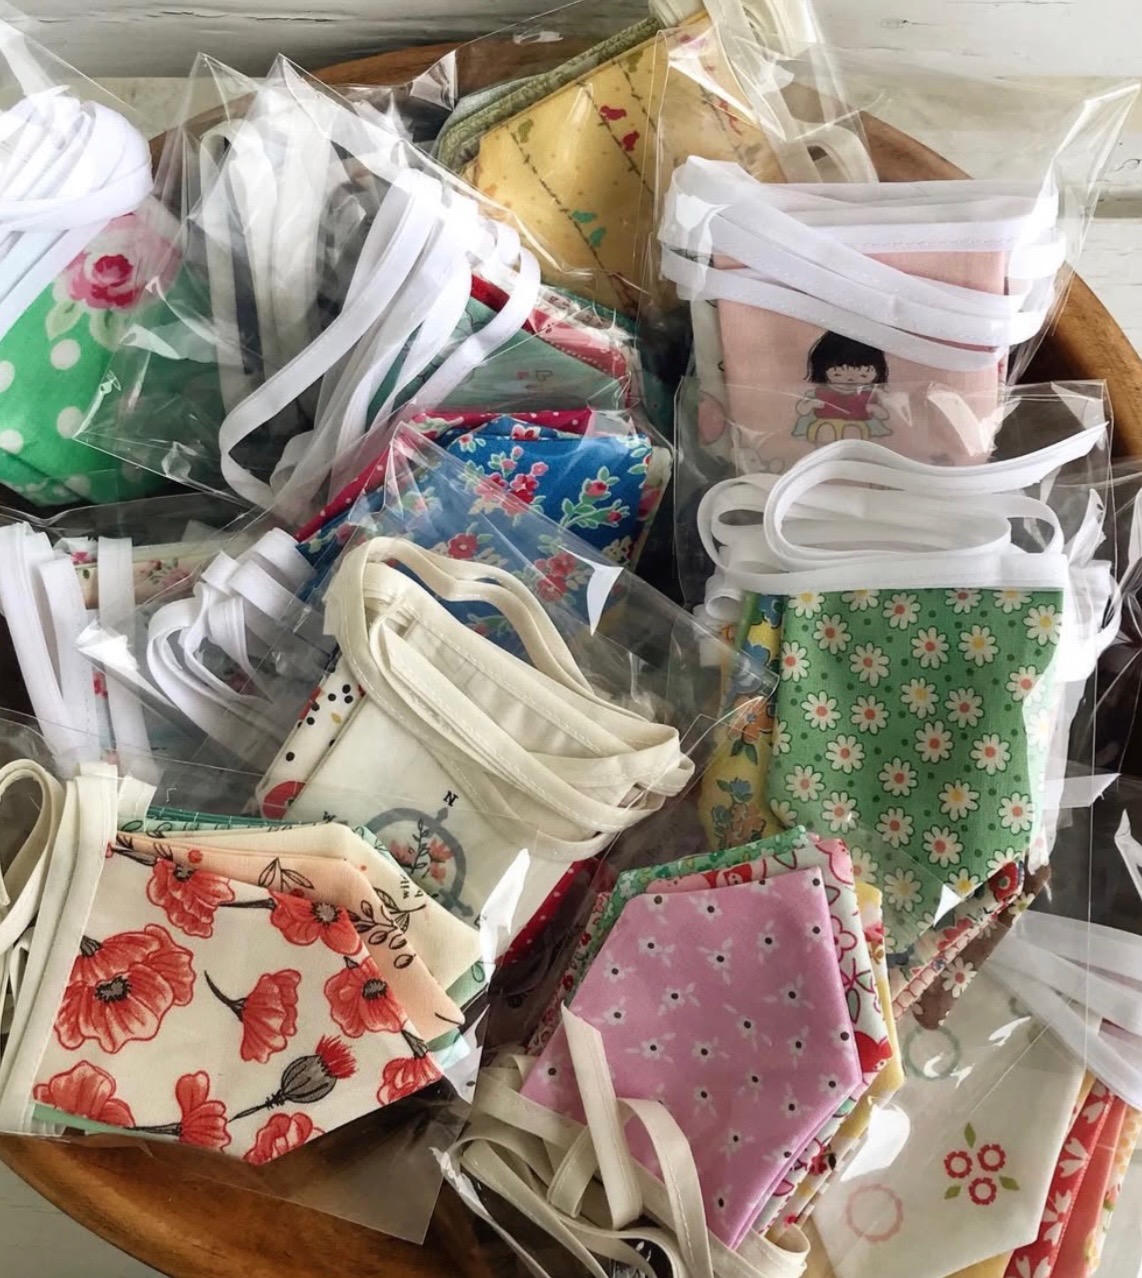
And now, who would like a tutorial on exactly how to make these little buntings? They are fast and fun to make and the best part is they make such a happy little gift. Many years ago, I attended a quilt retreat in Vermont with about 20 ladies I’d never met before (I wrote a blog post here if you want to read it!). I wanted to take each of them a little gift so I made buntings! They got to pick which one they wanted. It was such a fun gift and I’ve made (and gifted) so many since then. So… let’s get started and make a few!
.
.
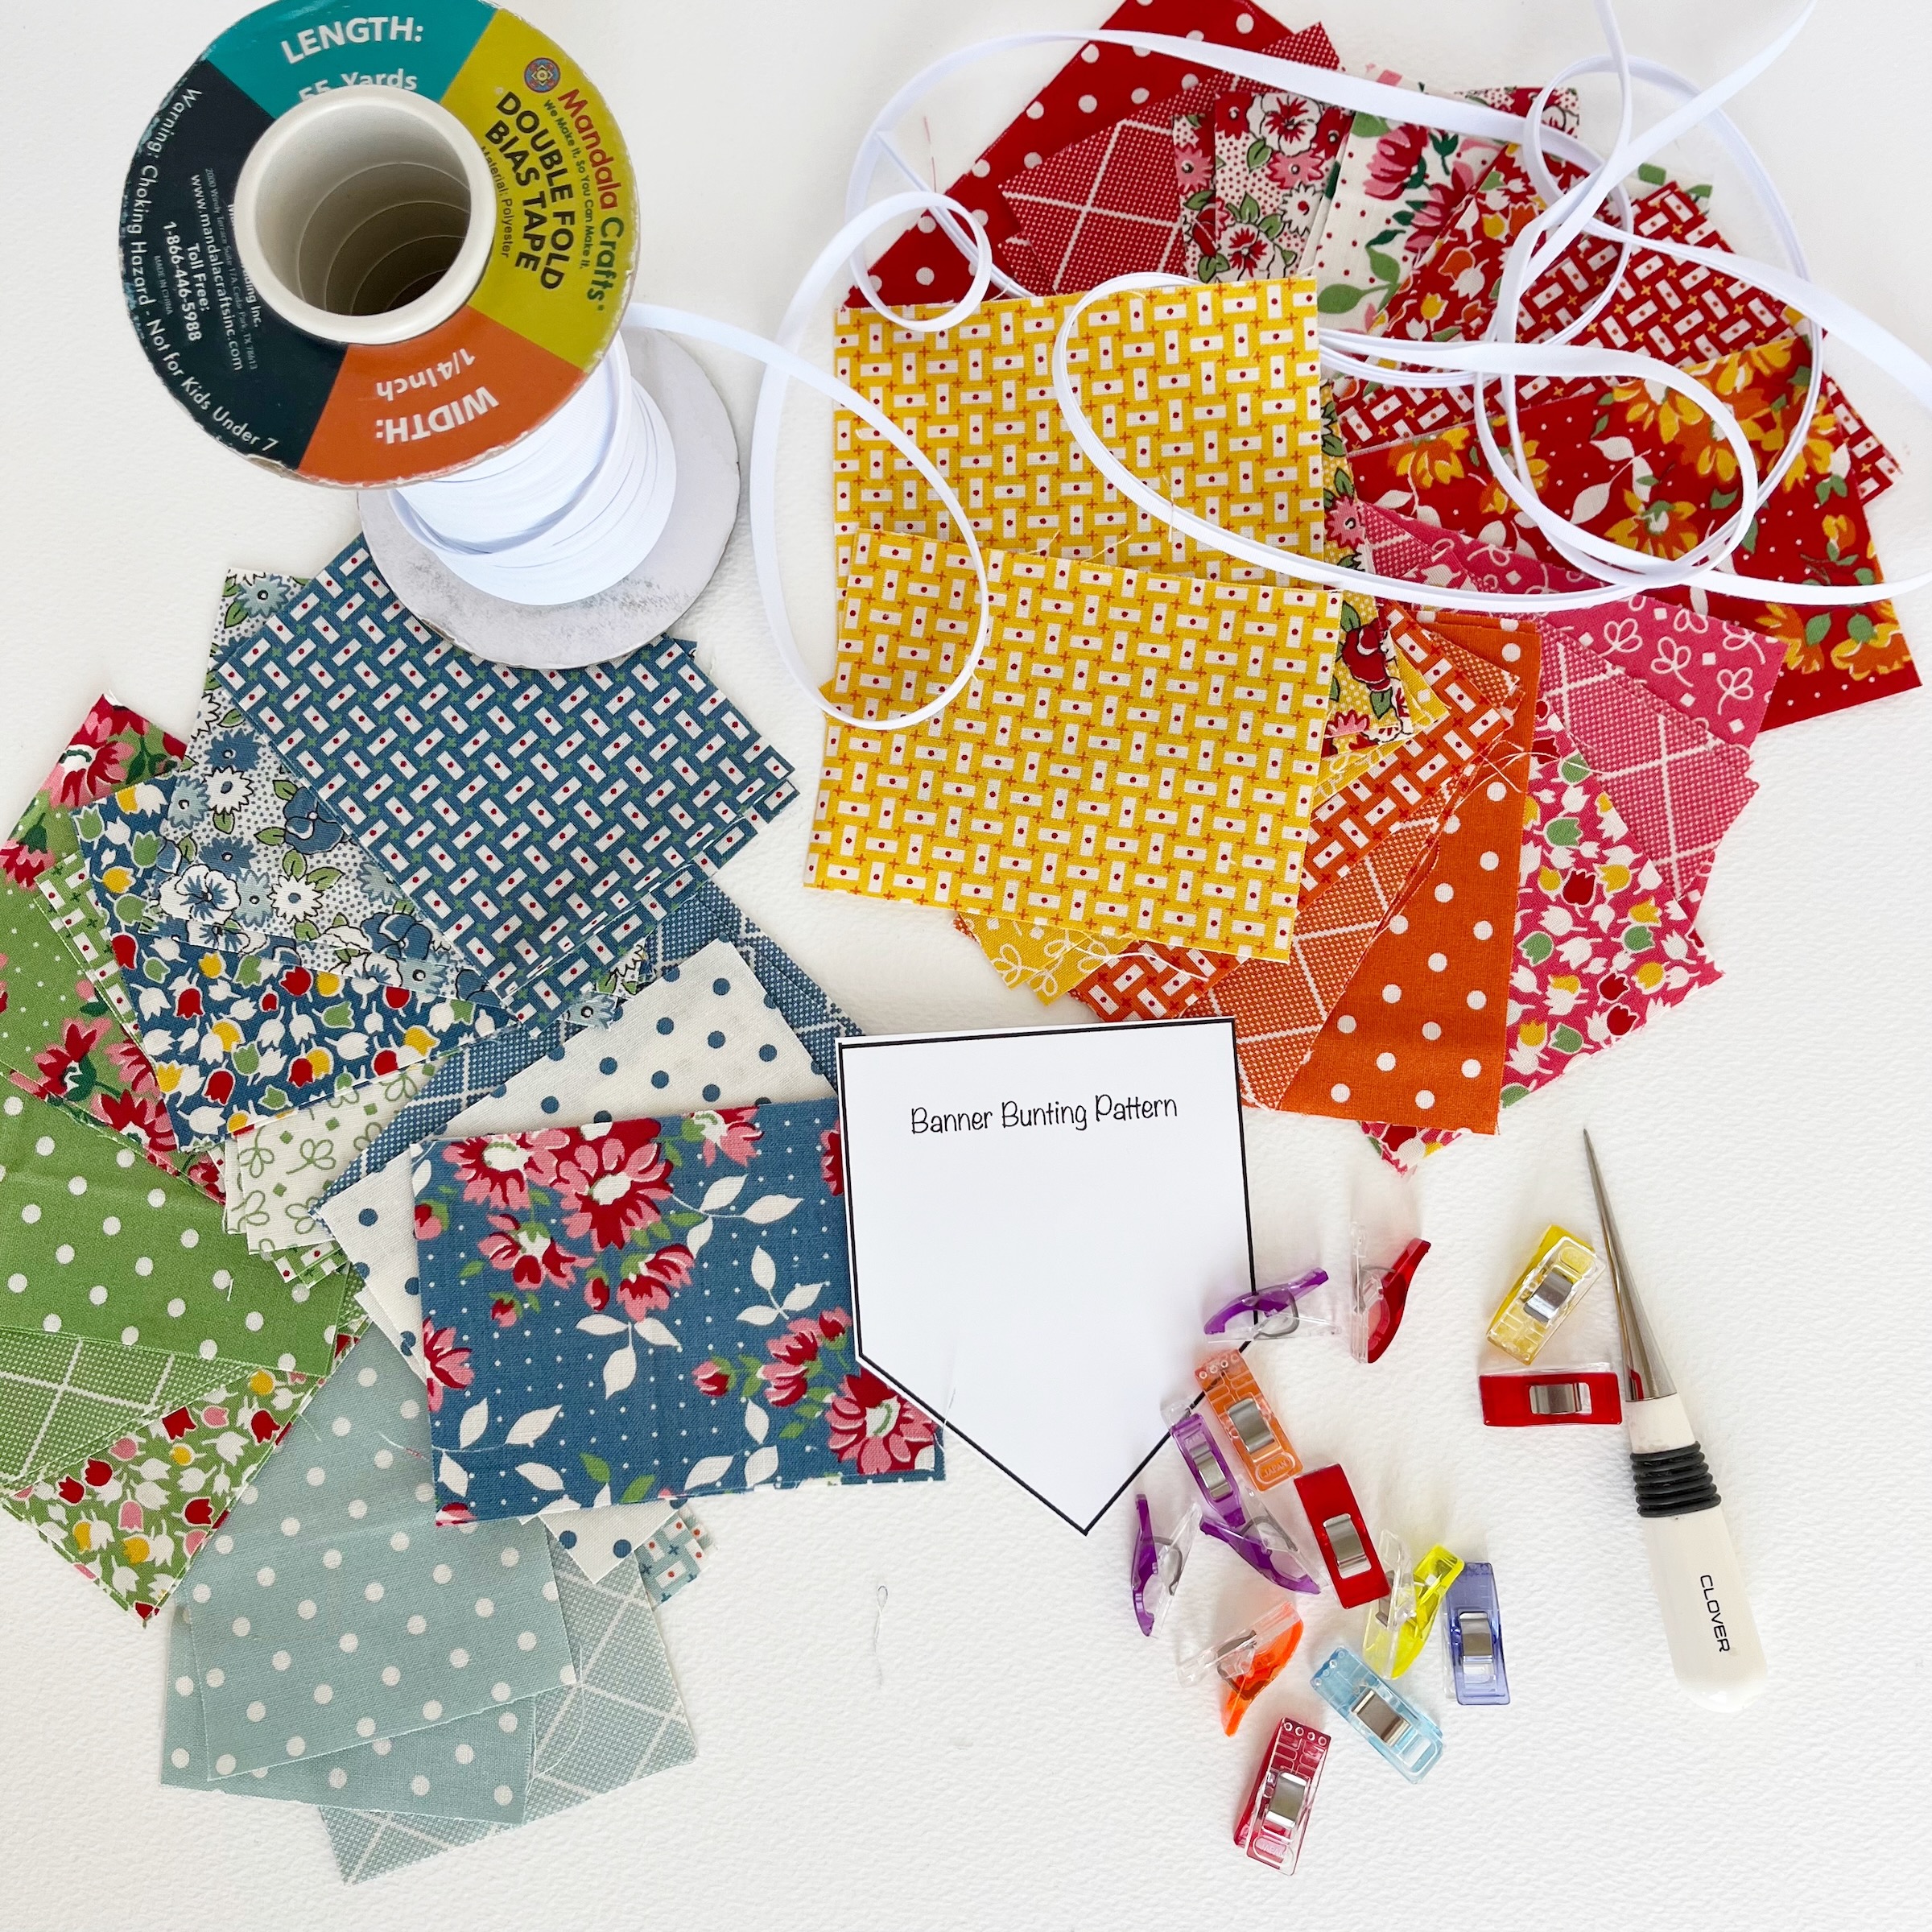
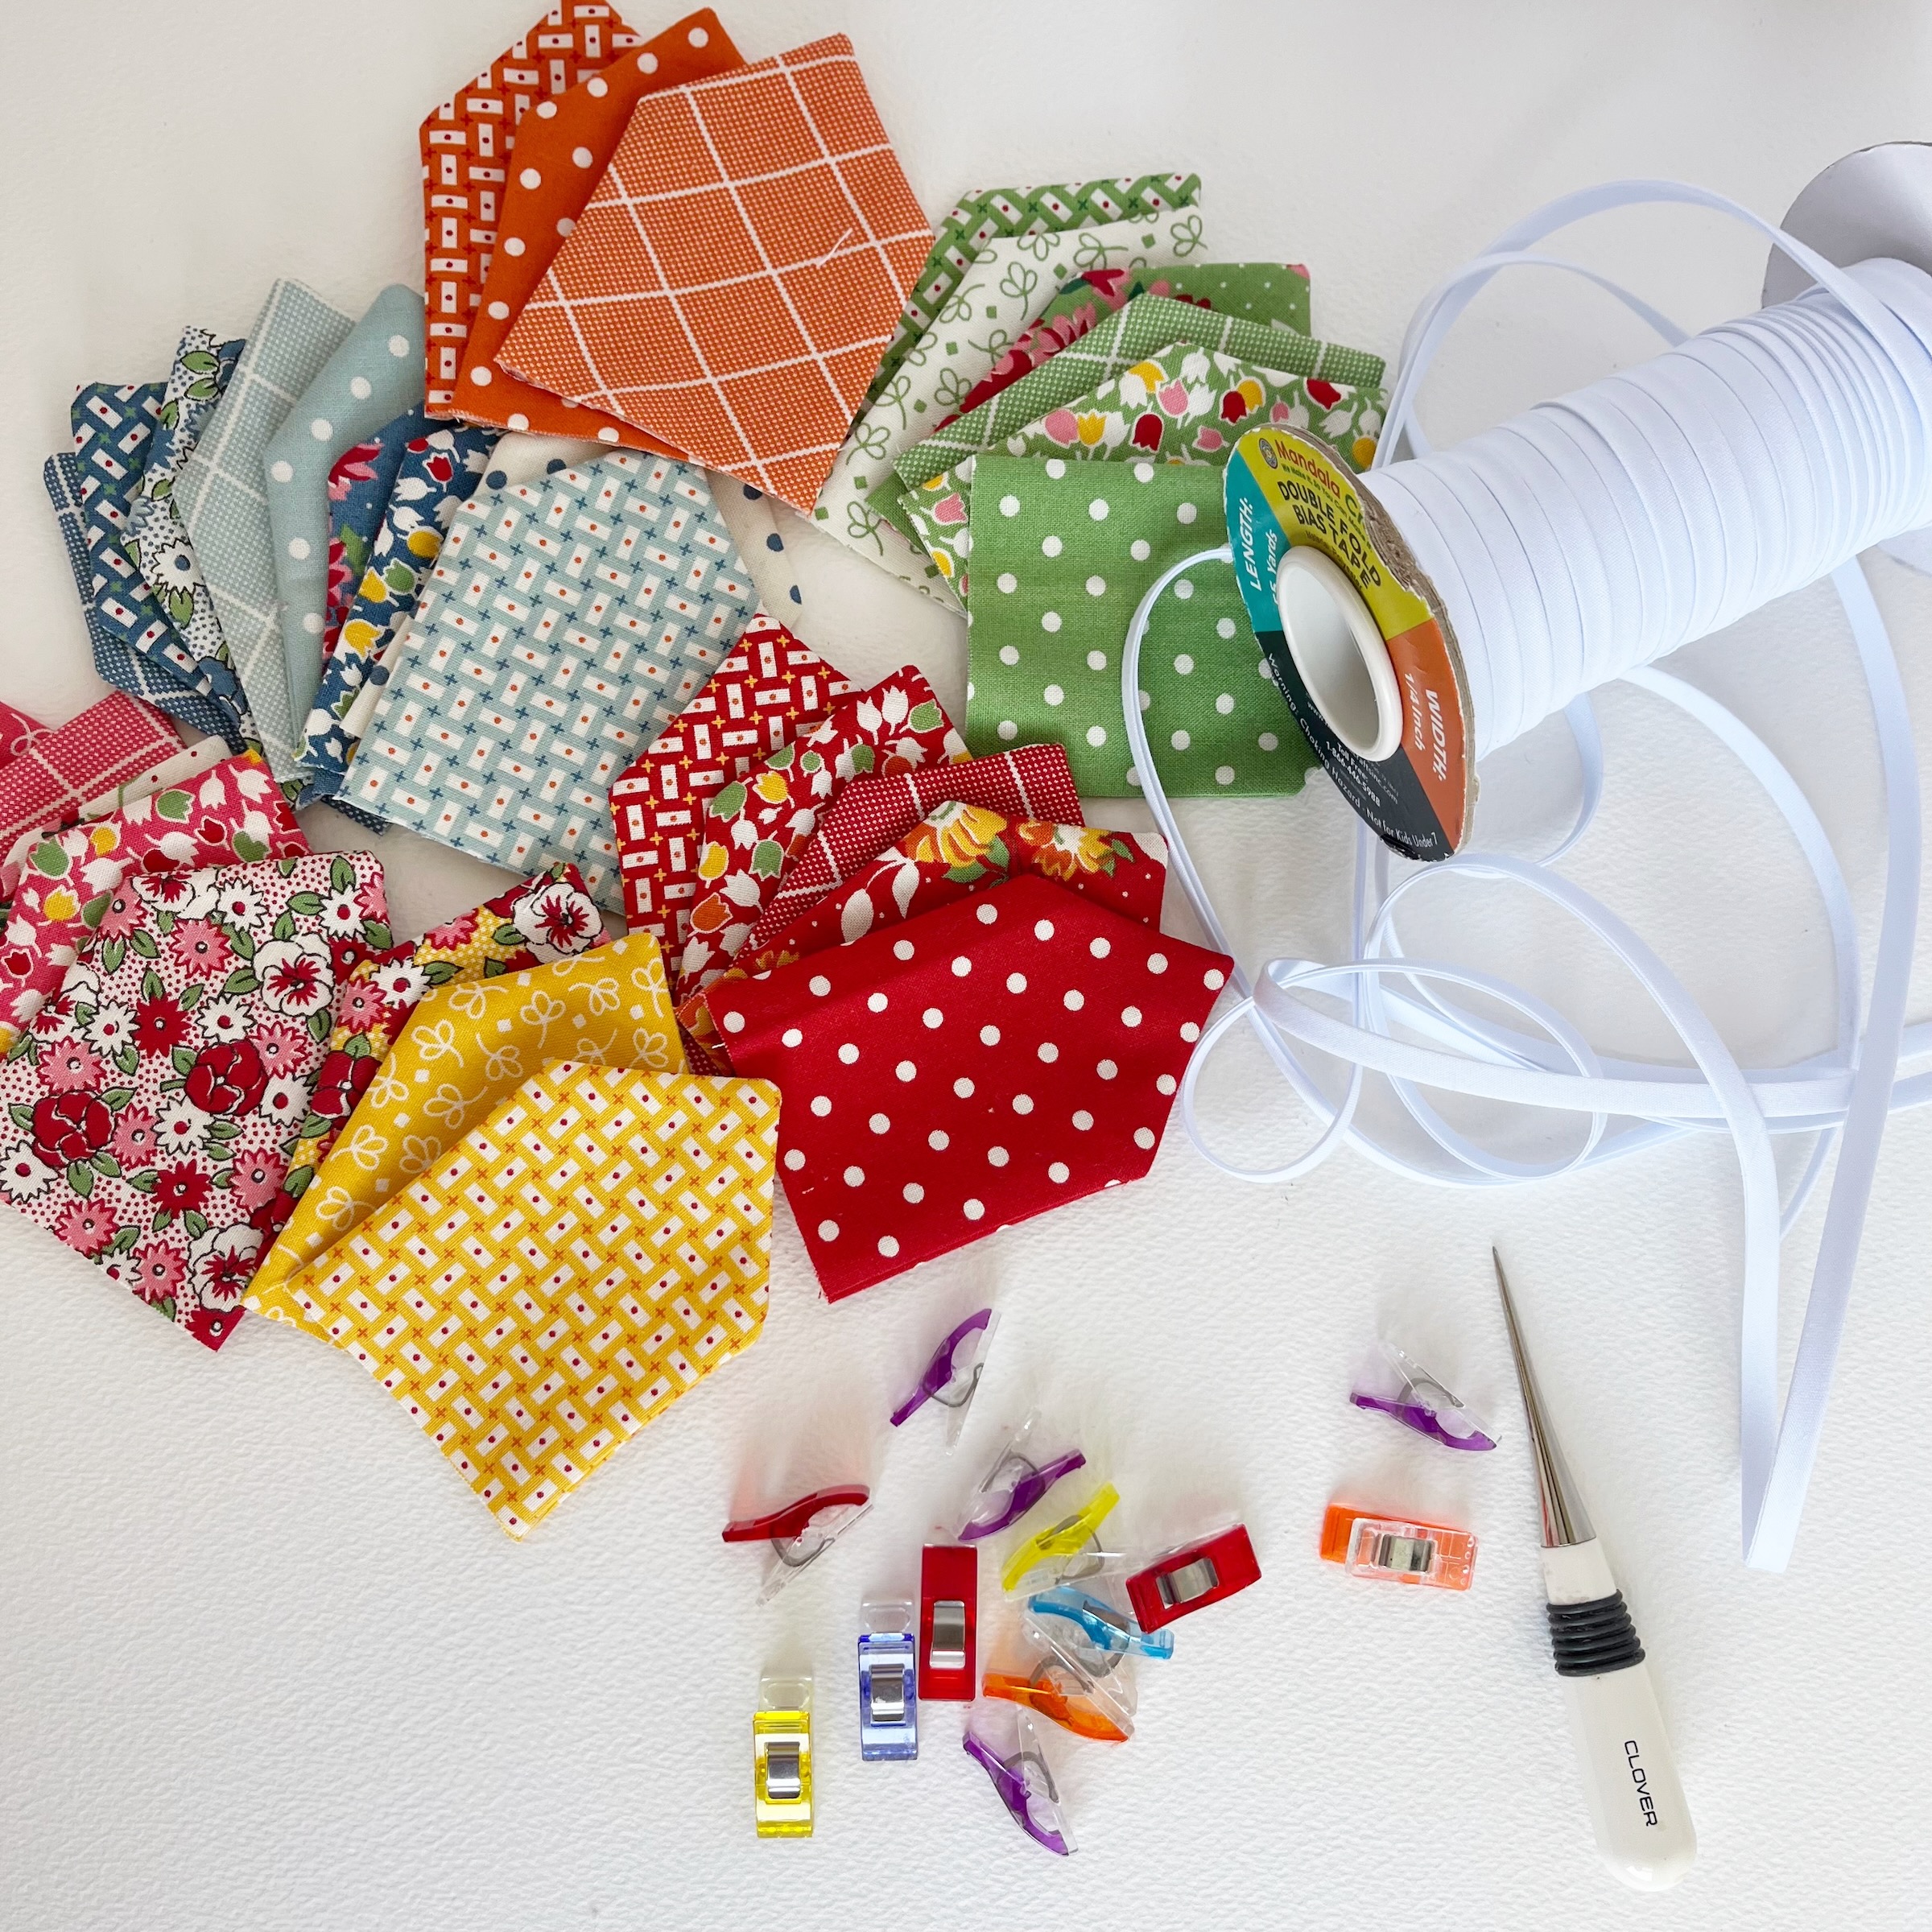
Gather your supplies:
- 3” x 4” Fabric Scraps (you will need two for each little banner)
- 1/4” Double Fold Bias Tape Binding
- Banner Bunting Pattern Piece
- Rotary Cutter and Ruler
- Wonder Clips (optional)
- Tailor’s Awl (optional)
.

.
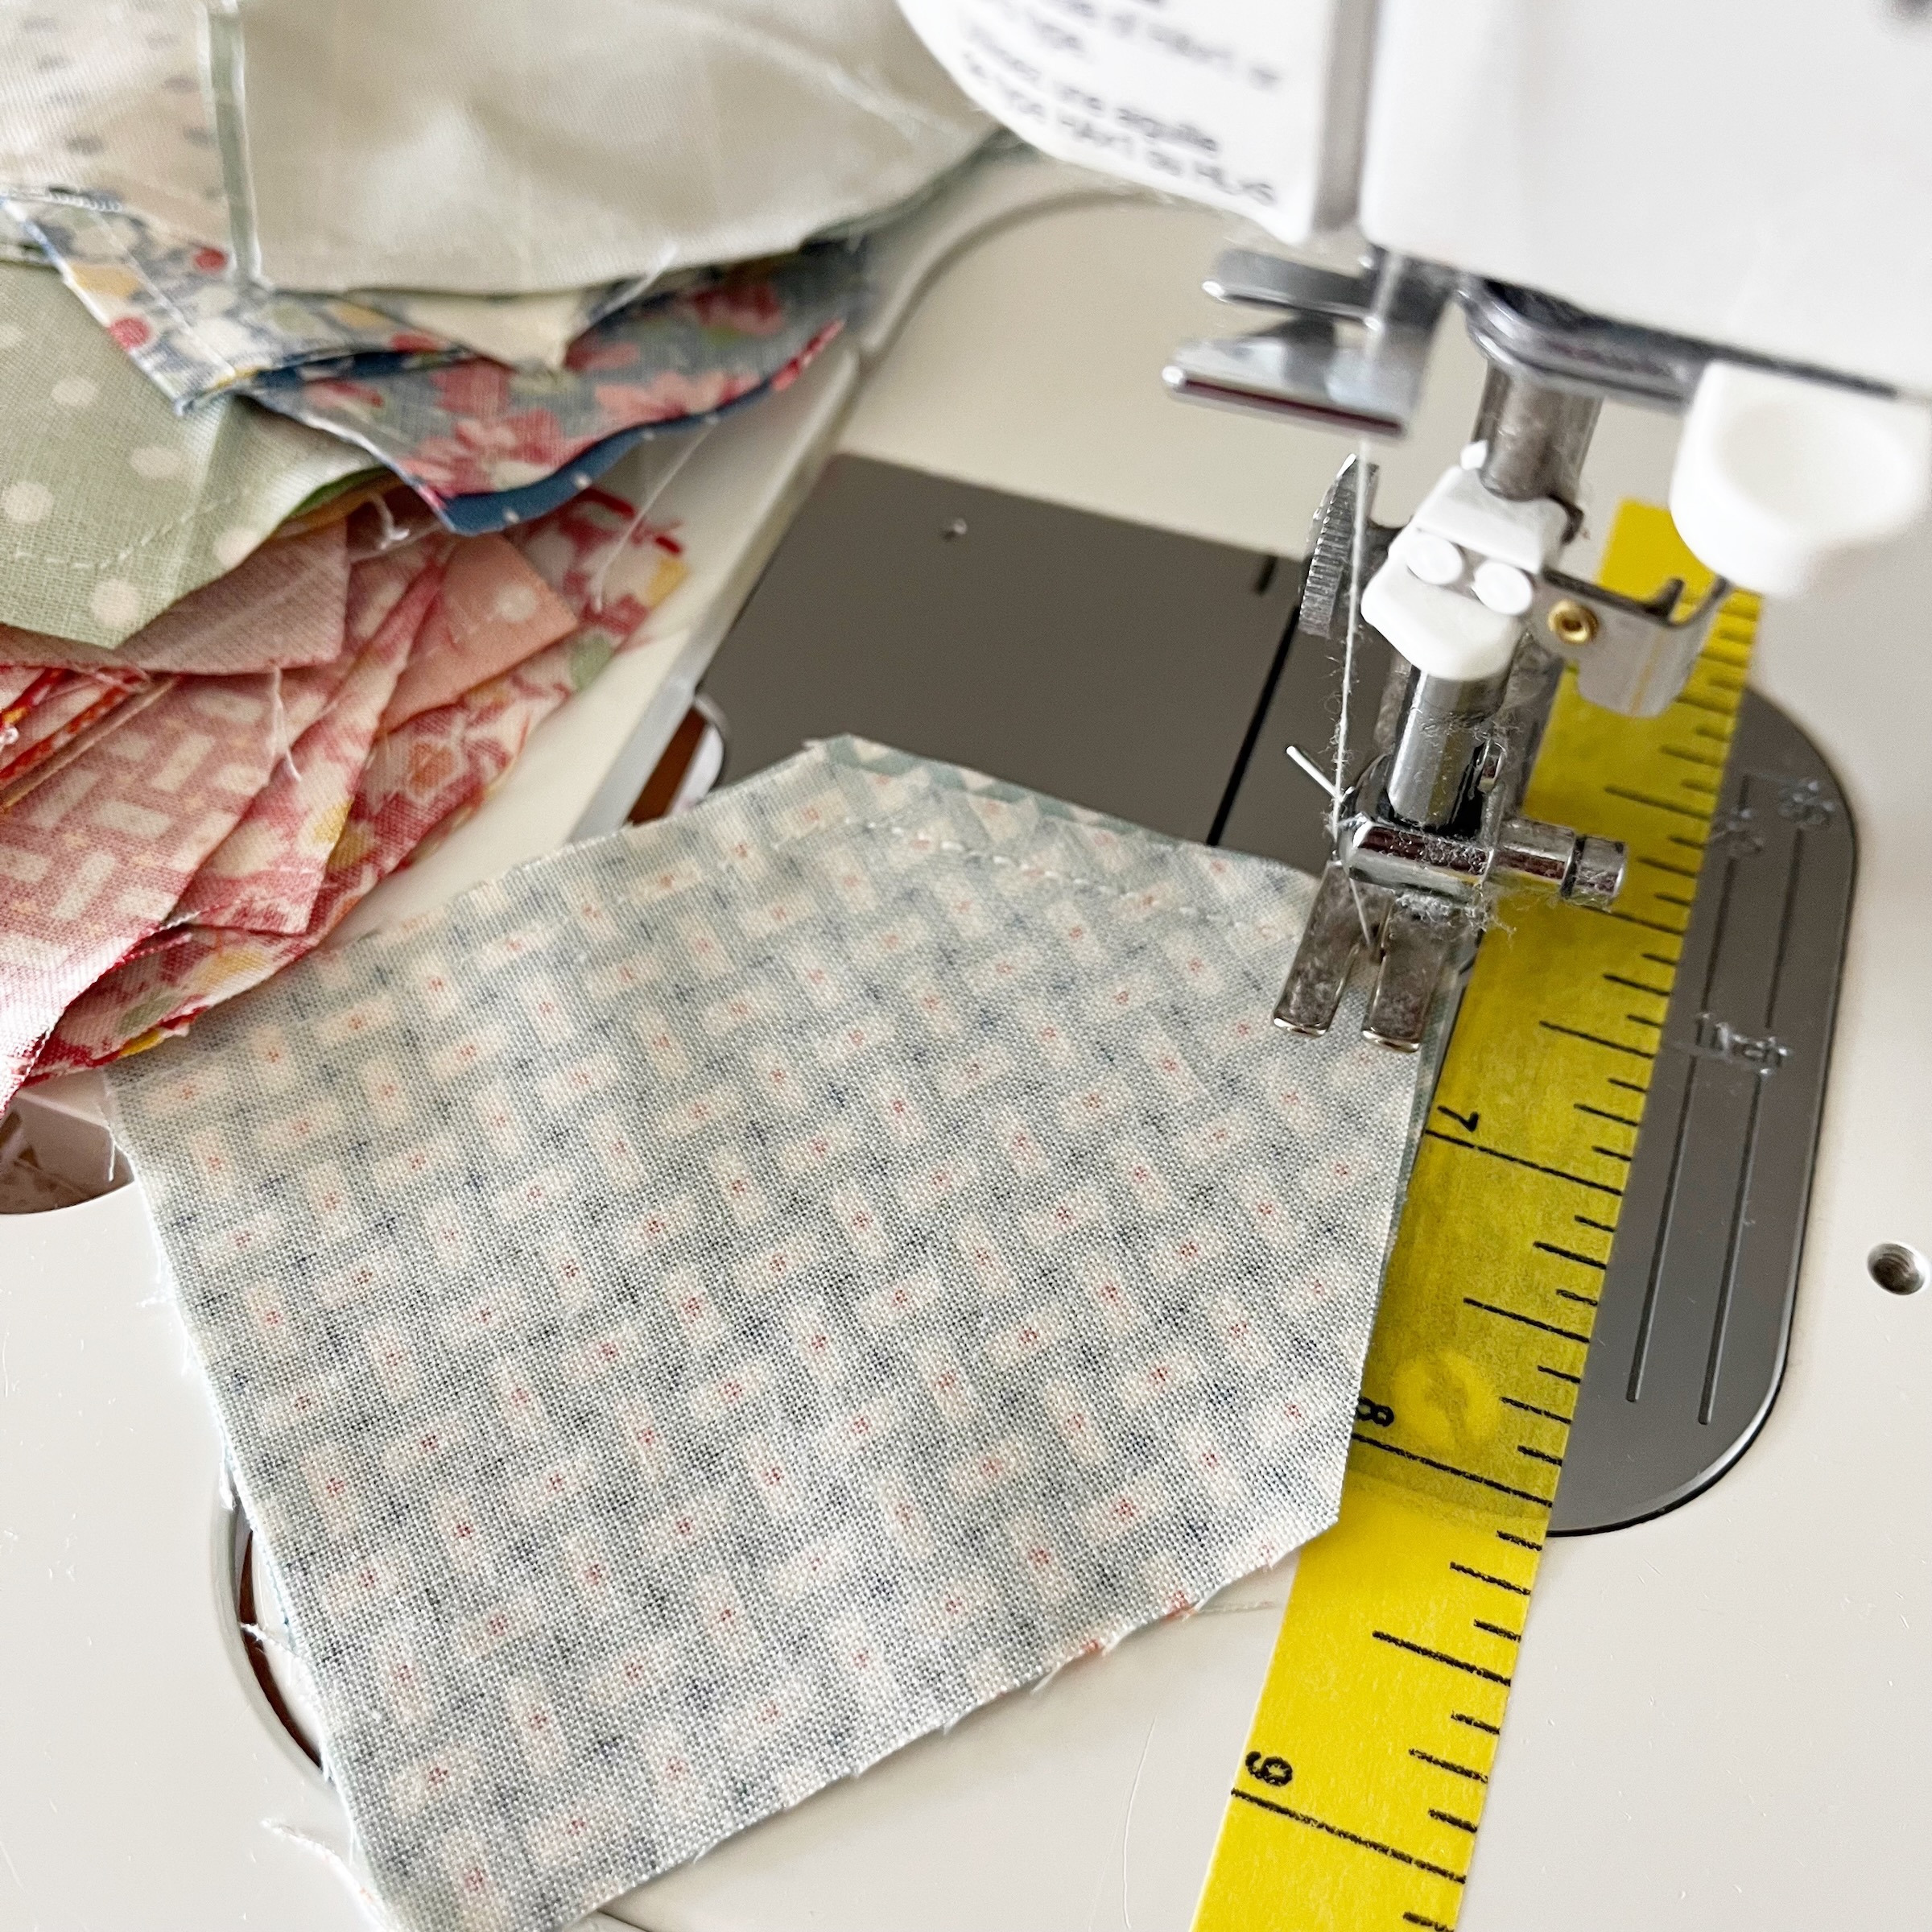
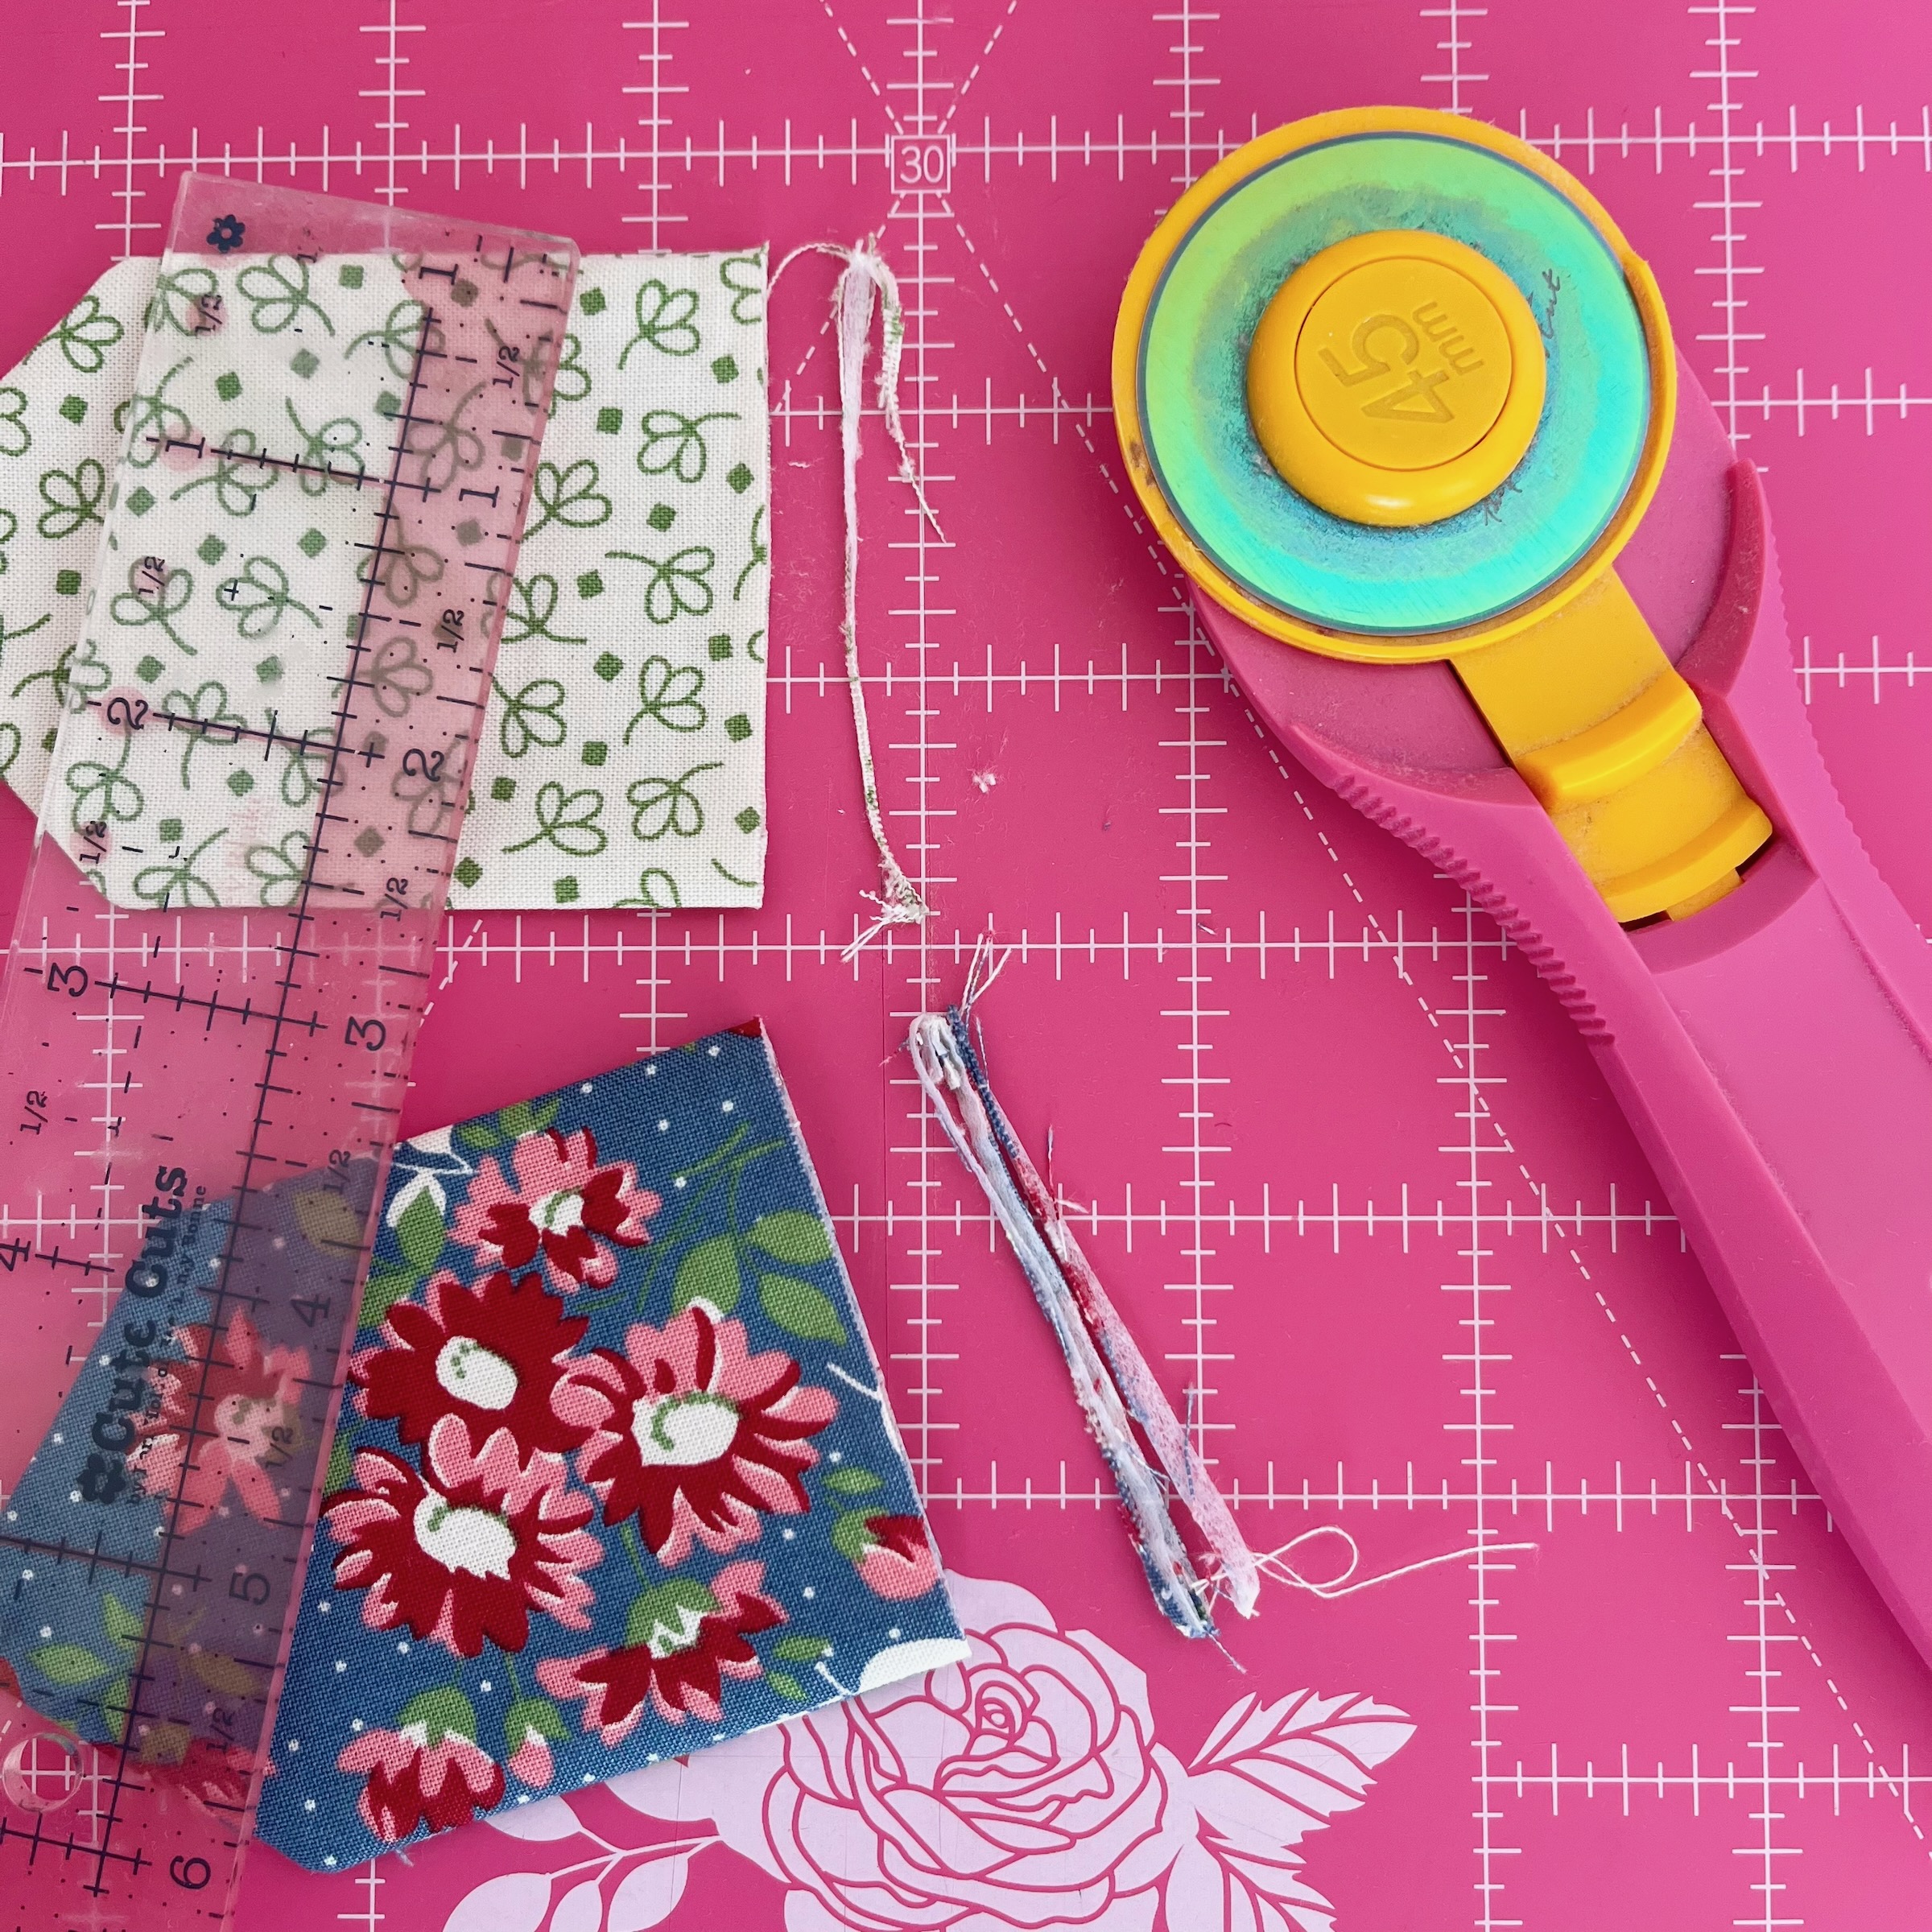
Step One: Press your fabric scraps and using a rotary cutter and ruler cut them to 3″ x 4″ in size. Then cut a point at the bottom on a 45 degree angle. (I did make a little pattern that you can download here if you choose.)
.
.
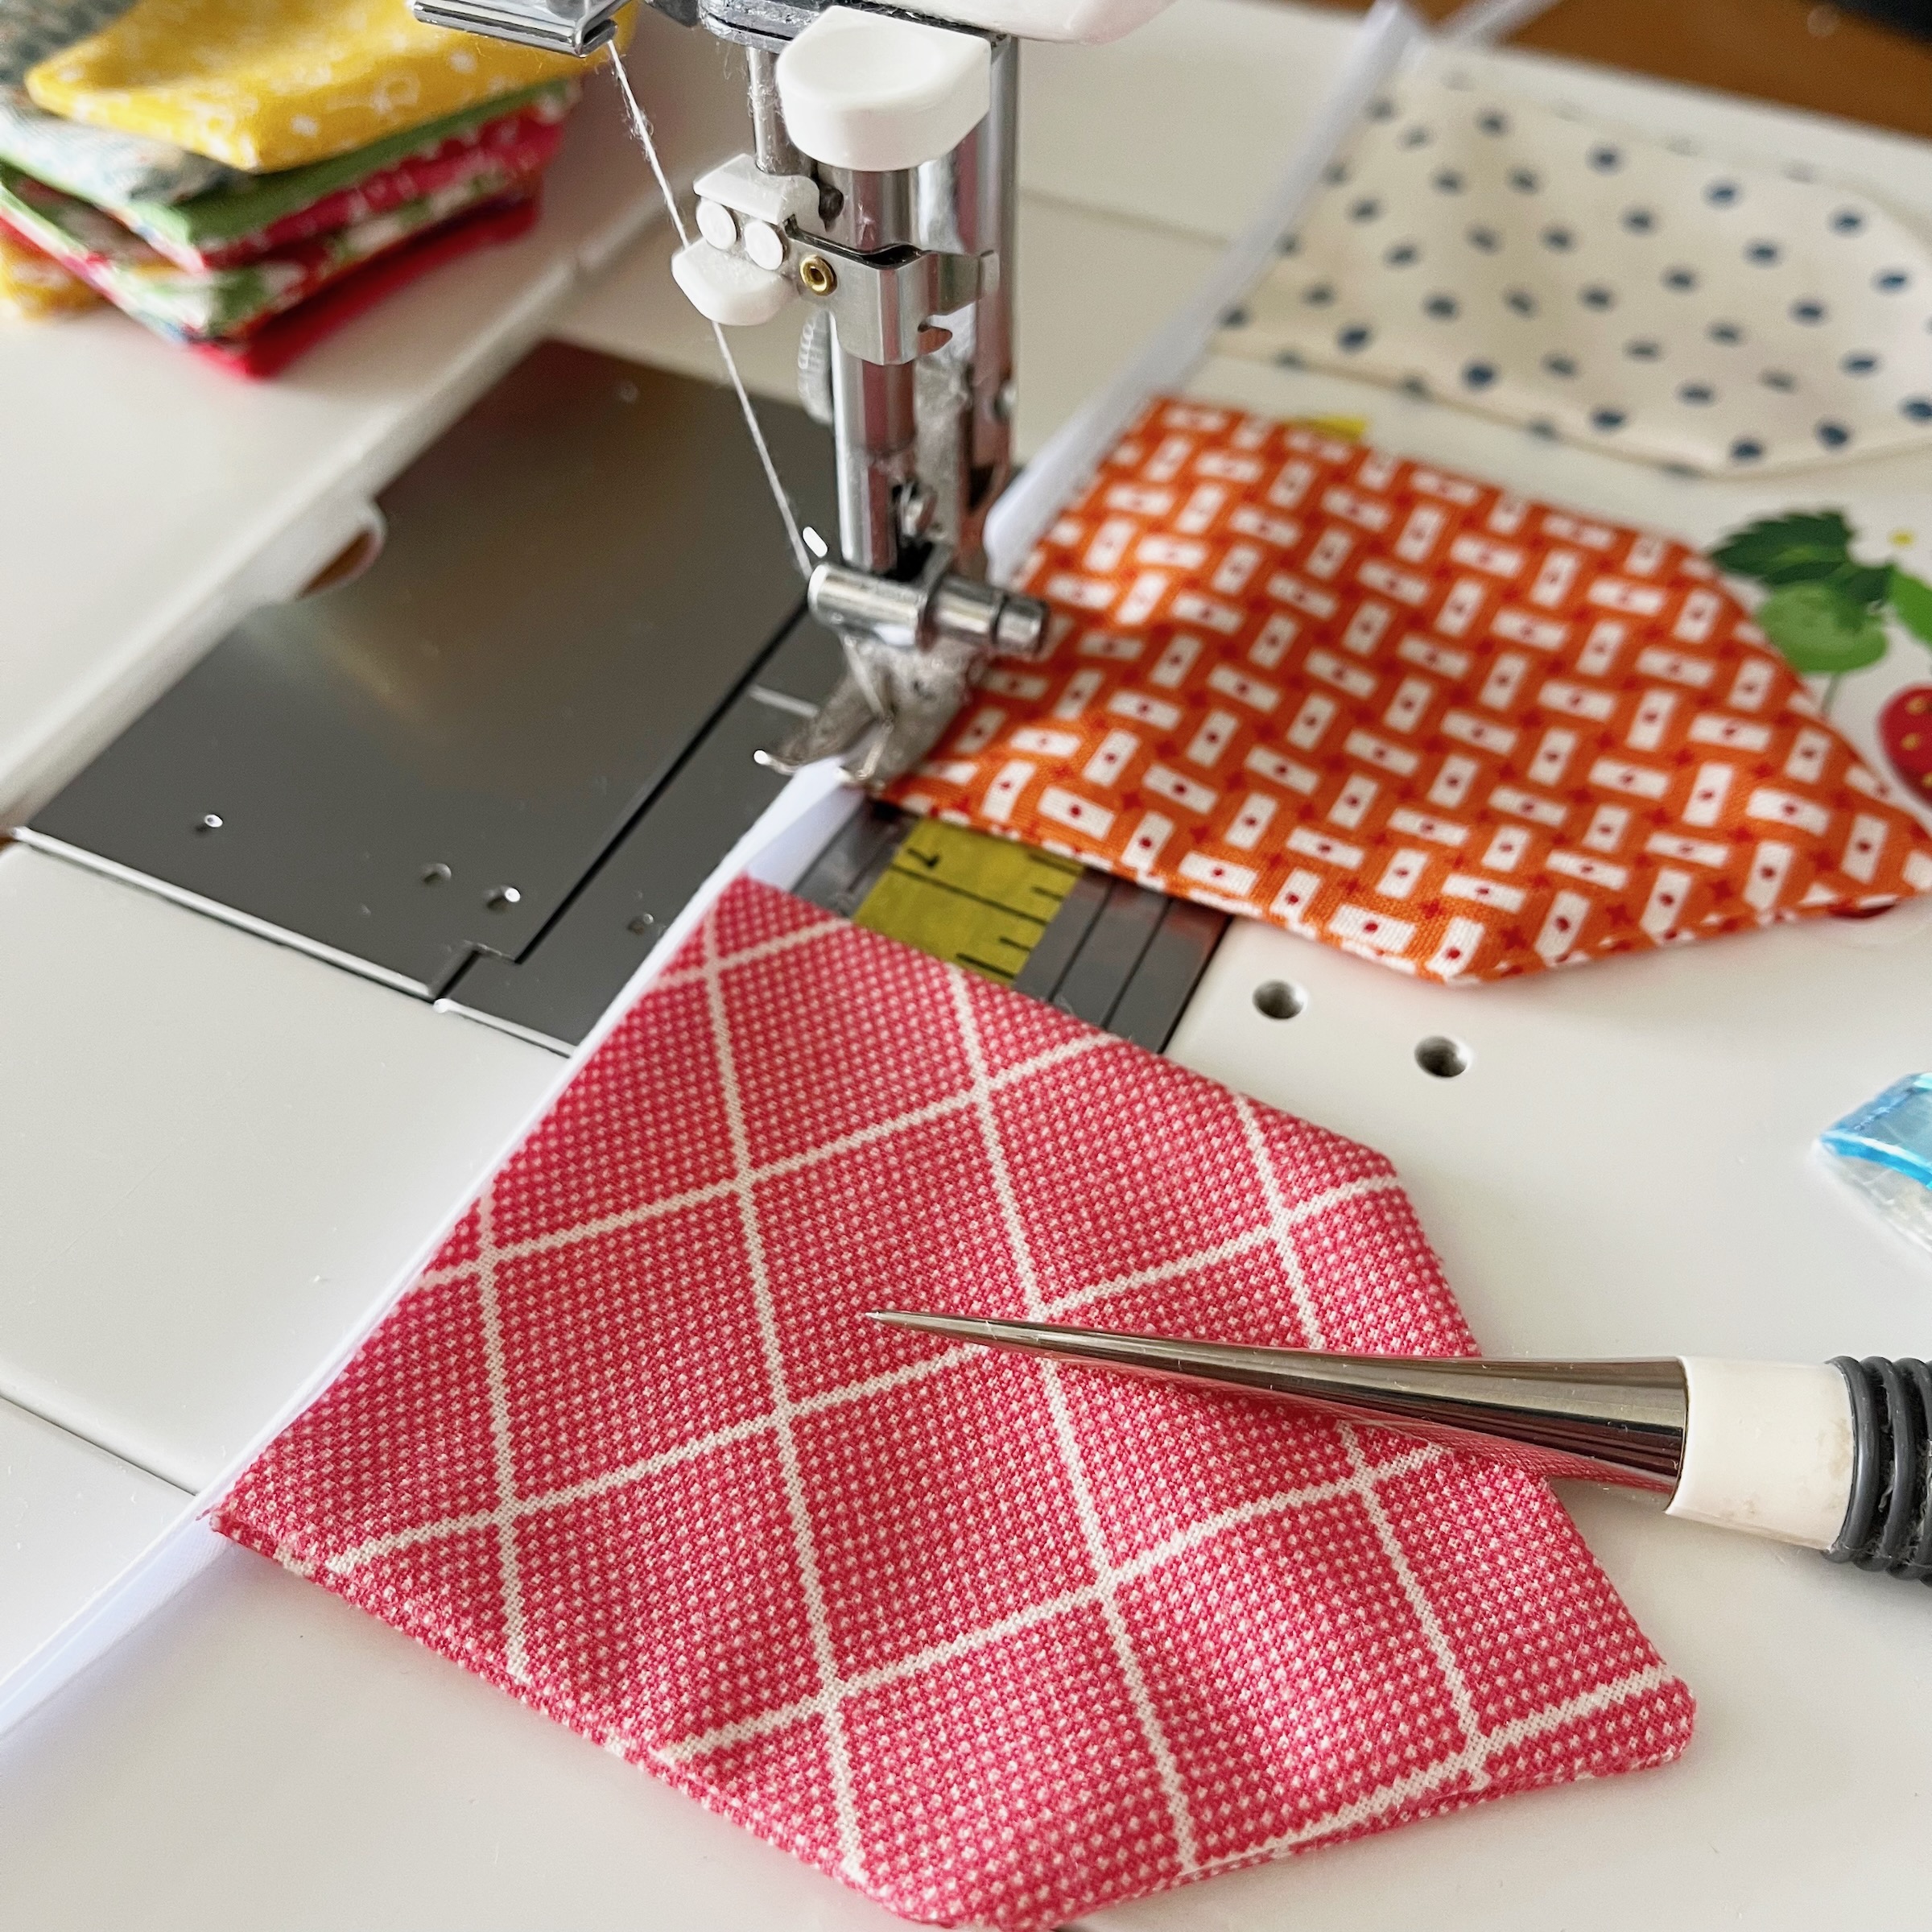
Step Two: Place two of the fabric pieces right sides together and sew 1/4″ seam down one side, along the points, and up the other side. Leave the top open for turning.
.
.
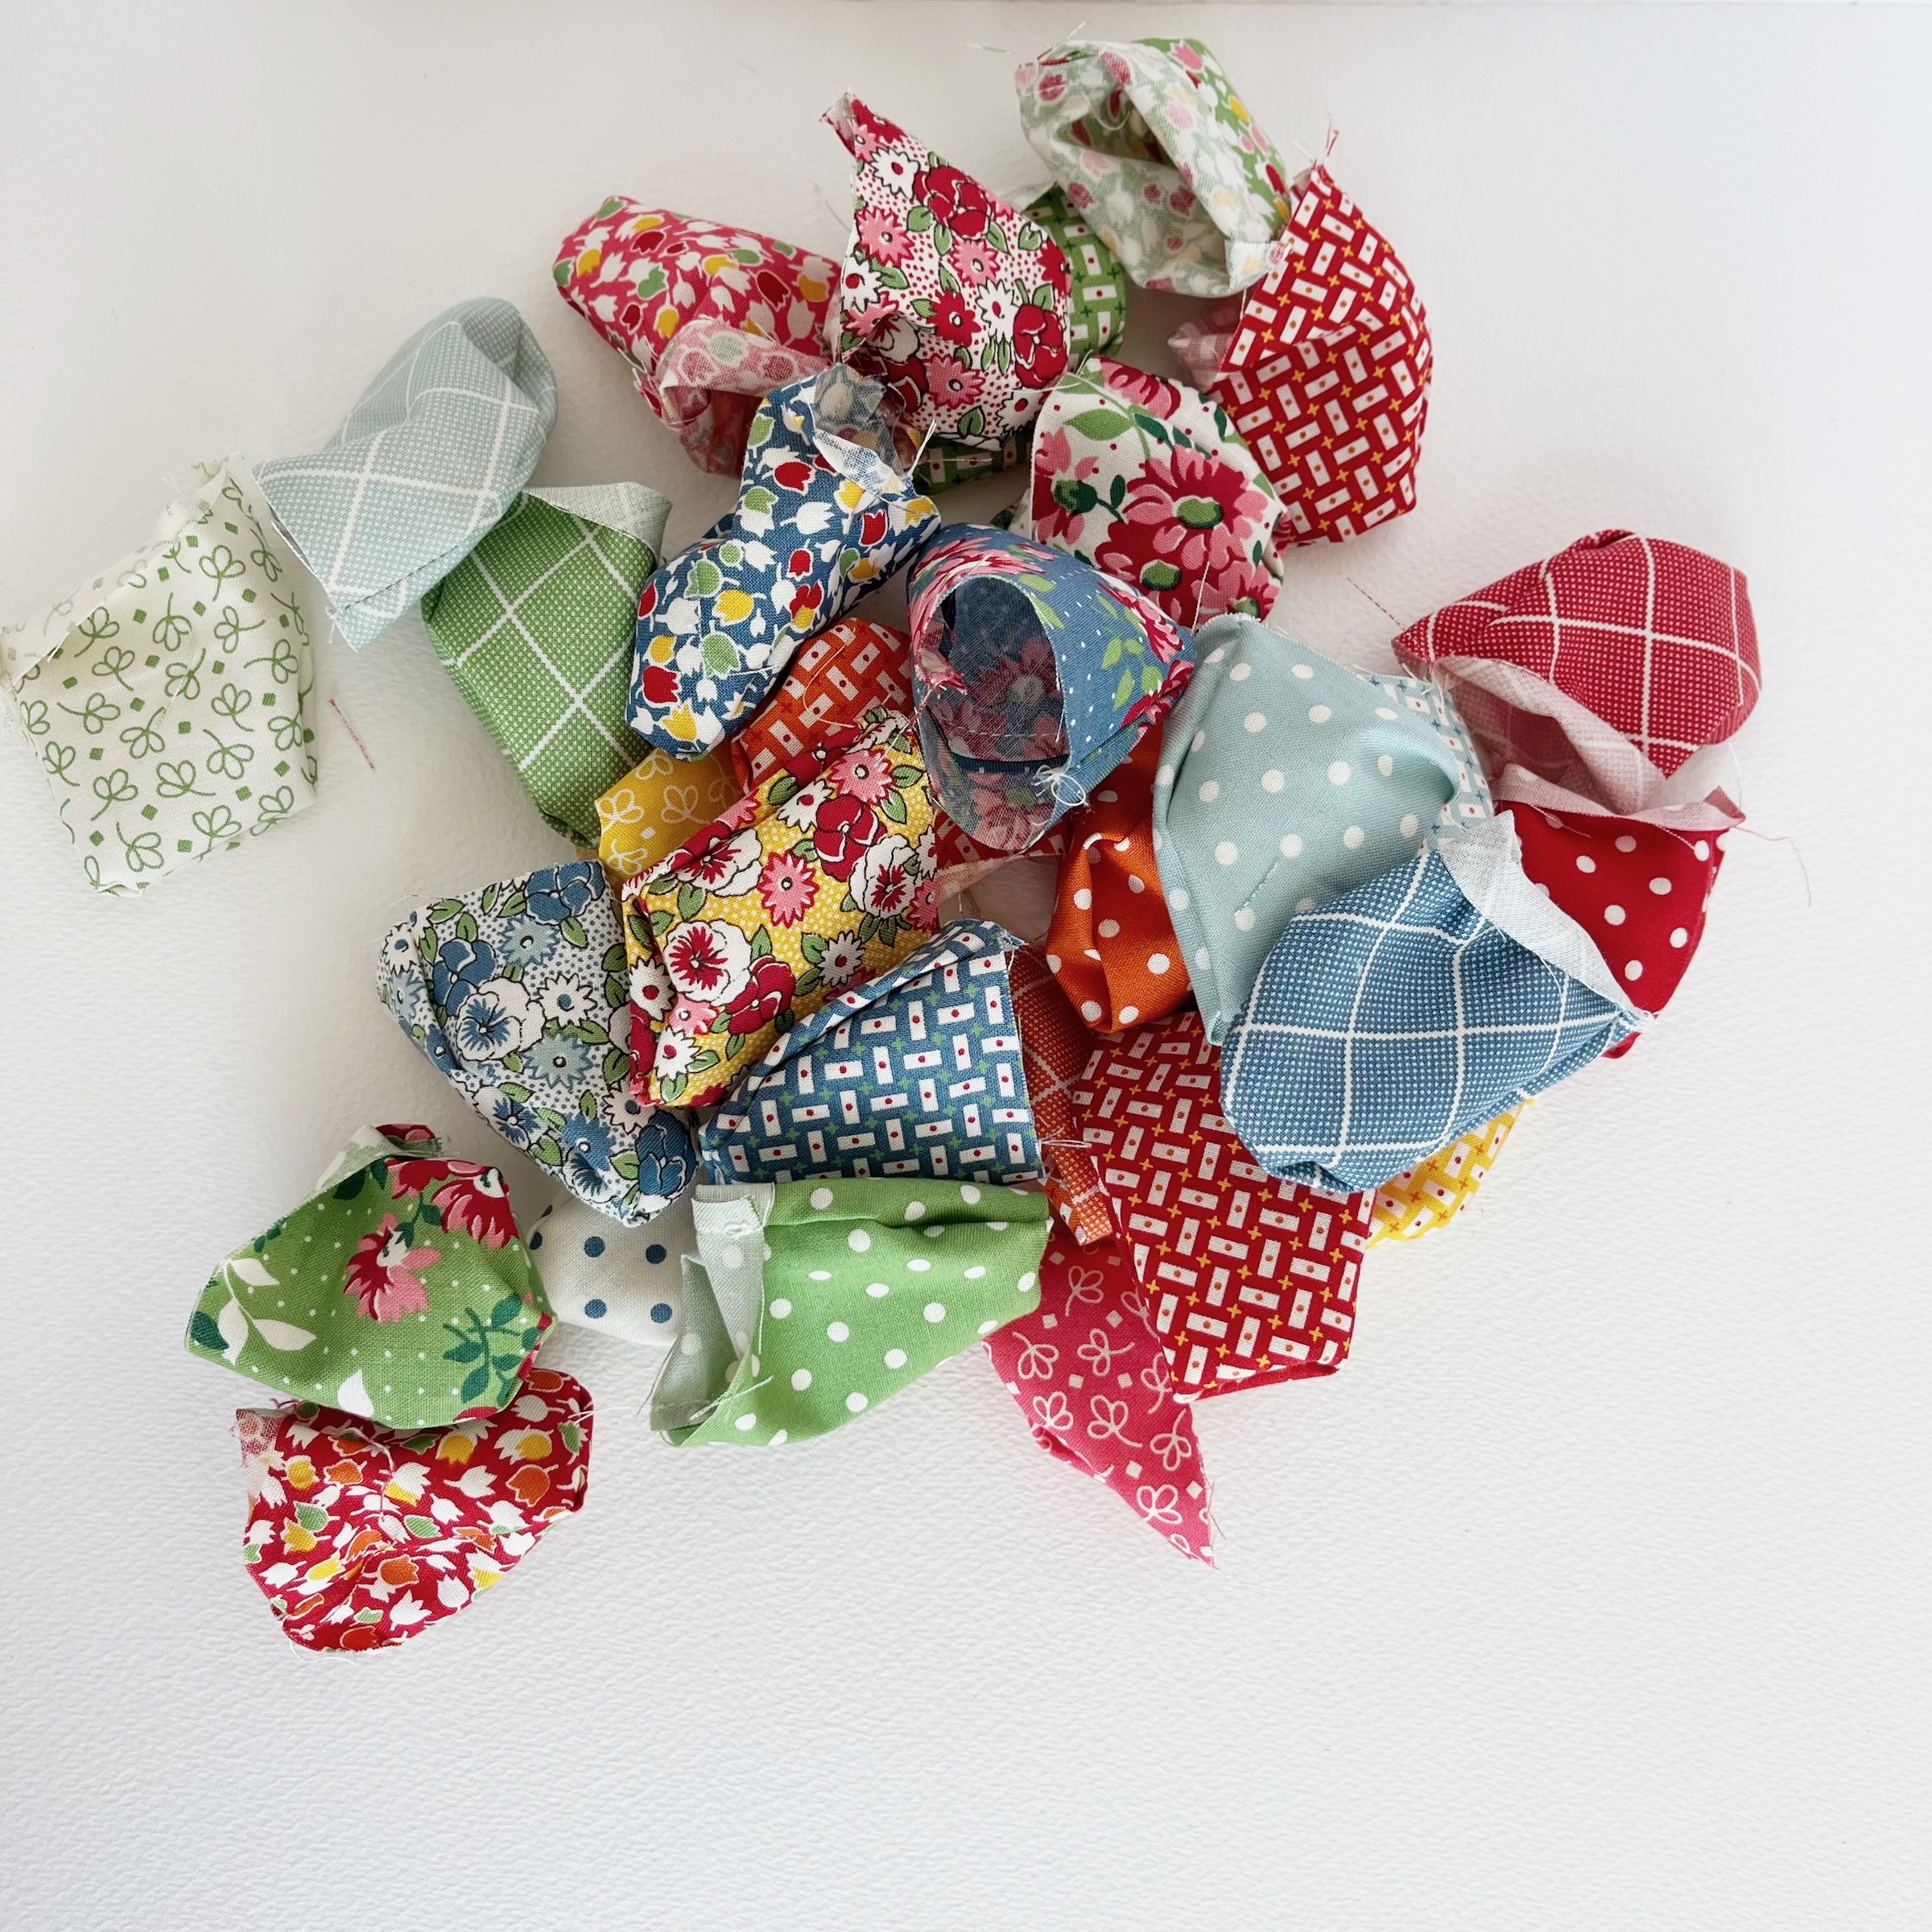
Step Three: Turn the little banners right sides out. Use a sharp object to very carefully push the points out.
.
.
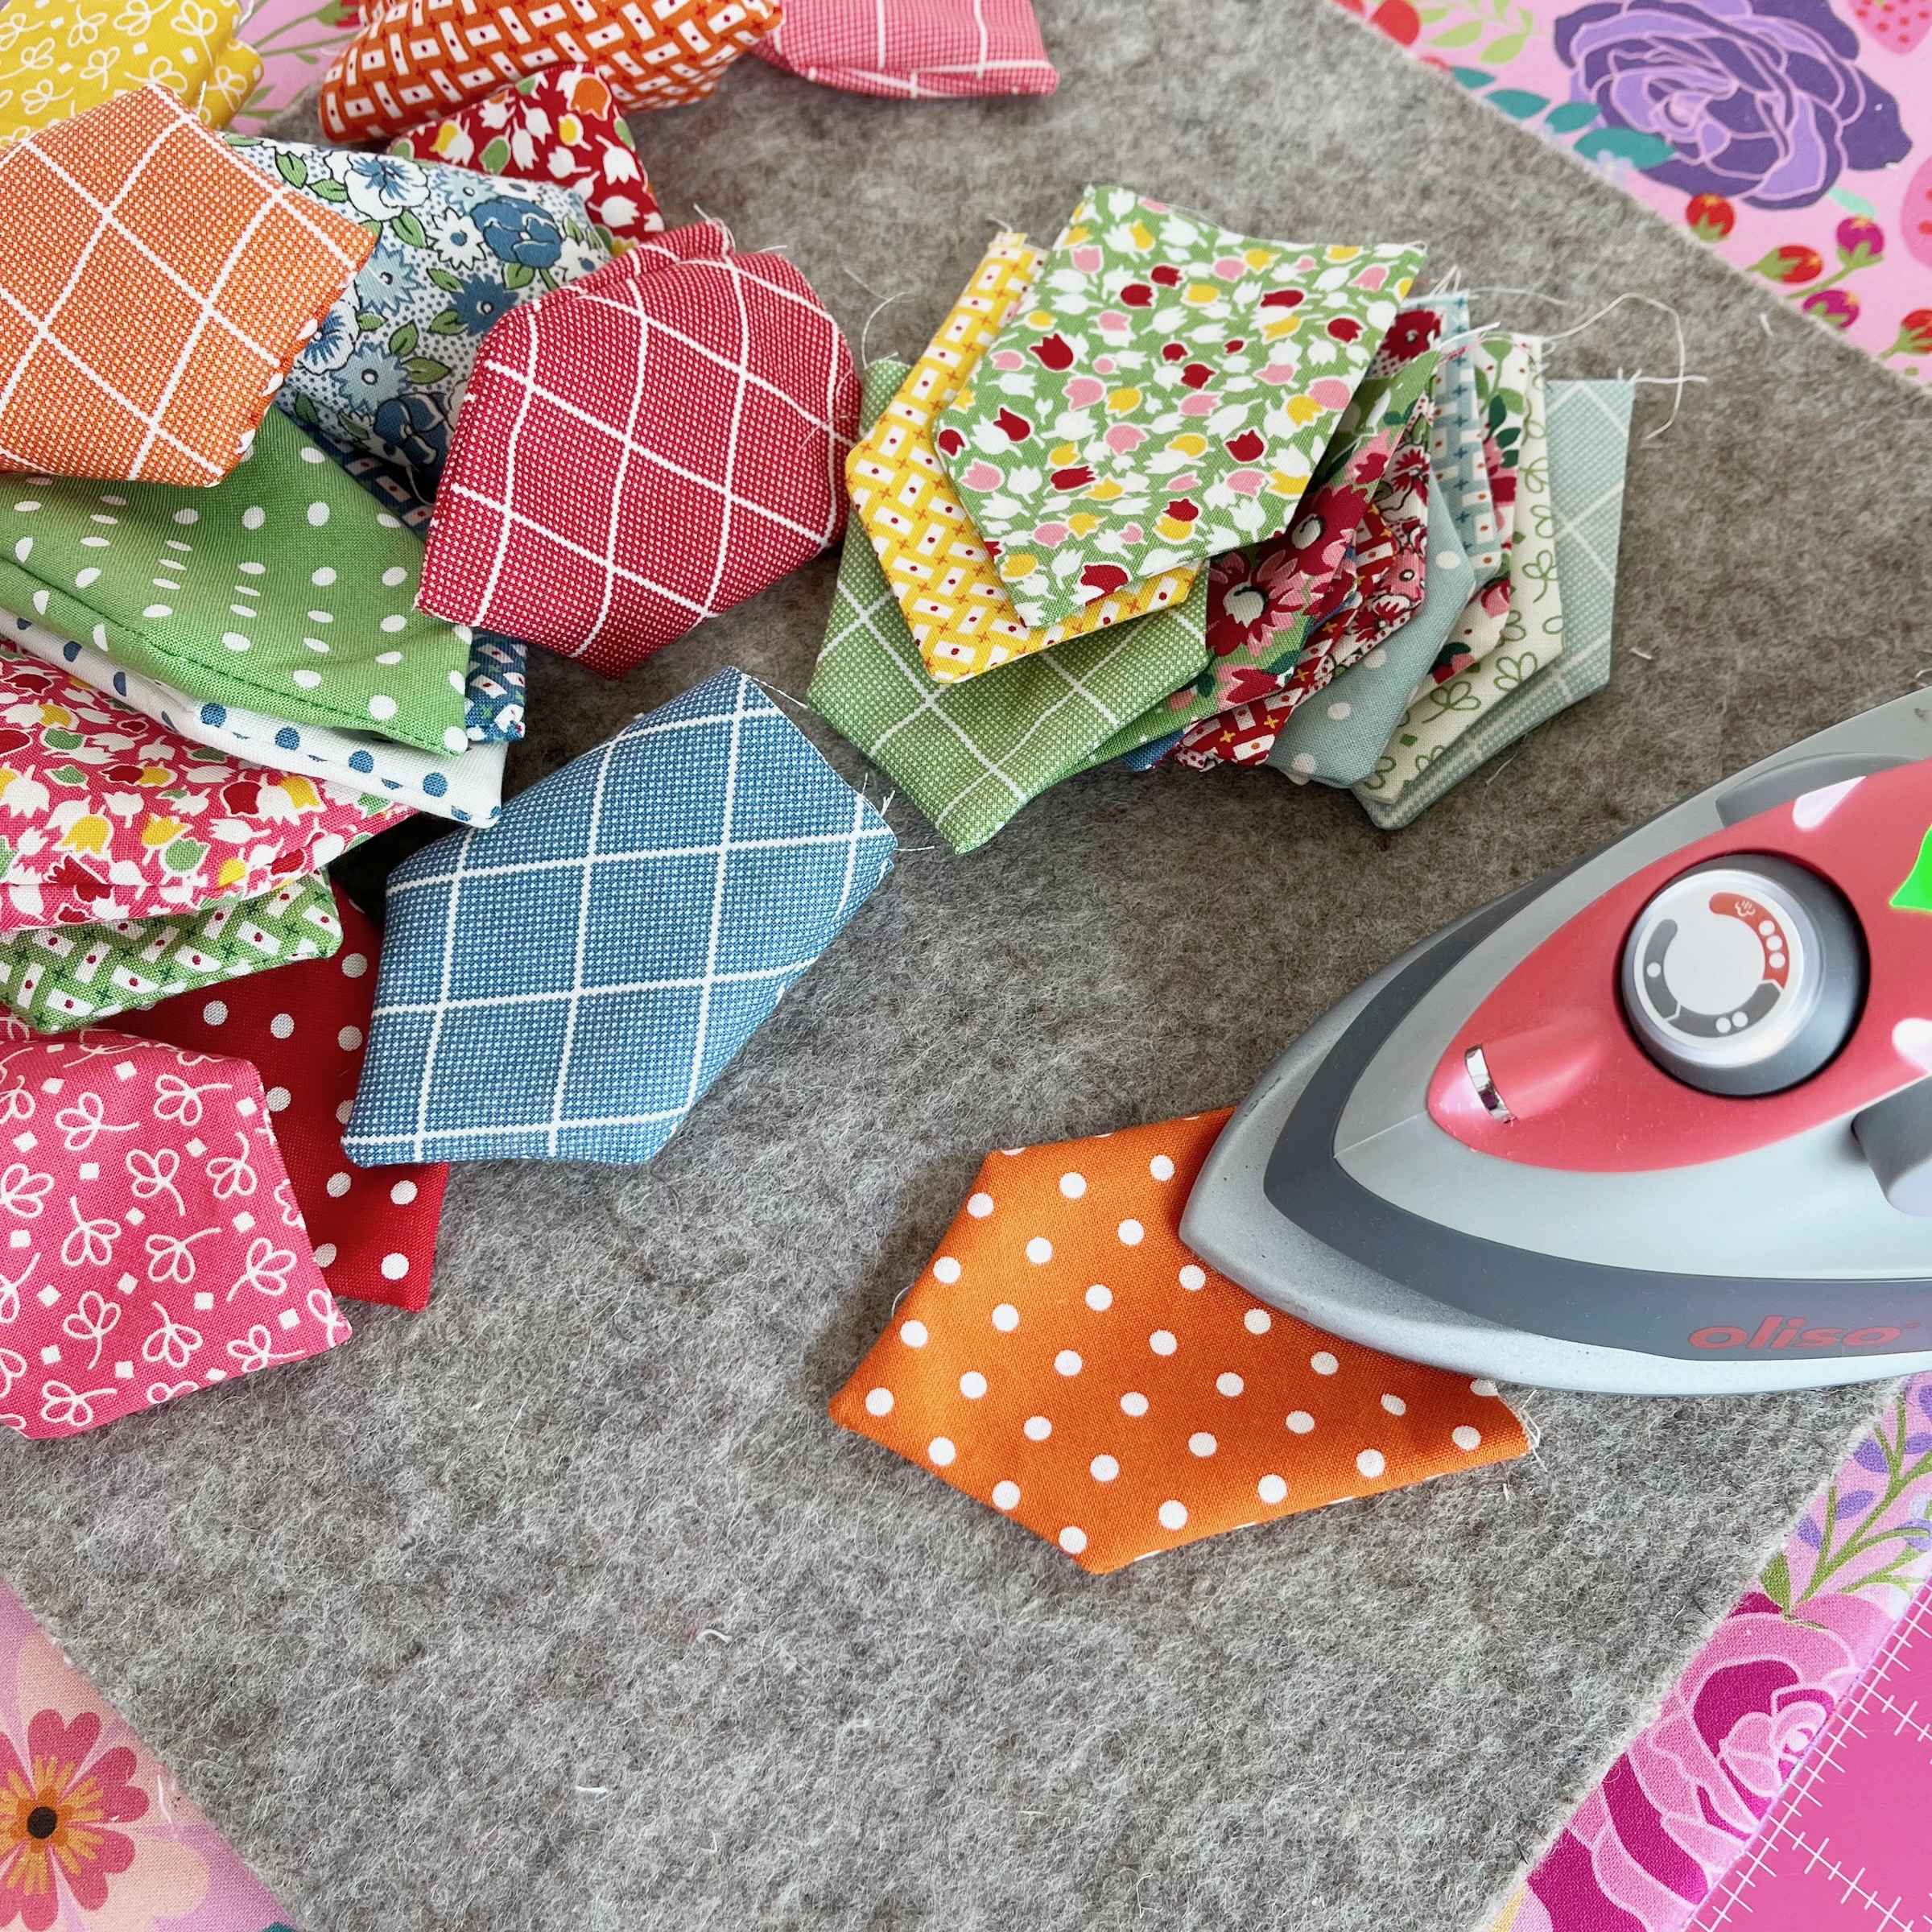
Step Four: Iron until nice and flat and seams and points are crisp.
.
.
Step Five: Use your rotary cutter to trim off the open edge of the banners. You are simply cutting off scraggly ends in order to make them nice and smooth to fit into the bias binding. You don’t need to cut off much.
.
.
Step Six: Measure and cut a piece of double fold bias binding to the length that you need it. Be sure to add about 12″ on each end to use for hanging your bunting.
.
.
Step Seven: Begin sewing from the end of your bias binding about 12 inches, then without removing your binding from the machine, place the raw edge of a banner inside the fold of the bias binding. Sew along the edge and continue placing the little banners until you have as many as you choose on the bunting.
Tip: Be sure to sew right next to the edge of the binding in order to completely catch the raw edge of the banner. I use a Tailors Awl to hold the edge in place as I sew.
.
.
.
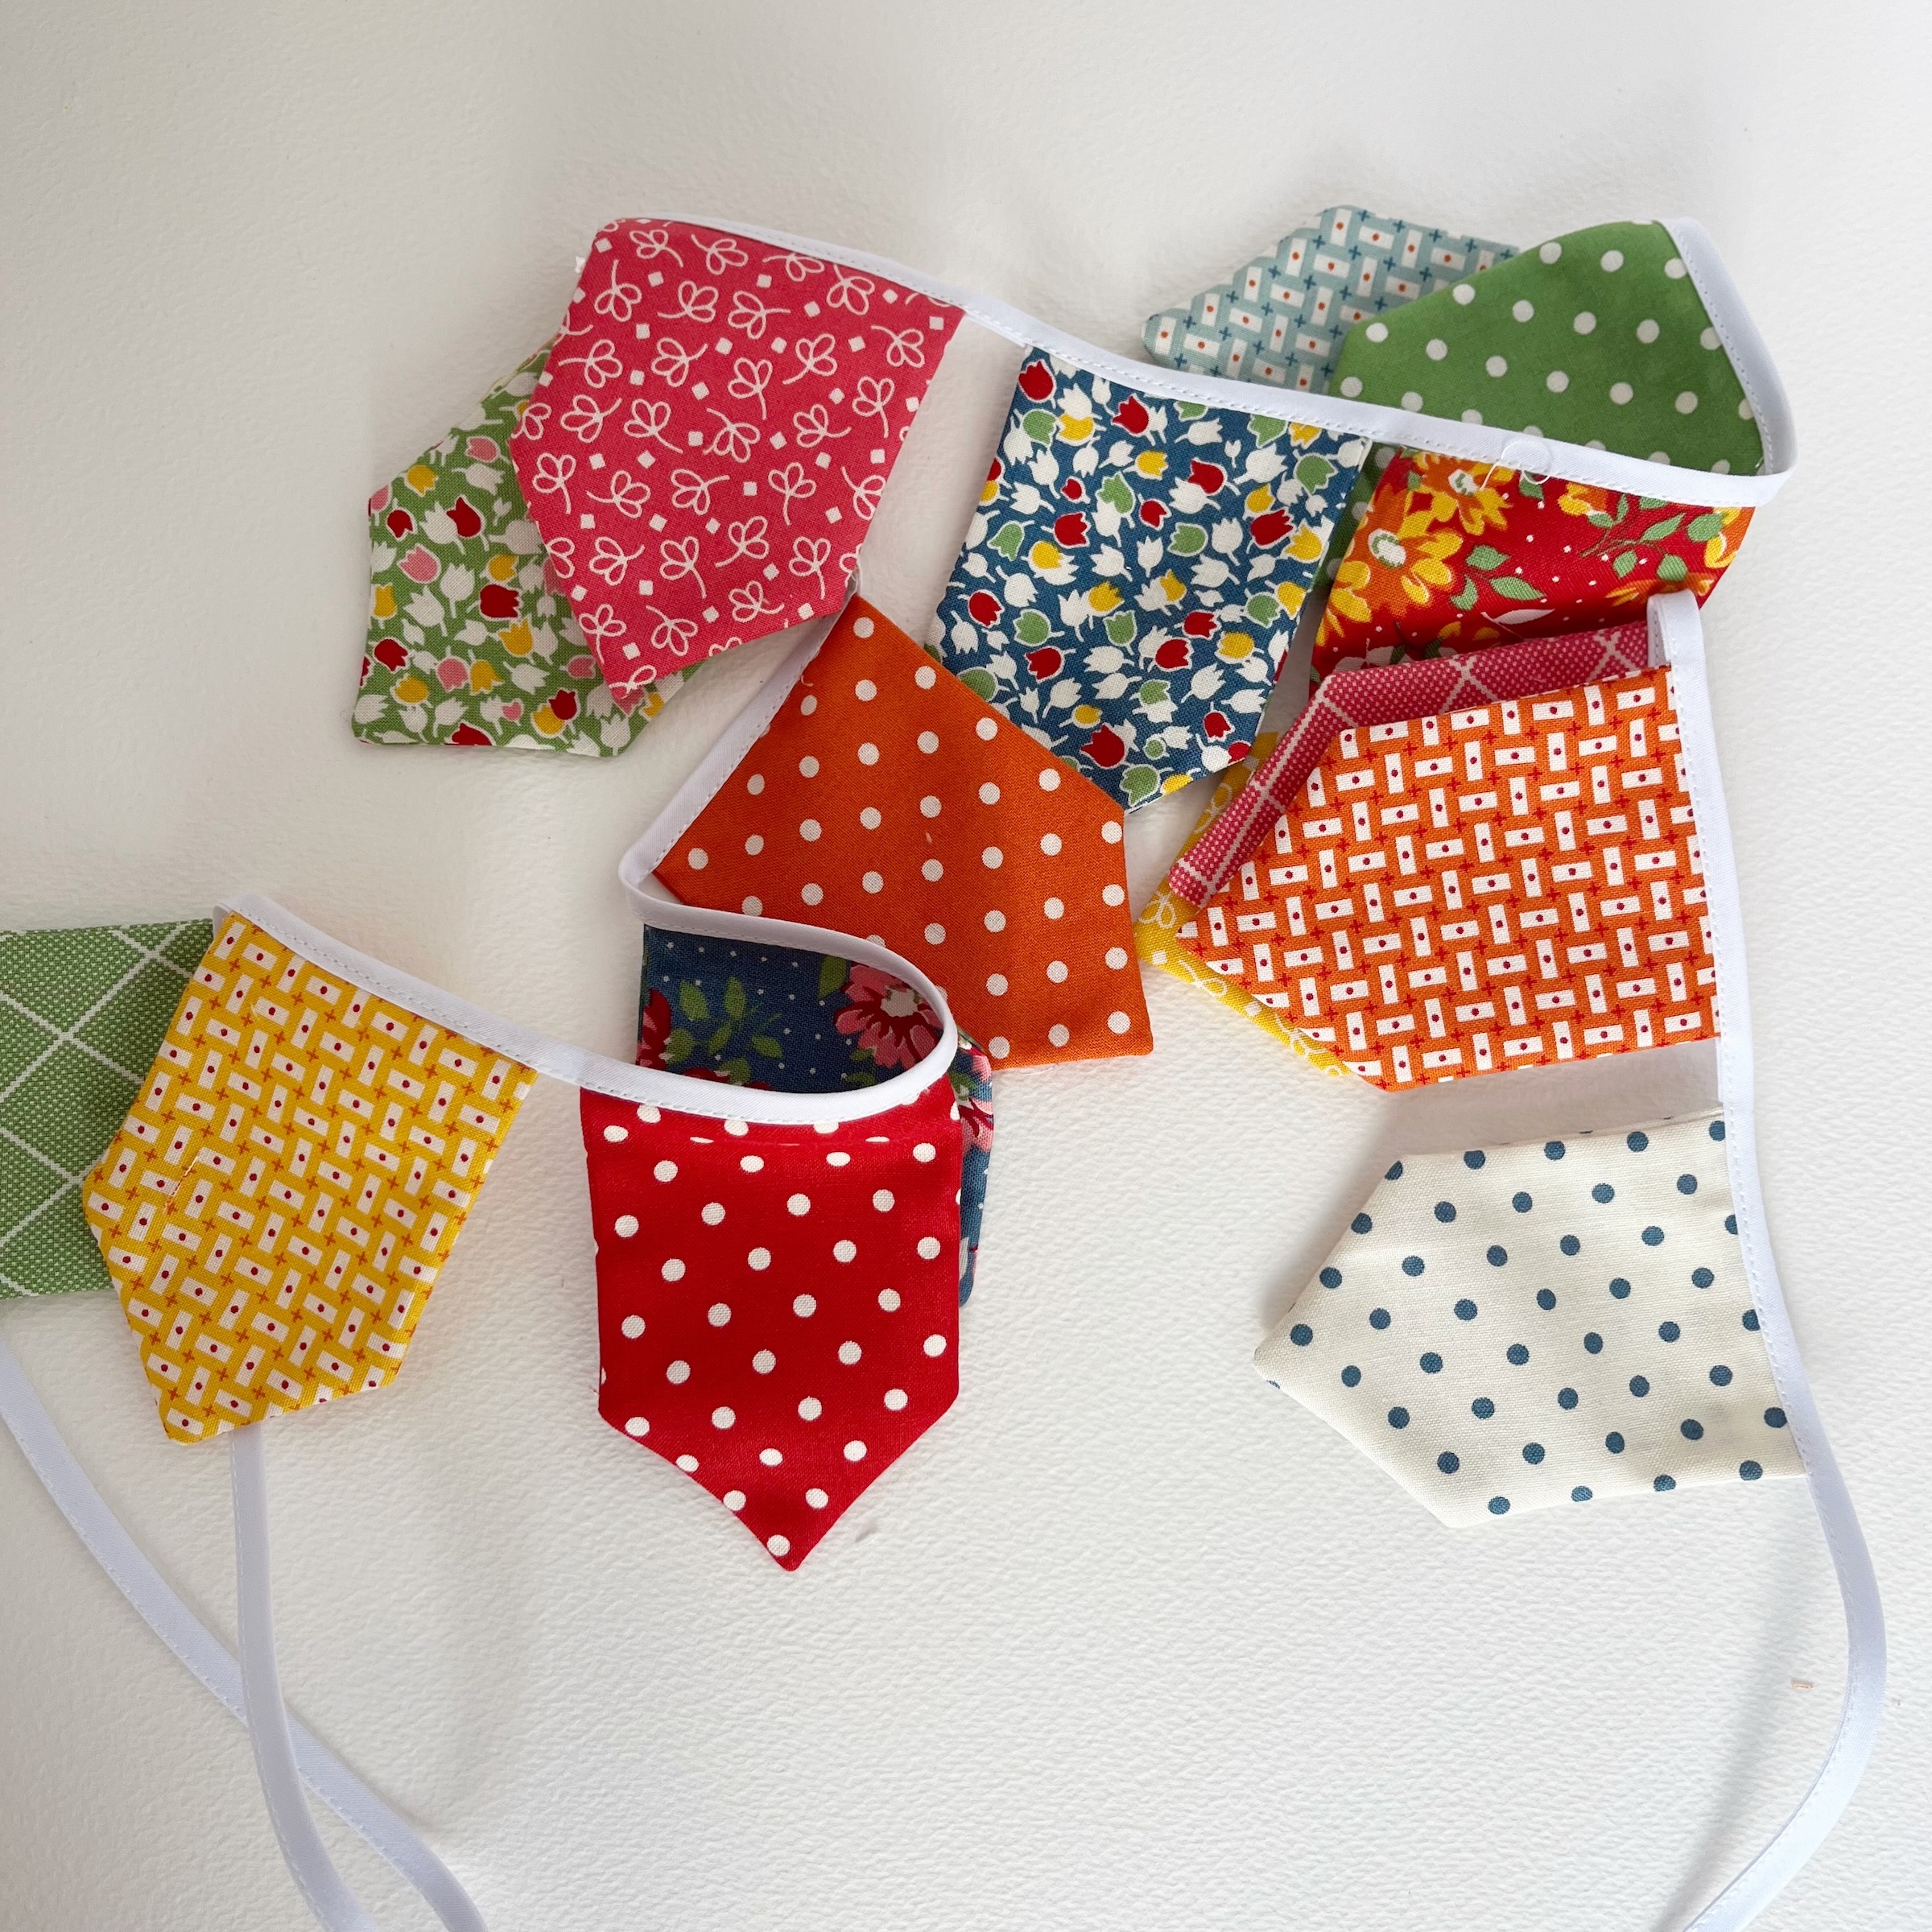
Step Eight: Your adorable bunting is finished and it’s time to hang it! Or, carefully fold it up and package it in a small plastic sleeve and gift it to someone that needs a reason to smile! And if YOU need a reason to smile, sewing one will do it for you! I’d love to hear how yours came out and who you gifted it to!
.
.
Until our gravel roads cross again… so long.
.
Dori


This would make a great christmas gift
thanks
Oh yes Glenna… absolutely!!!!
~ Dori ~
Absolutely adorable!
Thank you Meri!
~ Dori ~
Thank you so much, Dori! I’ve sent you my address and have already decided where to hang your sweet gift. This is such a perfect project for using up those scraps that I will be making some of my own to pass the happiness along.
Hi Cindi,
I think you’ll love it!!! Let me know when it arrives!
~ Dori ~
This is so sweet. I thinking it’s a great winter project. Thank you so much for the instructions
Brenda, the BEST winter project!!!
~ Dori ~
Dori,
You are such an inspiration to me. I have made many buntings but never thought to give them as little gifts. I will be making some for my Bible study ladies for the fall. Good to have on hand for a nice hostess, birthday or cheer someone up gift. Way to go Sister for sharing your talent with us! I know we would be good friends if we lived close. So we’ll just have to be good friends from a distance. Have a Blessed day my Sister Friend!
Darlene
PS: Your home always looks lovely and so welcoming!
Hi Darlene,
I absolutely LOVED you comment on my blog post!!! What a sweet thing to say and YES, we would be good friends if we lived close! Thankful for things like social medial, blog posts, email… so we can be friends from a distance!
It is really fun to gift these because it’s just a simple thing but is a really happy little thing too!! I think gifting them to your bible study ladies is a brilliant idea!!!
~ Dori ~
This is such a wonderful craft. Thank you for sharing it
Hi Juli,
It’s a simple one!!!
~ Dori ~
Bless you Dory, you made me smile for the first time since tragically losing our oldest son Michael in an accident while our (healthy)youngest son was recovering from a stroke(undetected birth defect). I always enjoy your blog so, so much and even have ordered fabric you featured. My favorite was those pink Russian dolls 🪆/strawberries that you inspired me to make a purse (I’ll try to send photo, but seems I retired from technology when I retired from nursing😉, so not sure it’ll go through. Thank you for the JOY you bring🙏
Oh Barbara. I am so very, very sorry for your loss and such hard experiences. Wow. My heart hurts for you. Life can really have some hard things can’t it.
I’m thankful that my blog posts can bring a little joy on a dark day.
Also… MaryJane forwarded your email to me and I LOVE the purse!!! Isn’t that fabric so much fun???
Tightest of hugs to you….
~ Dori ~
Thank you Dorie,
We are looking forward o the weather changing into Fall so there’s pleasure quilting and srwing with out guilt that it good weather, we should be outside working~Binky Thorsson- Petaluma, Ca
Hi Binky!
I know EXACTLY what you mean about the guilt of sewing when it’s perfect “working weather” outside!!!! I look forward to Fall and Winter for that reason as well!
~ Dori ~
Last message went before I was done. Lol
Wonderful article and bunting to make.
Thank you.
Thank you Linda! I hope you’ll make one!
~ Dori ~
Beautiful, just Beautiful!
Thank you so much Jeretta!
~ Dori ~
Such a great gift idea, so easy and cute.
Thank you Kim. They are SO easy and FAST to make!
~ Dori ~
Your buntings are so cute and what a wonderful gift idea to give. Thanks for sharing with all of us.
Thank you DeAnn!
I hope you’ll make one (or ten!).
~ Dori ~
Dori, I just love the bunting. Thank you so much for sharing your wonderful ideas for such a great little gift. Have a wonderful day.
Sherry
Sweetea 59
Thank you Sherry! It is the BEST gift!!!
~ Dori ~