.
Oh my goodness! Are all of you Farmgirl friends as hot as we are here in Tennessee? It went from a nice, cool, wet spring to HOT and HUMID!!! Not that I am complaining, because I do love the hot summer. But it has been a shock to the system.
.

.
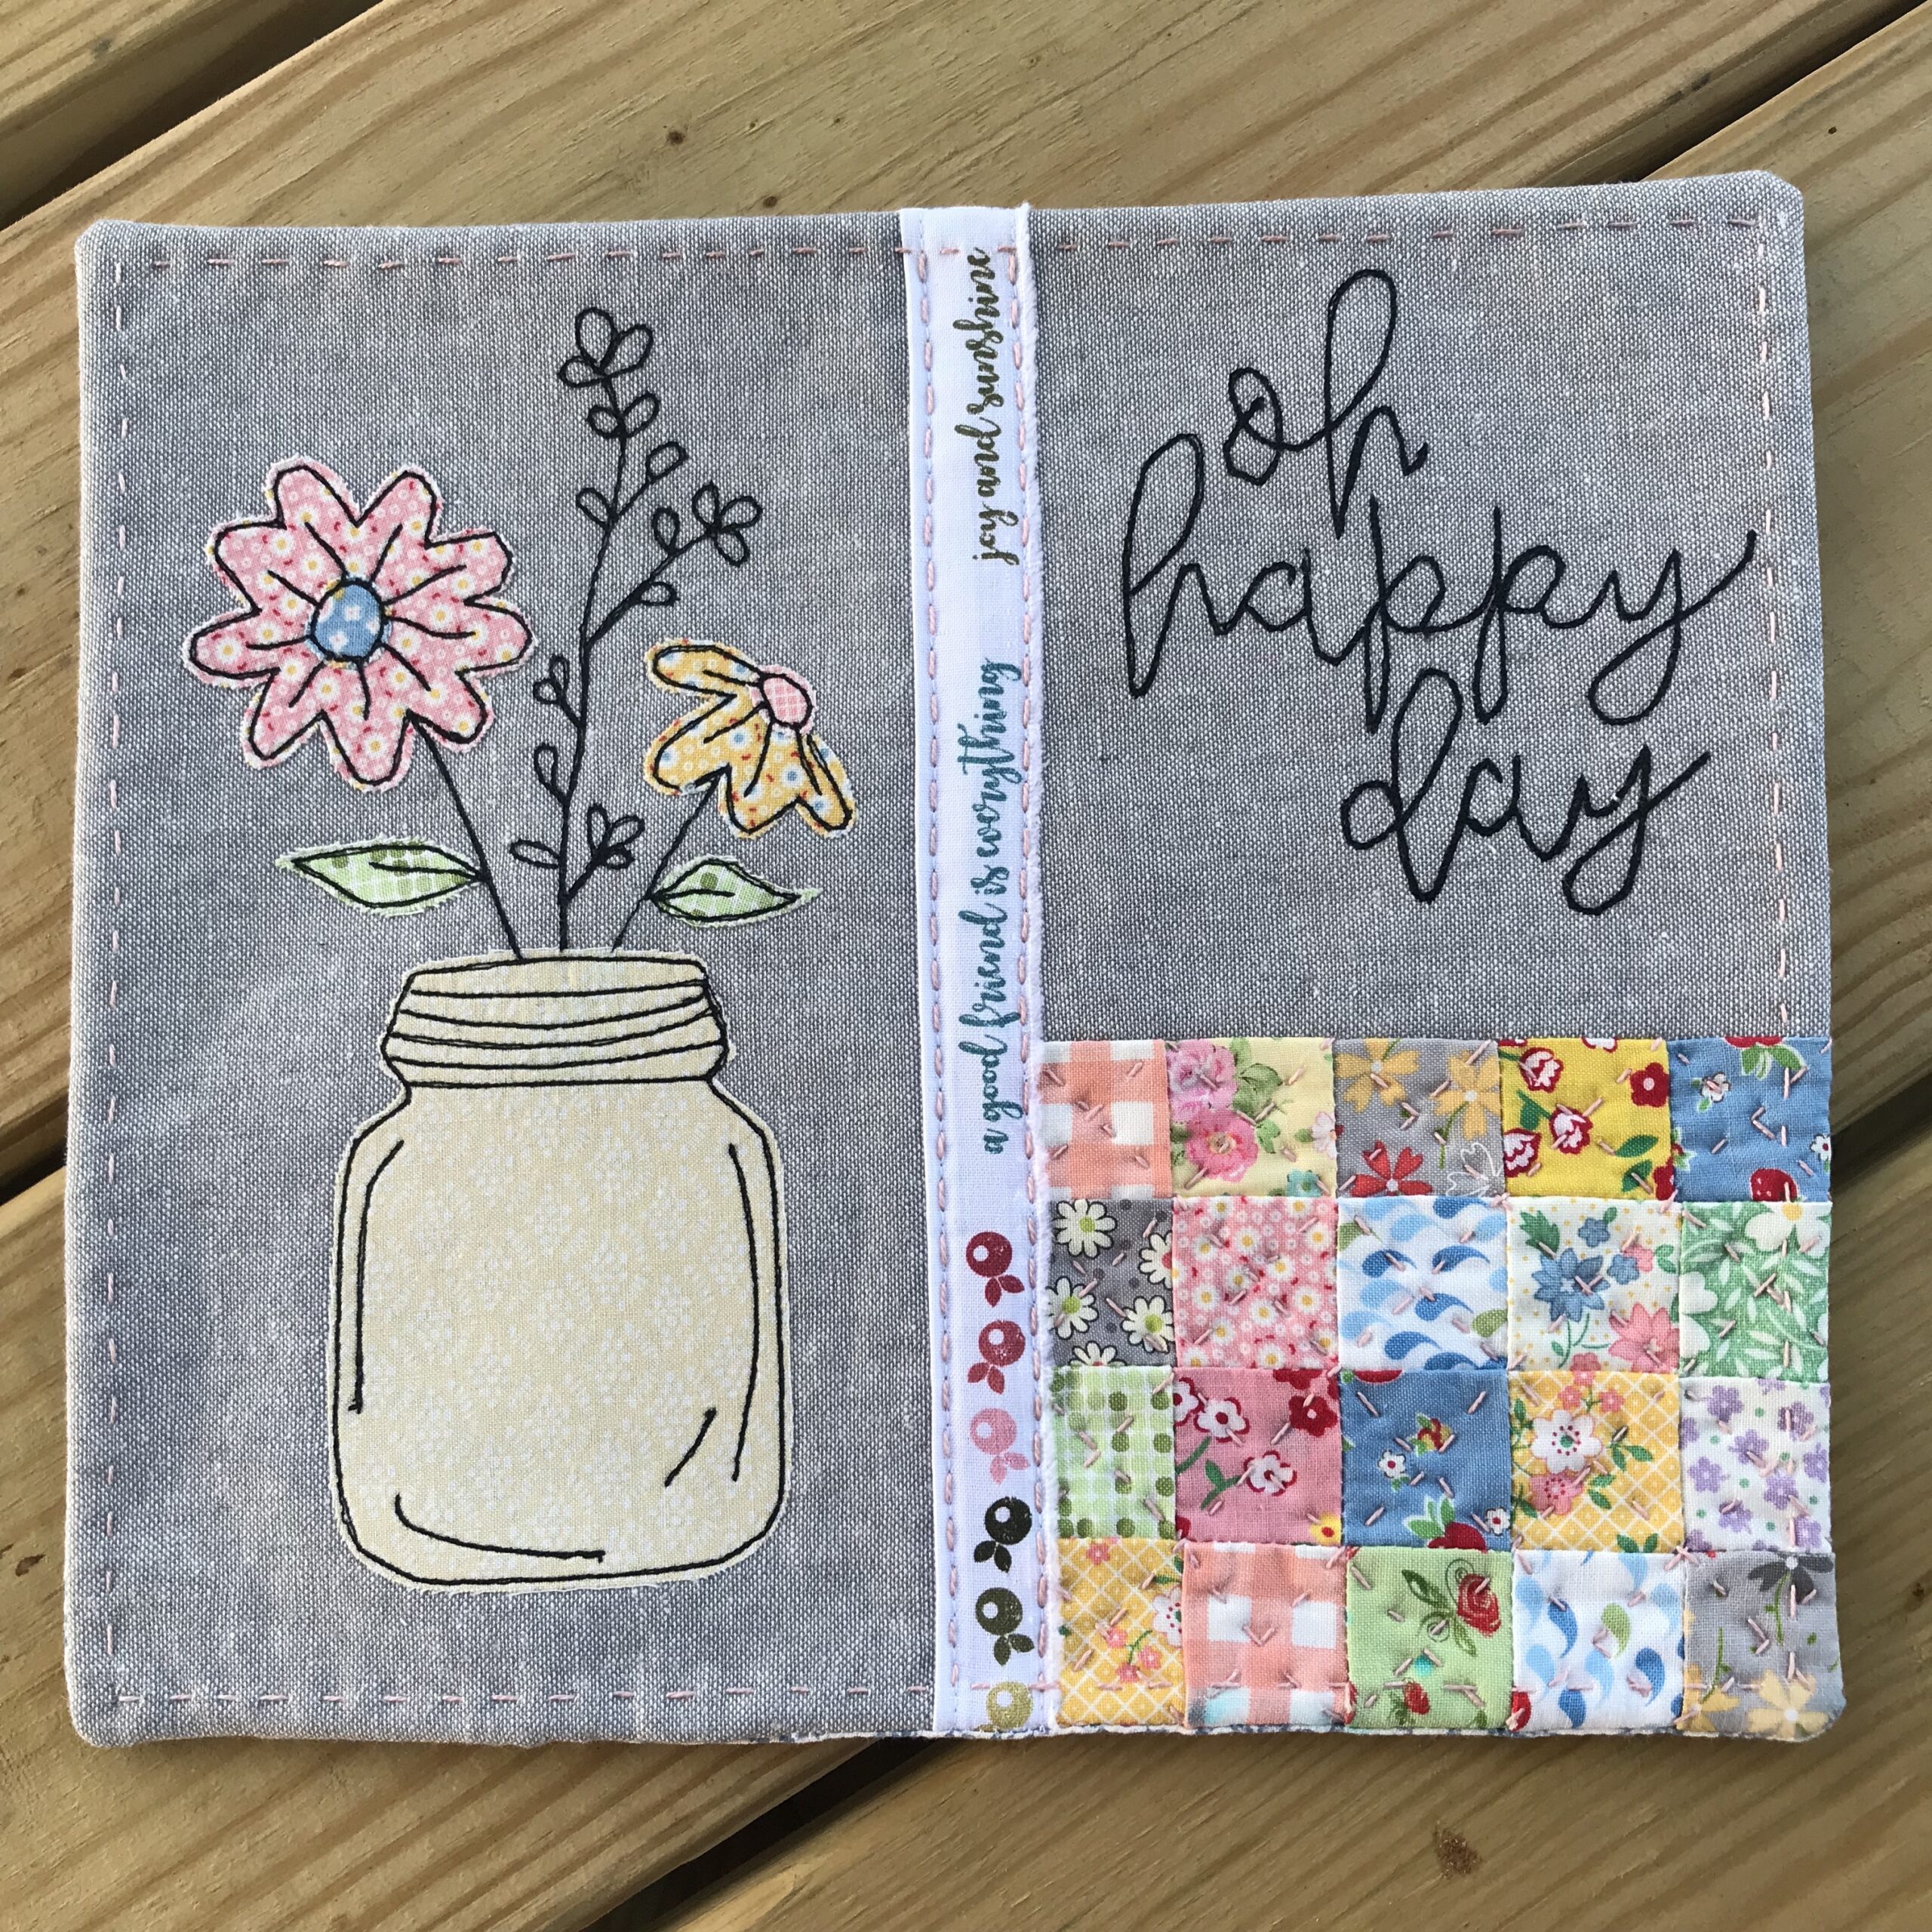
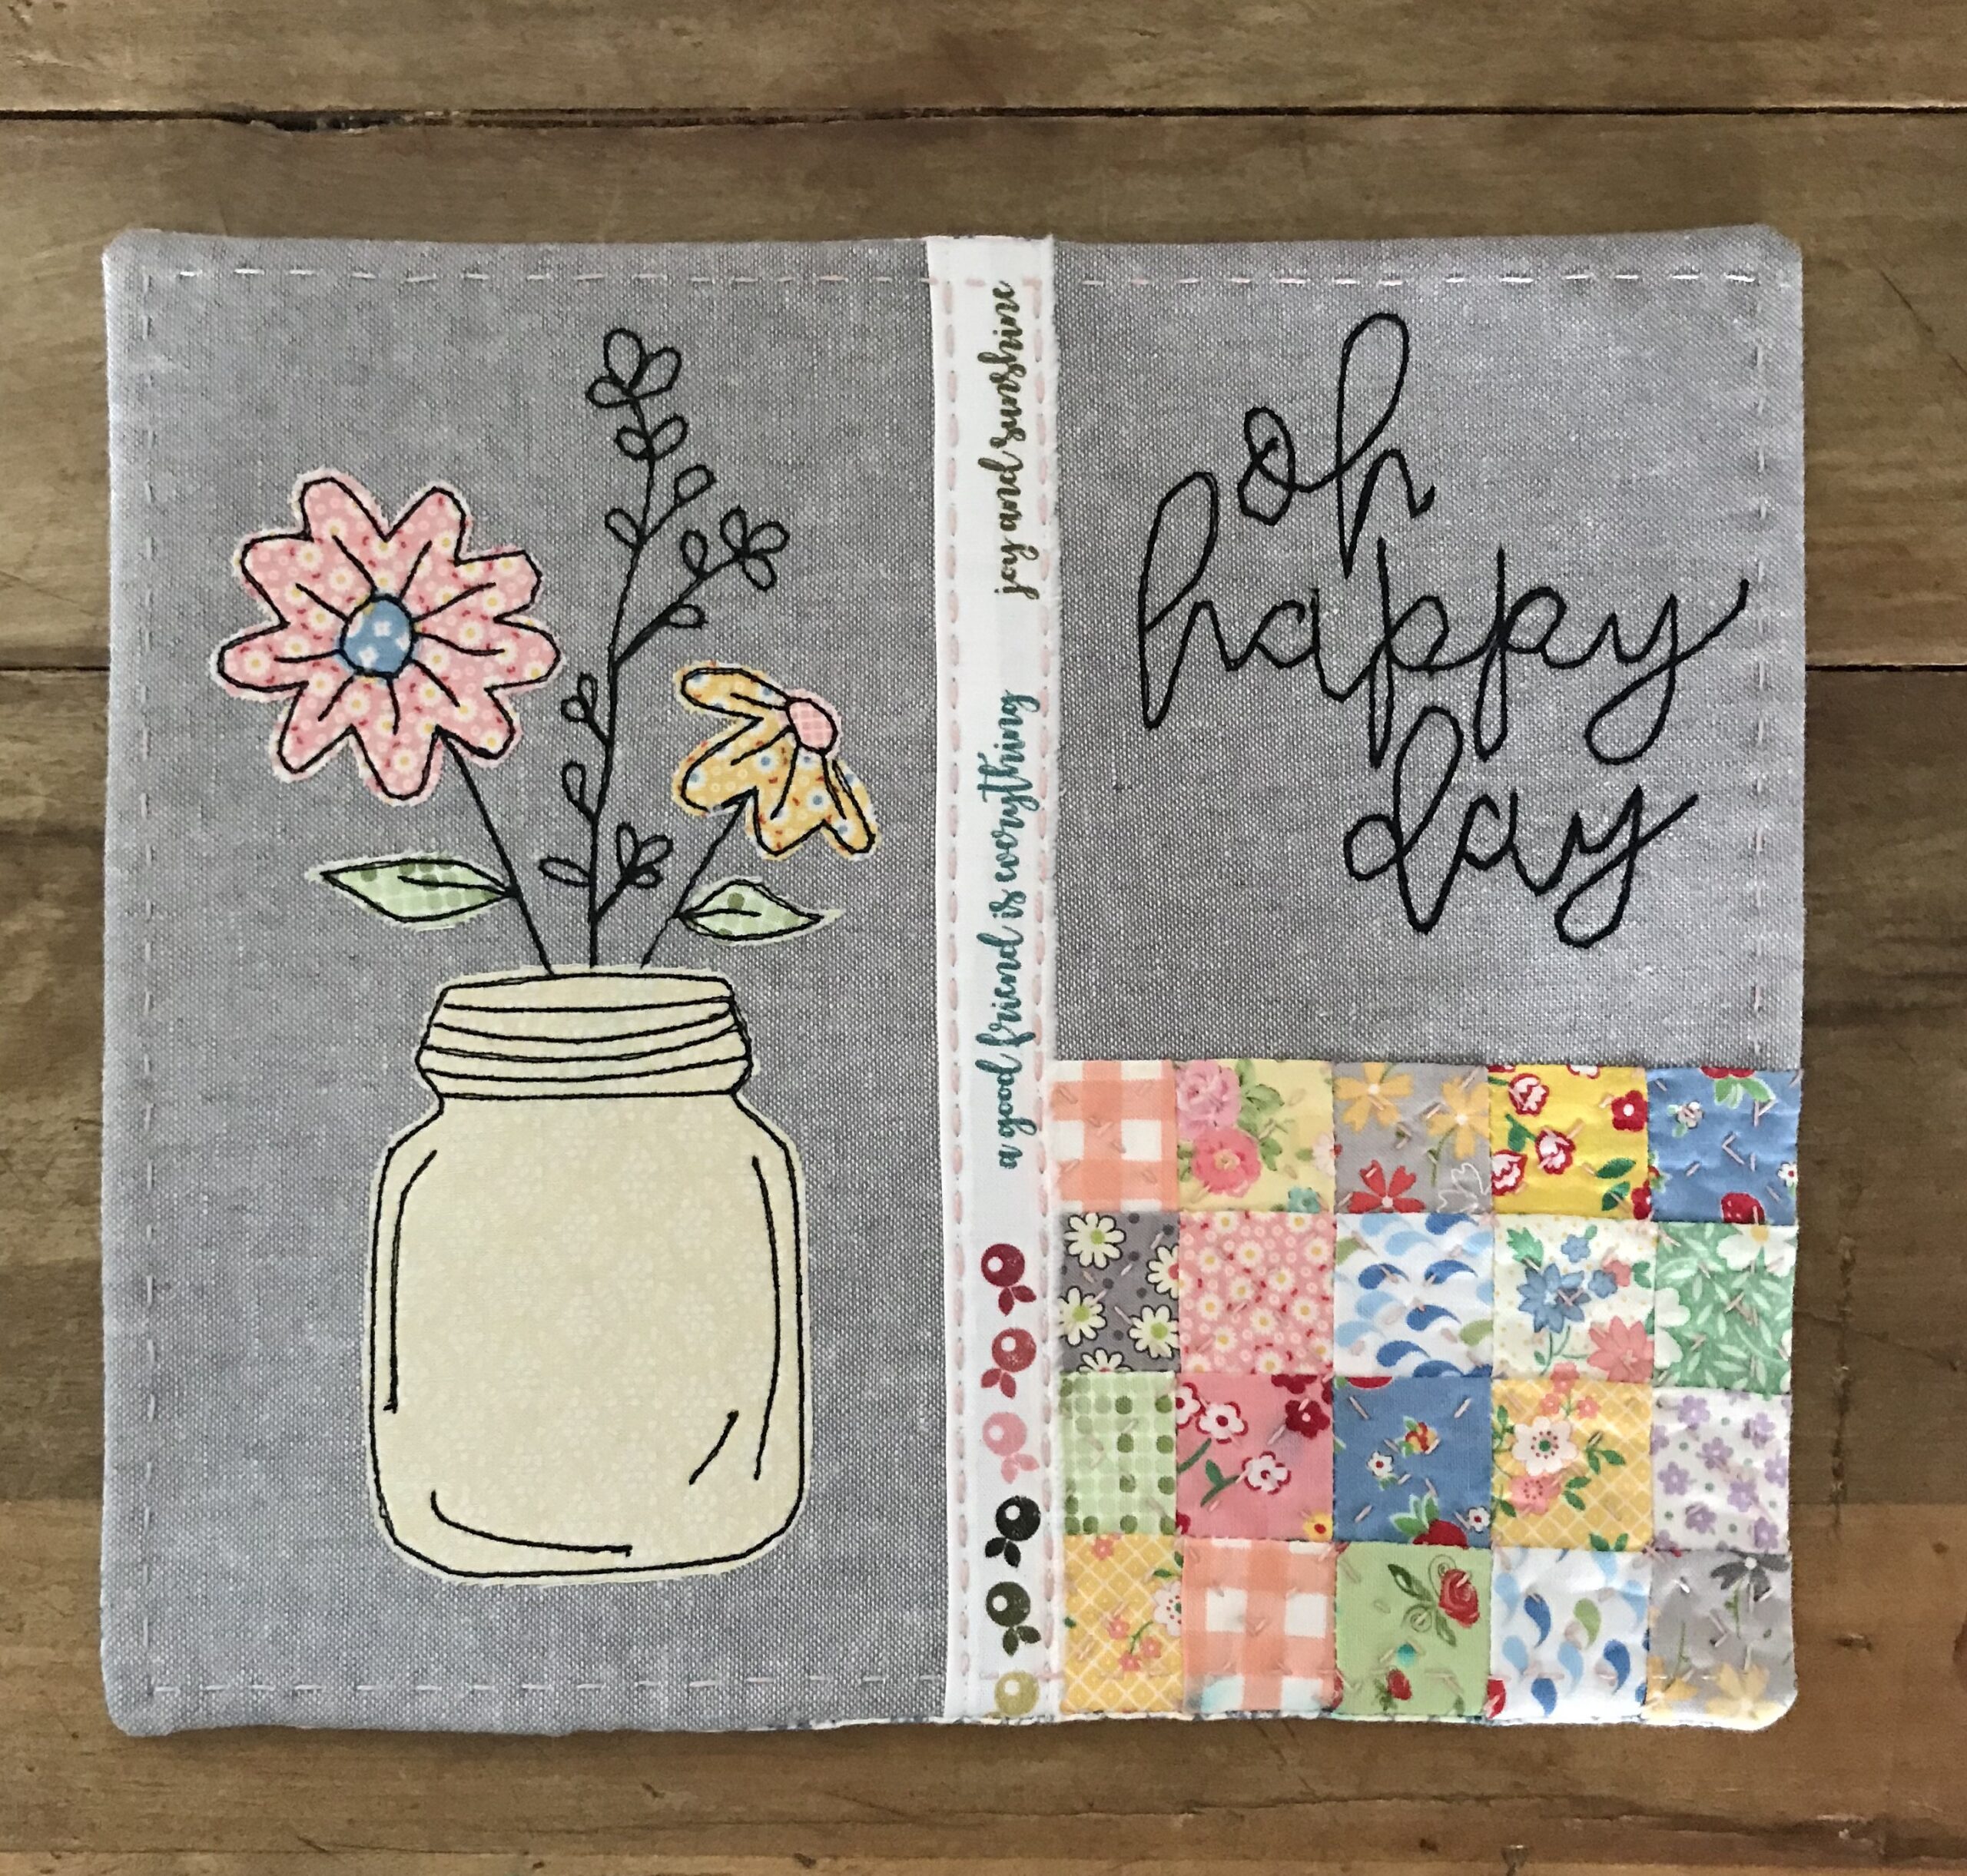
My daughter and I still have our cut flower farm and business and our flowers are especially gorgeous this year! I wish I could send everyone a beautiful bouquet… but instead, I have the next best thing! A mug rug inspired by a jar of our flowers. I’ve written a tutorial that you can use to make your own! I’m using a method called “Illustrated Sewing” to actually draw with my sewing machine. You could also do this by hand sewing.
I chose to make my mug rug 8″ x 10″ so it is almost a snack mat! I needed room to sew all the pretty things I planned in my head! But you can make yours whatever size you choose. Small enough for just a mug, or big enough for a placemat!
.
.
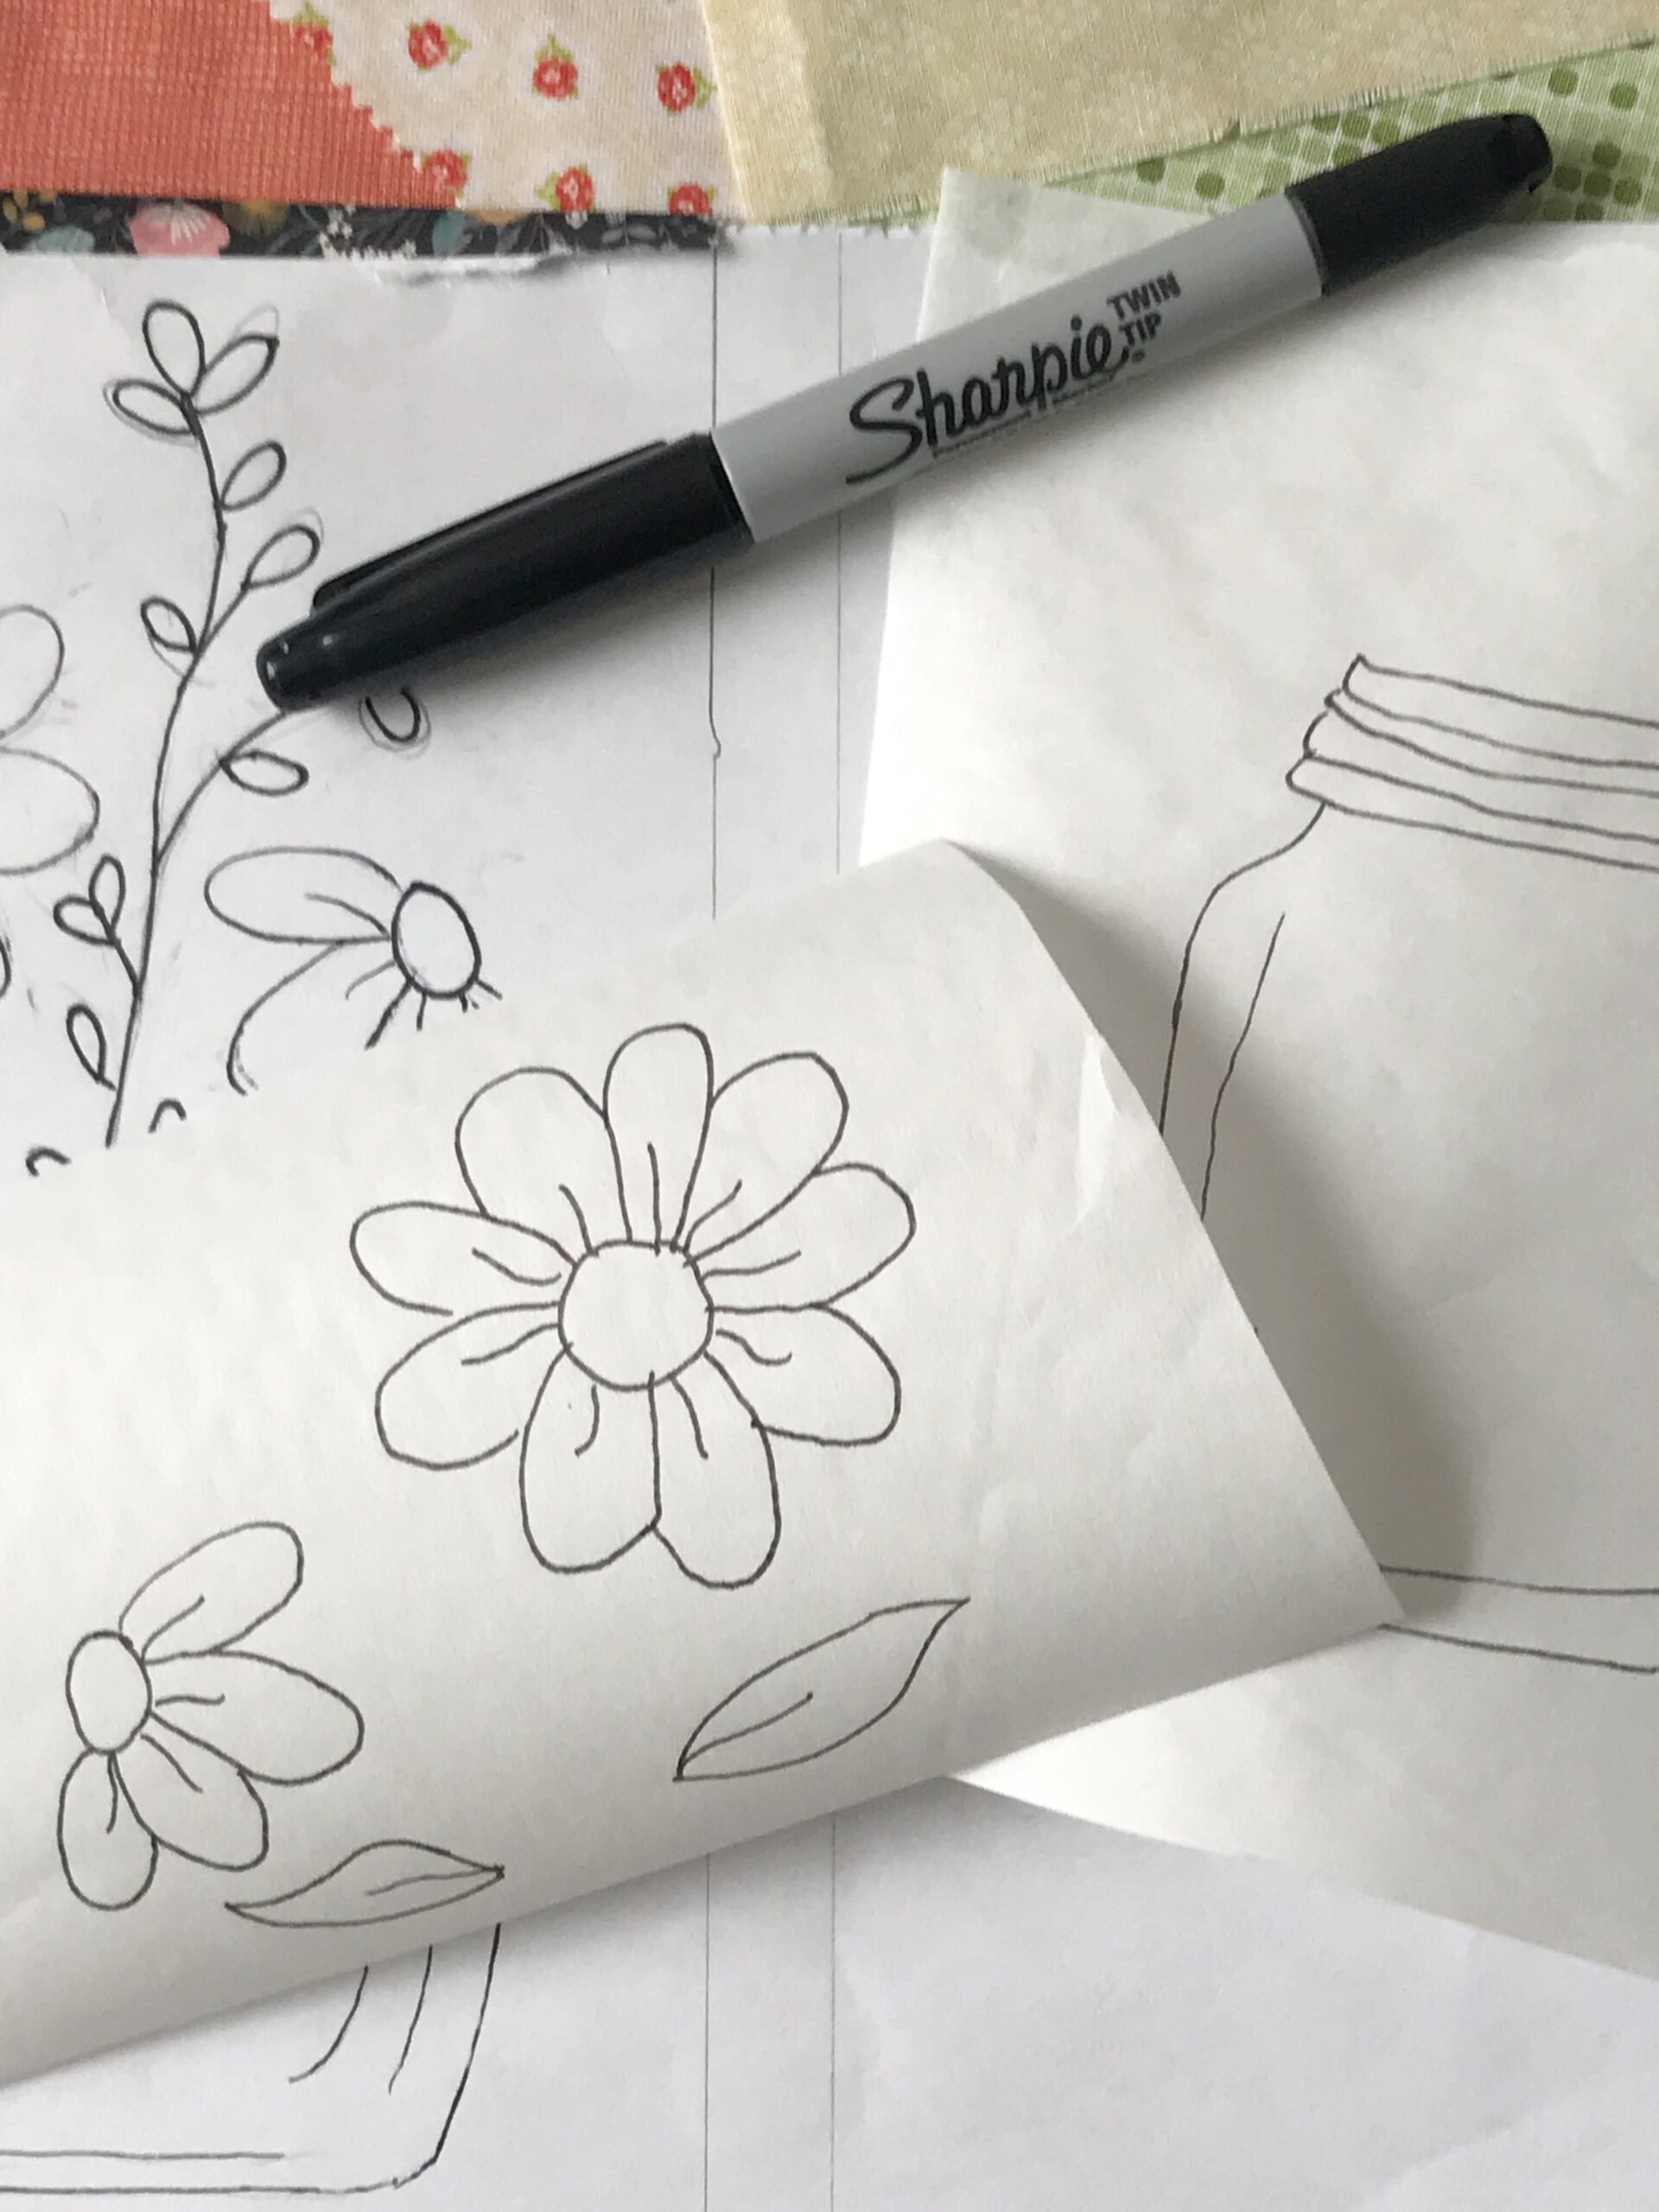
Let’s talk about your “illustration” you will use for your mug rug. I wanted mine to be a jar of flowers so I did some of my own sketching for that as well as the handwriting for the words. I’m not very talented when it comes to sketching so mine is very basic – and also inspired from fonts and clip art!
.
.
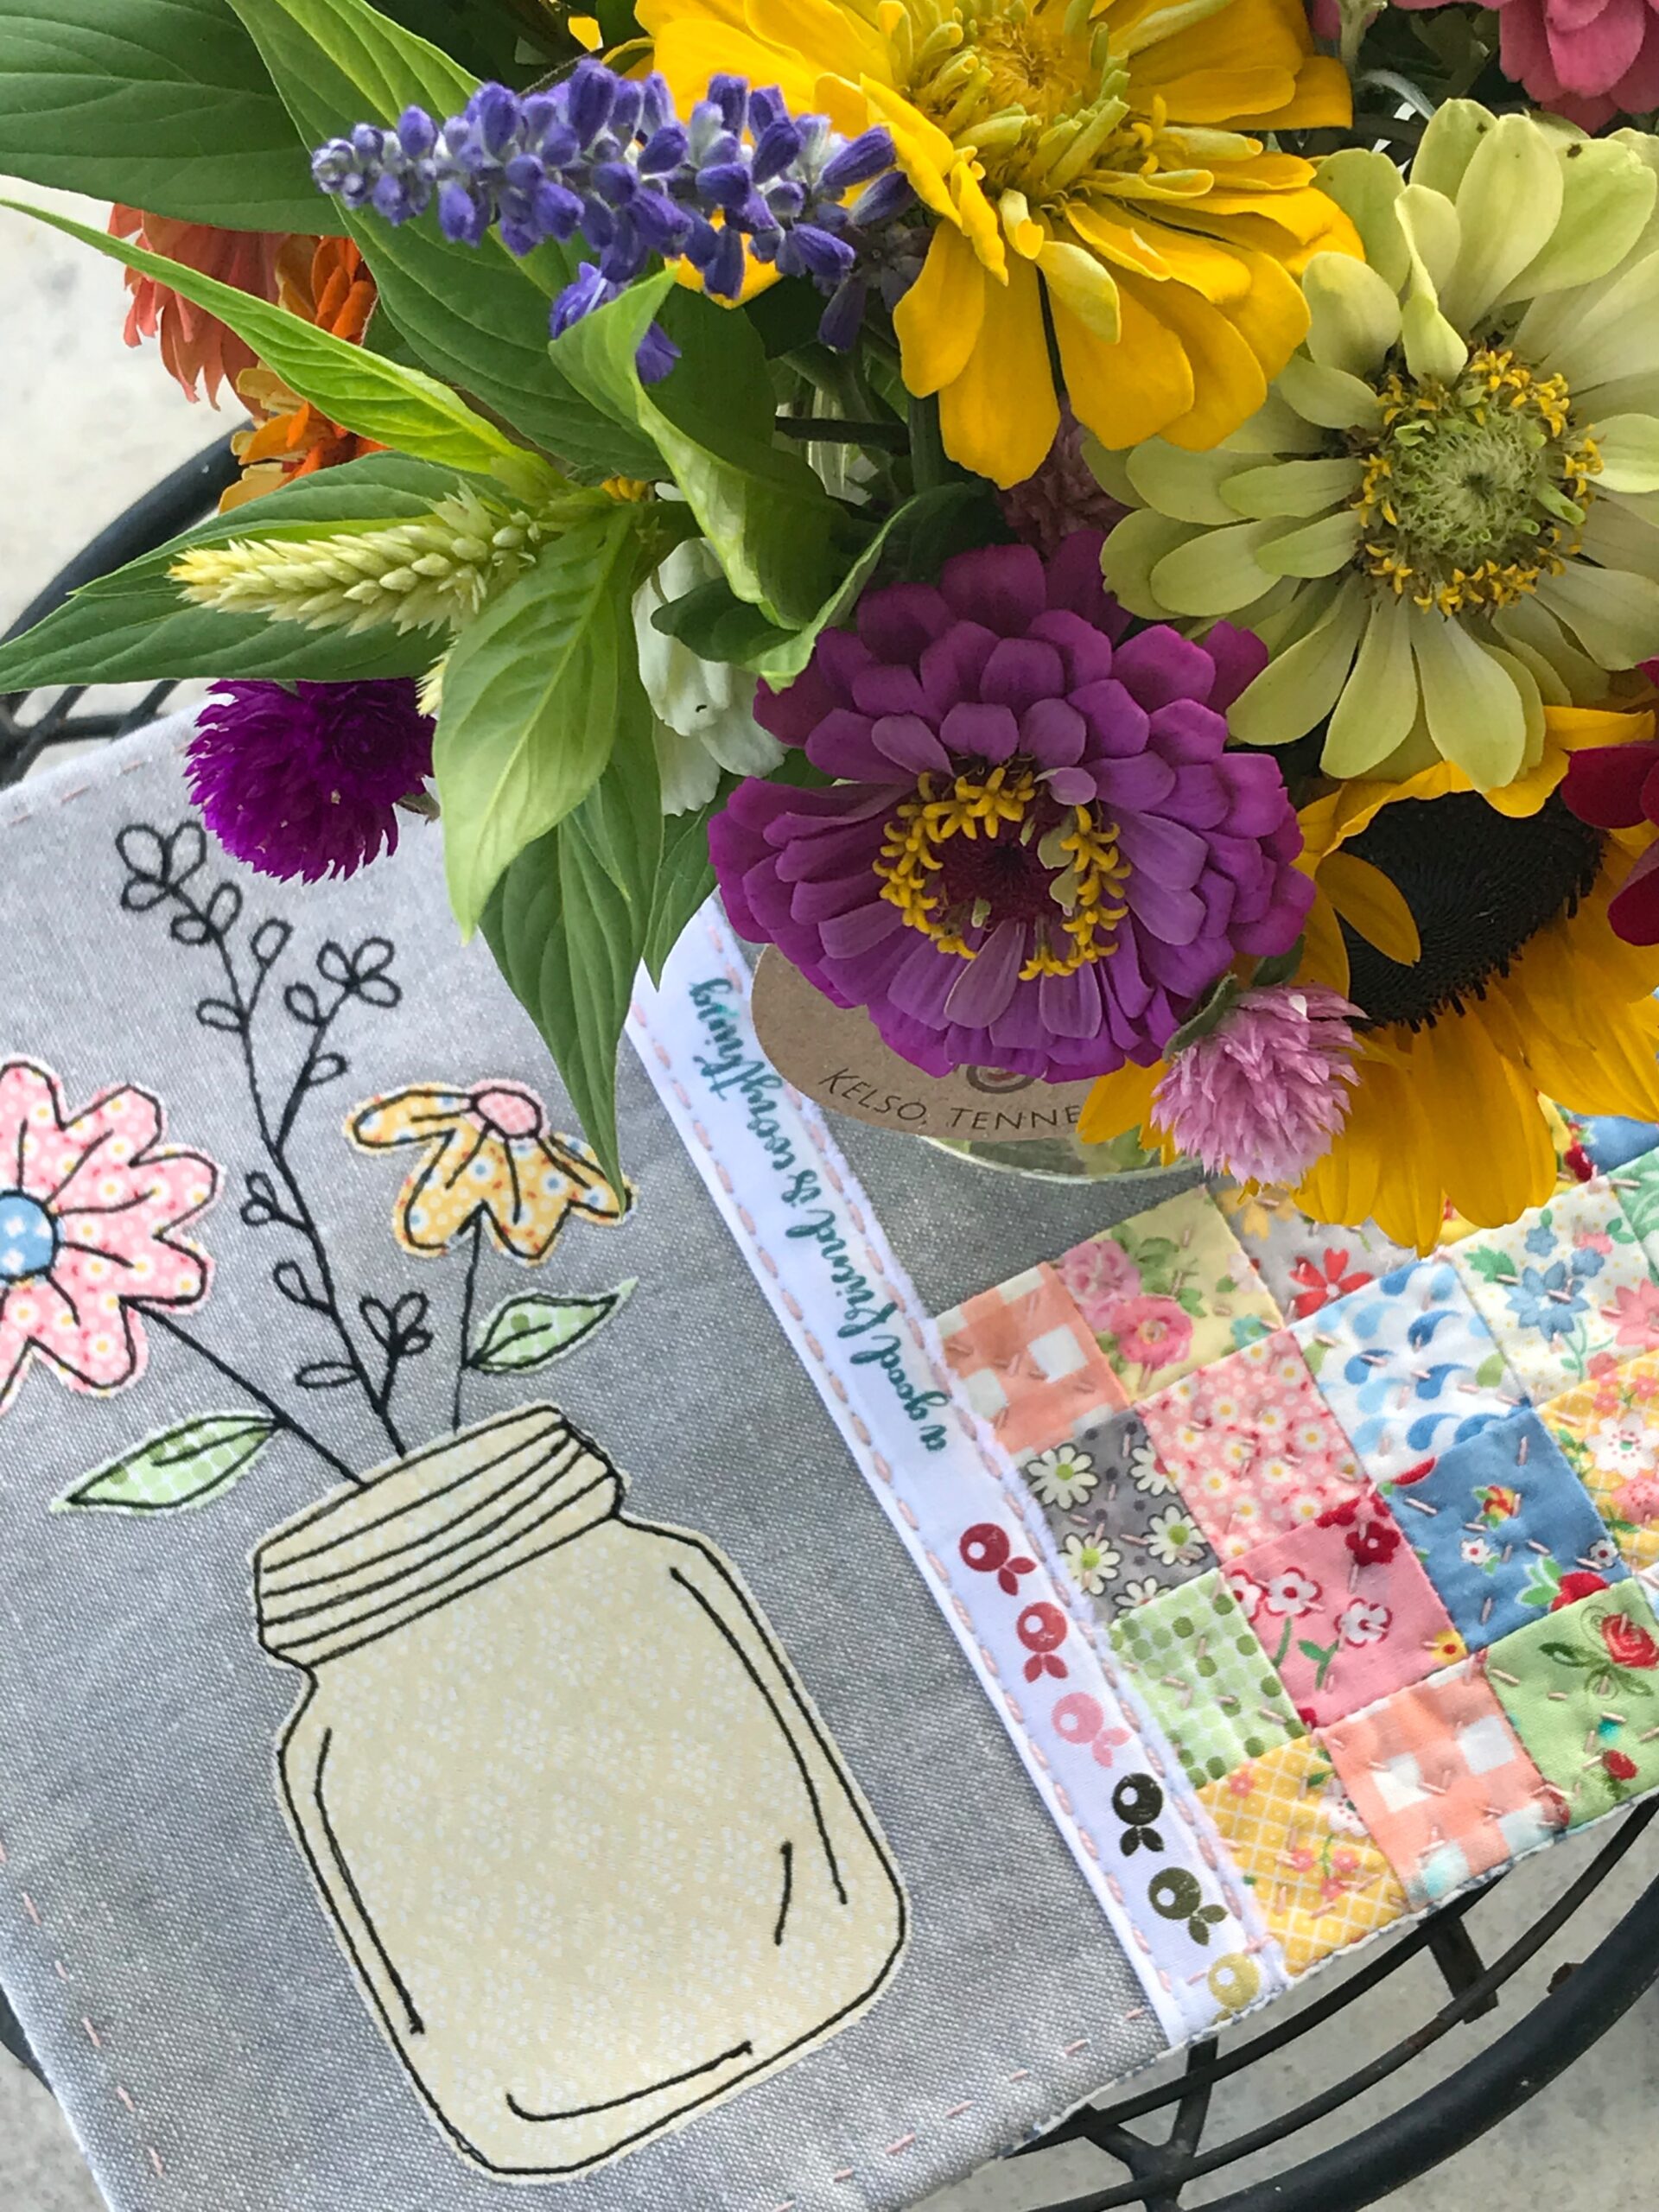
We’ll start with our supplies:
- Clover Wonder Fuse or any paper backed fusible web
- Water Erasable Marker
- Illustration drawn or printed on paper and outlined with a black pen
- Base front panel fabric – I was just winging it on size, so I started big and trimmed it as I went. Also, I used Linen – remember this is your base, you’ll likely want it light colored
- Fabric scraps
- Black sewing thread for both top and bobbin
- Open toe sewing machine presser foot
- Scrap fusible quilt batting the size of your final front panel
- Fabric backing scrap cut the same size as your final front panel
- Optional: Embroidery thread and embroidery needle
- Iron
.
.
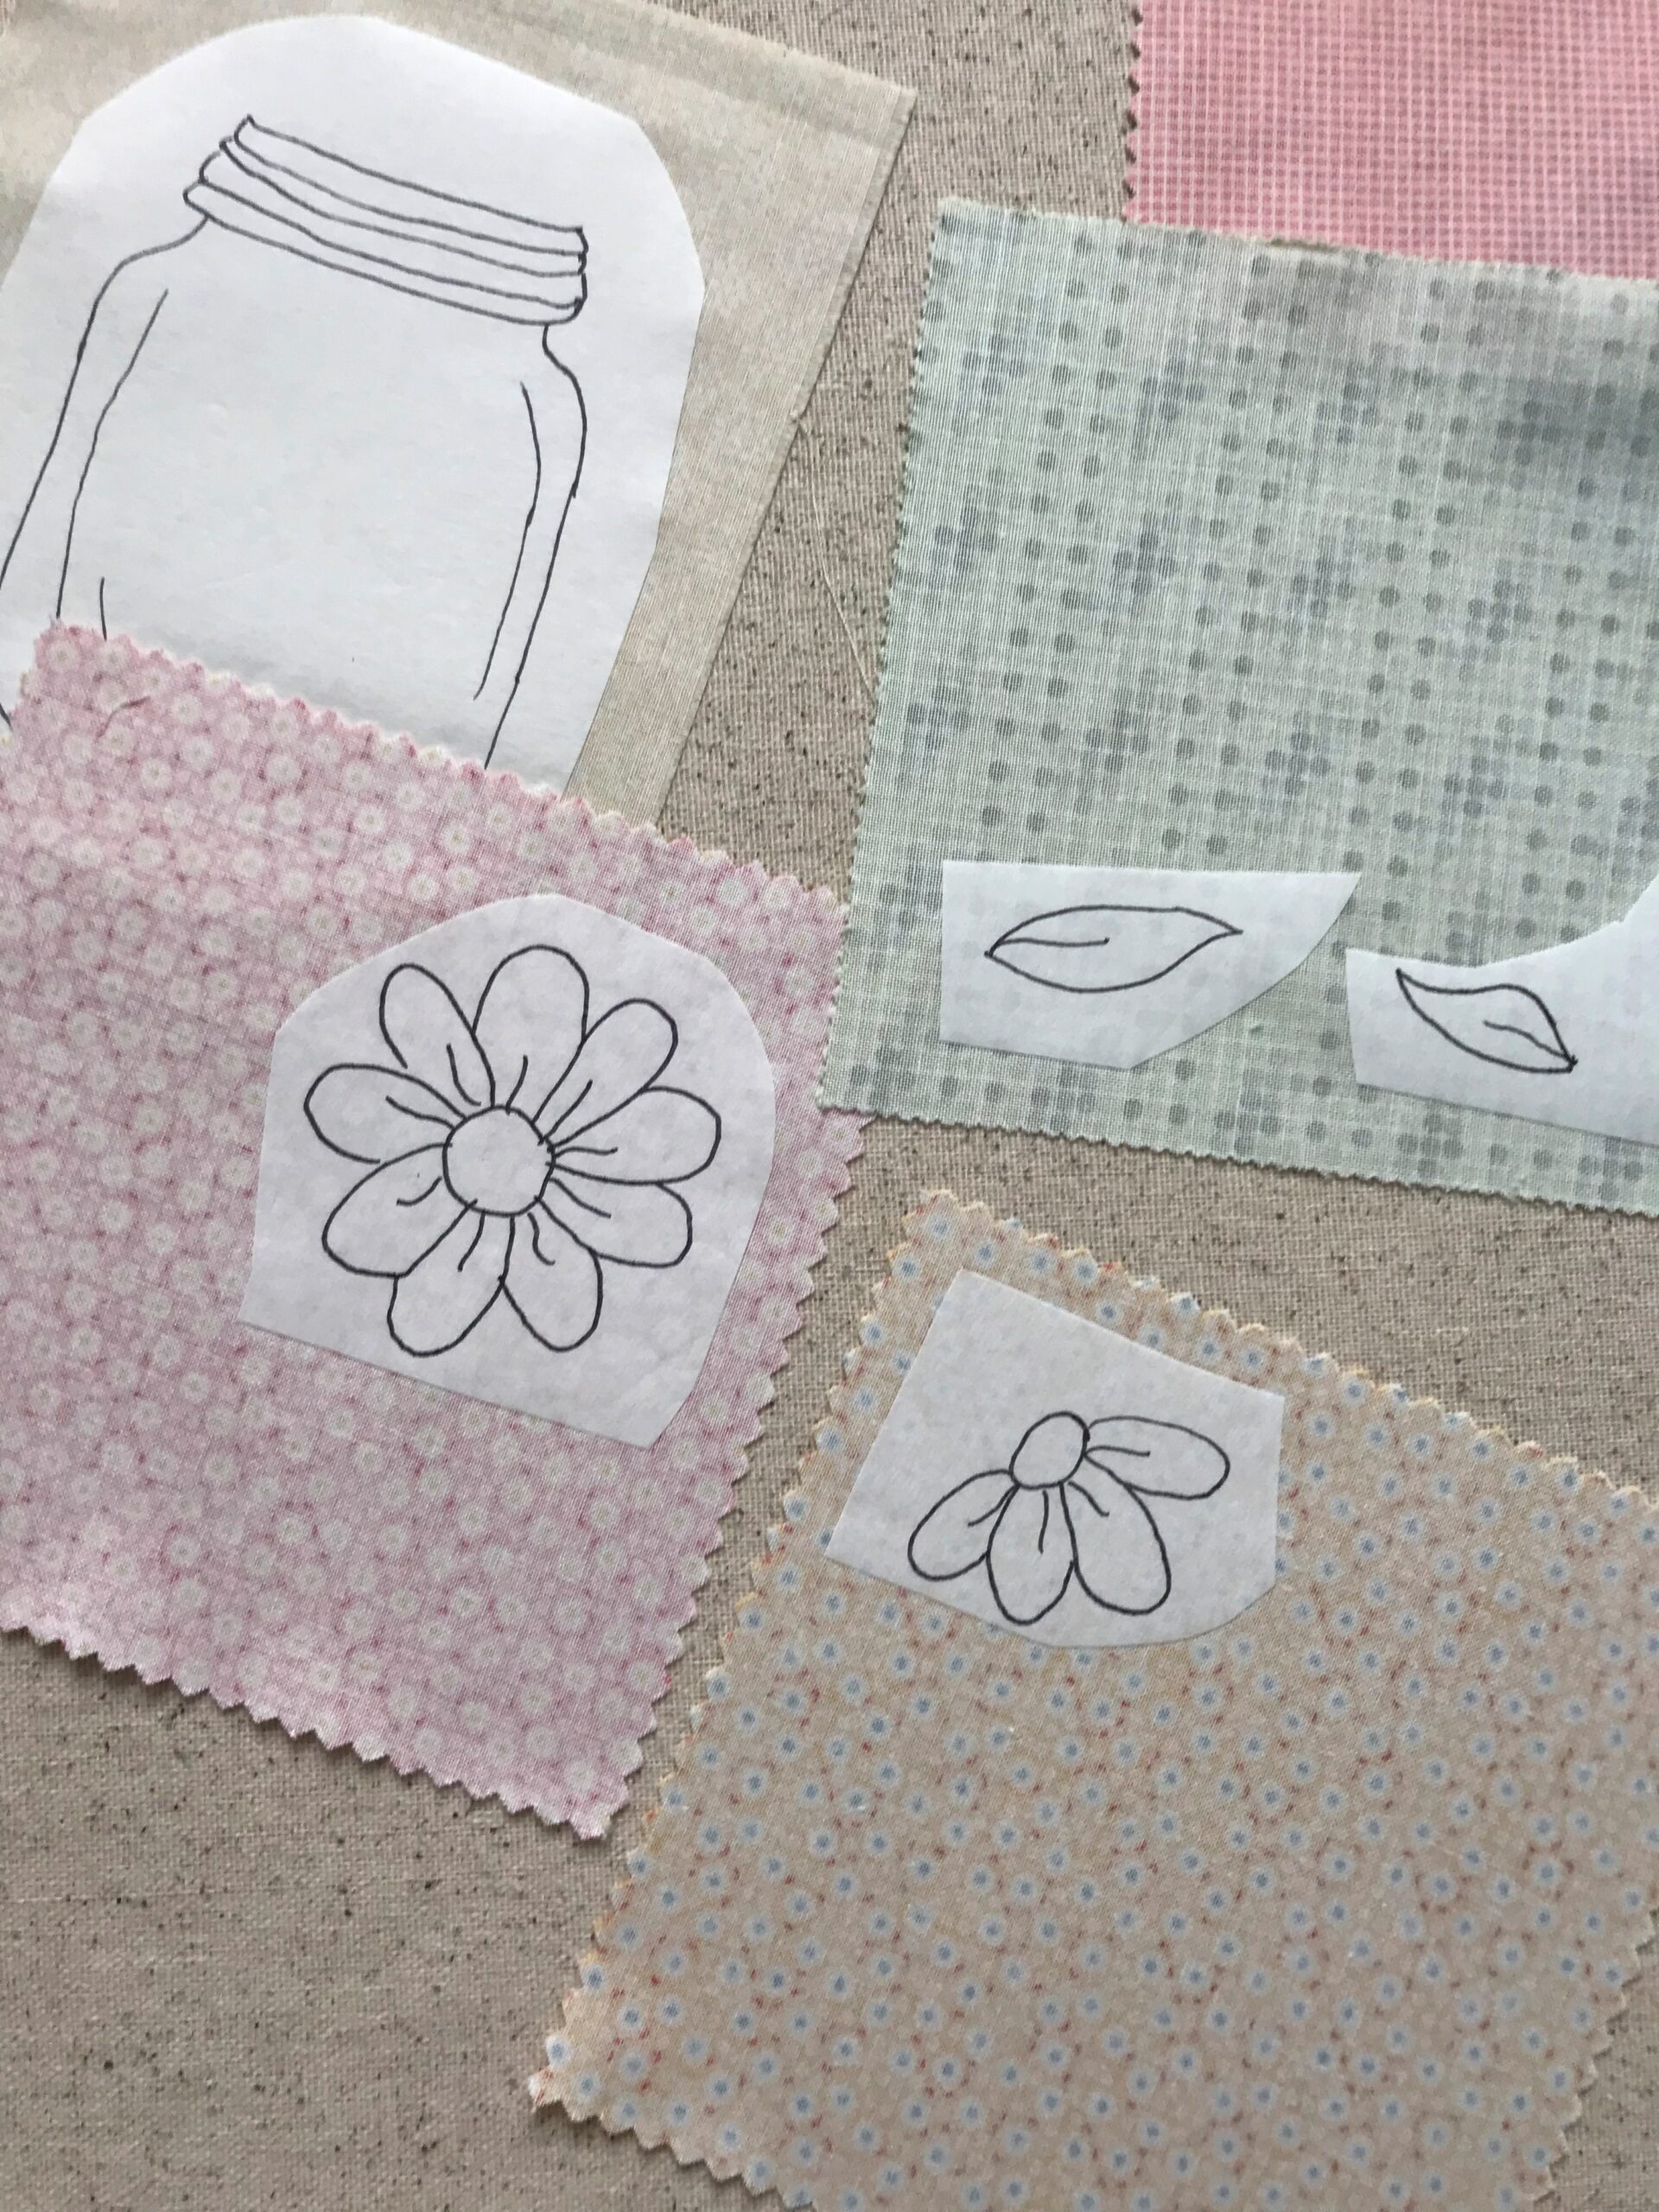
Cut a piece of fusible web large enough to cover the different elements of your illustration that you will use your fabric scraps for. I used fabric scraps for the jar, the flowers and the leaves. Lay the fusible web on top of your illustration, the fusible side down. Using a dark pen, trace your illustration onto the paper side of the fusible web.
.
.
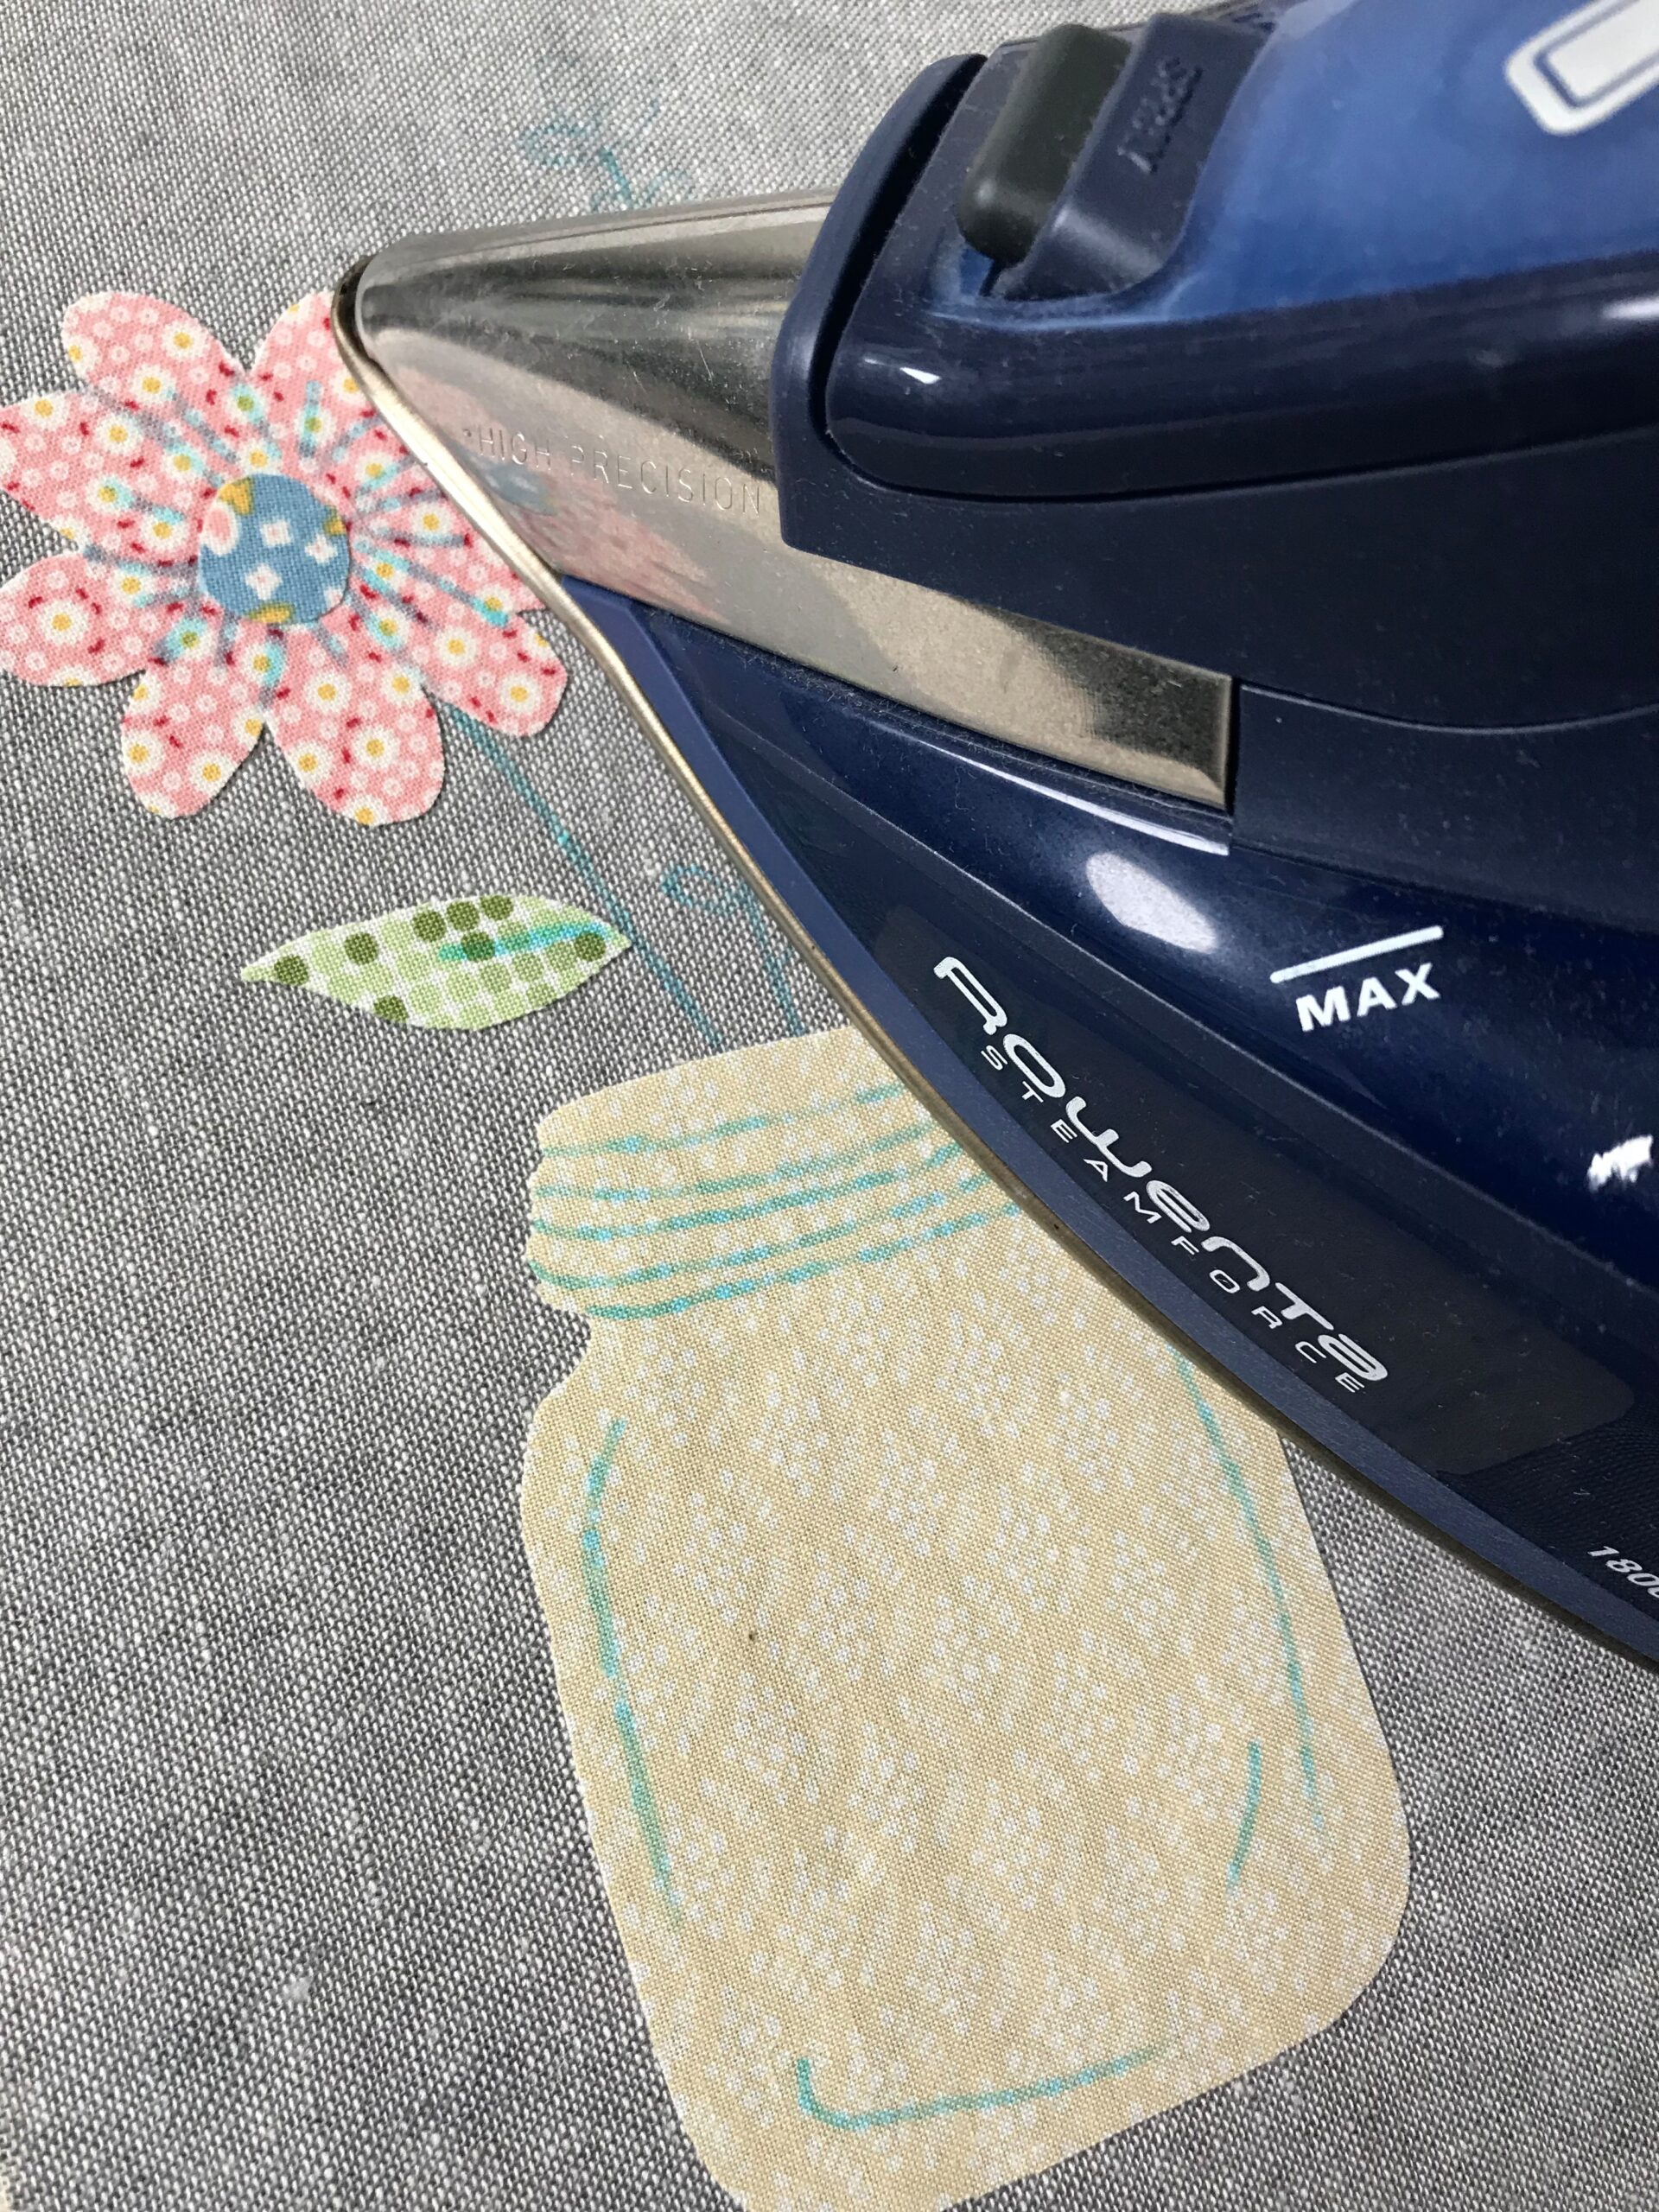
Fuse those drawings to the back of the fabric scraps you have chosen for the different elements. Fusing is quick and simple with a hot iron; you only need to press it for a few seconds.
.
.
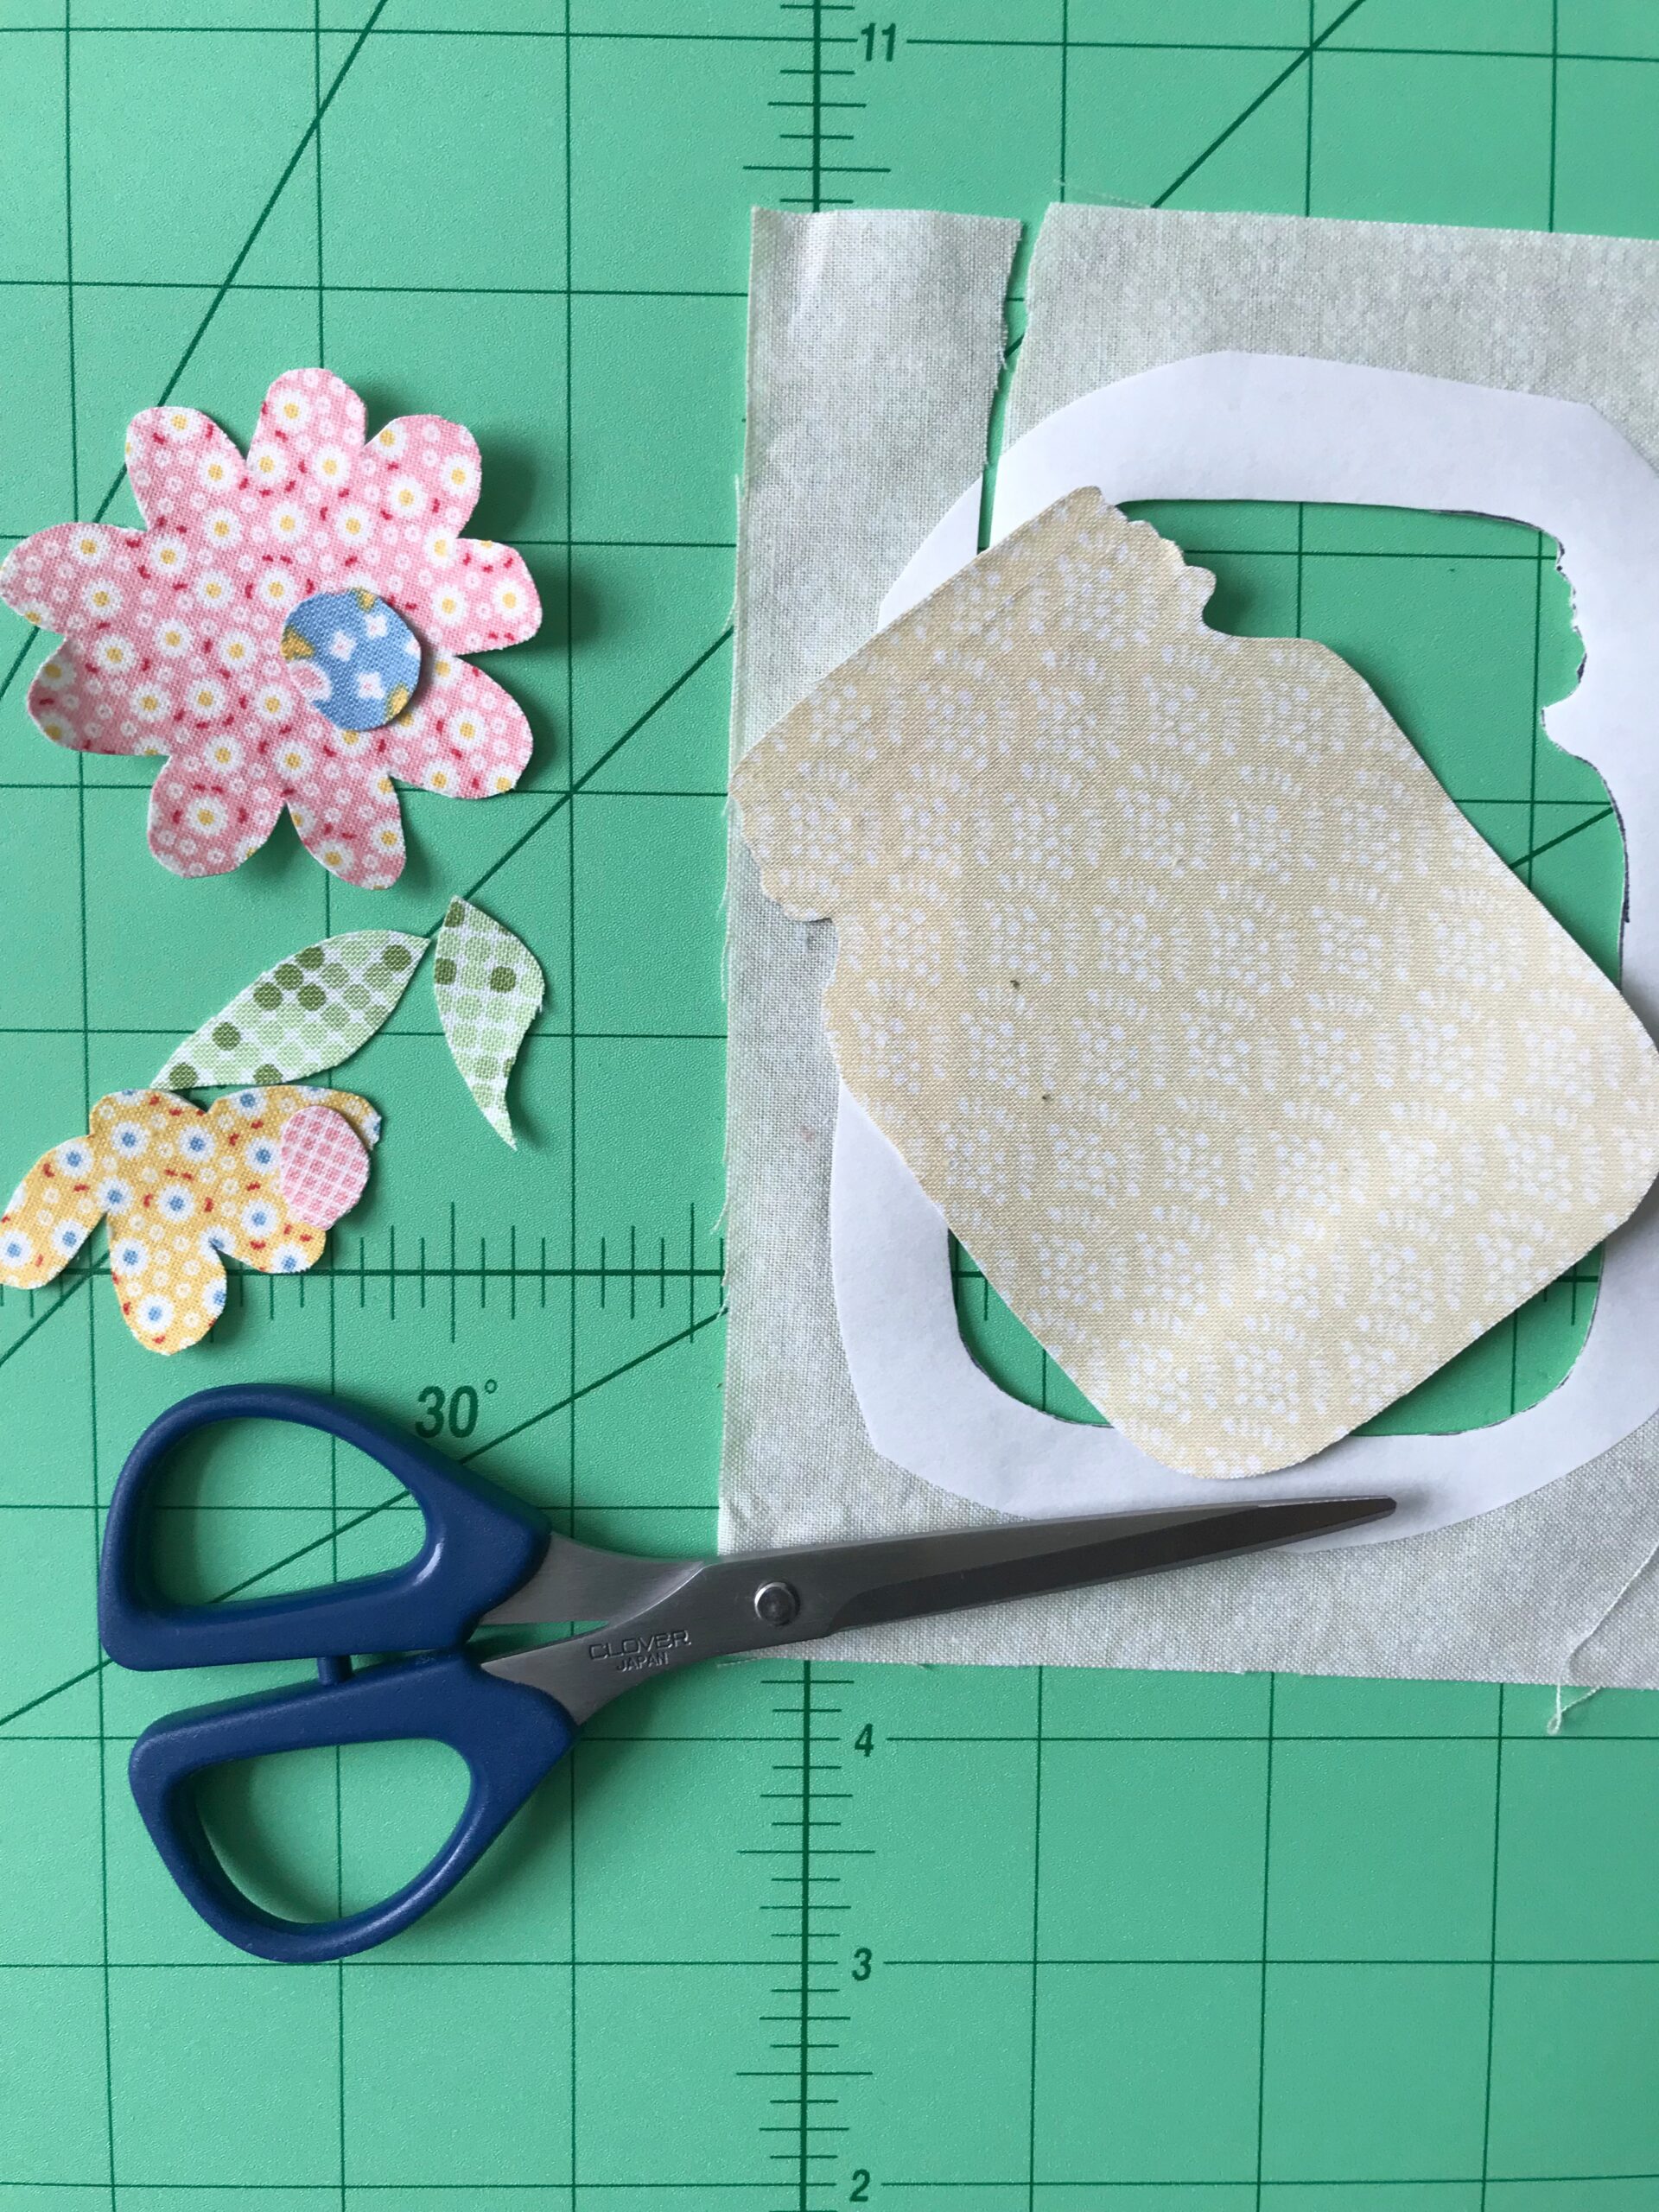
Leave the paper backing on and cut along your drawn lines on the fusible web on all your little fabric elements.
.
.
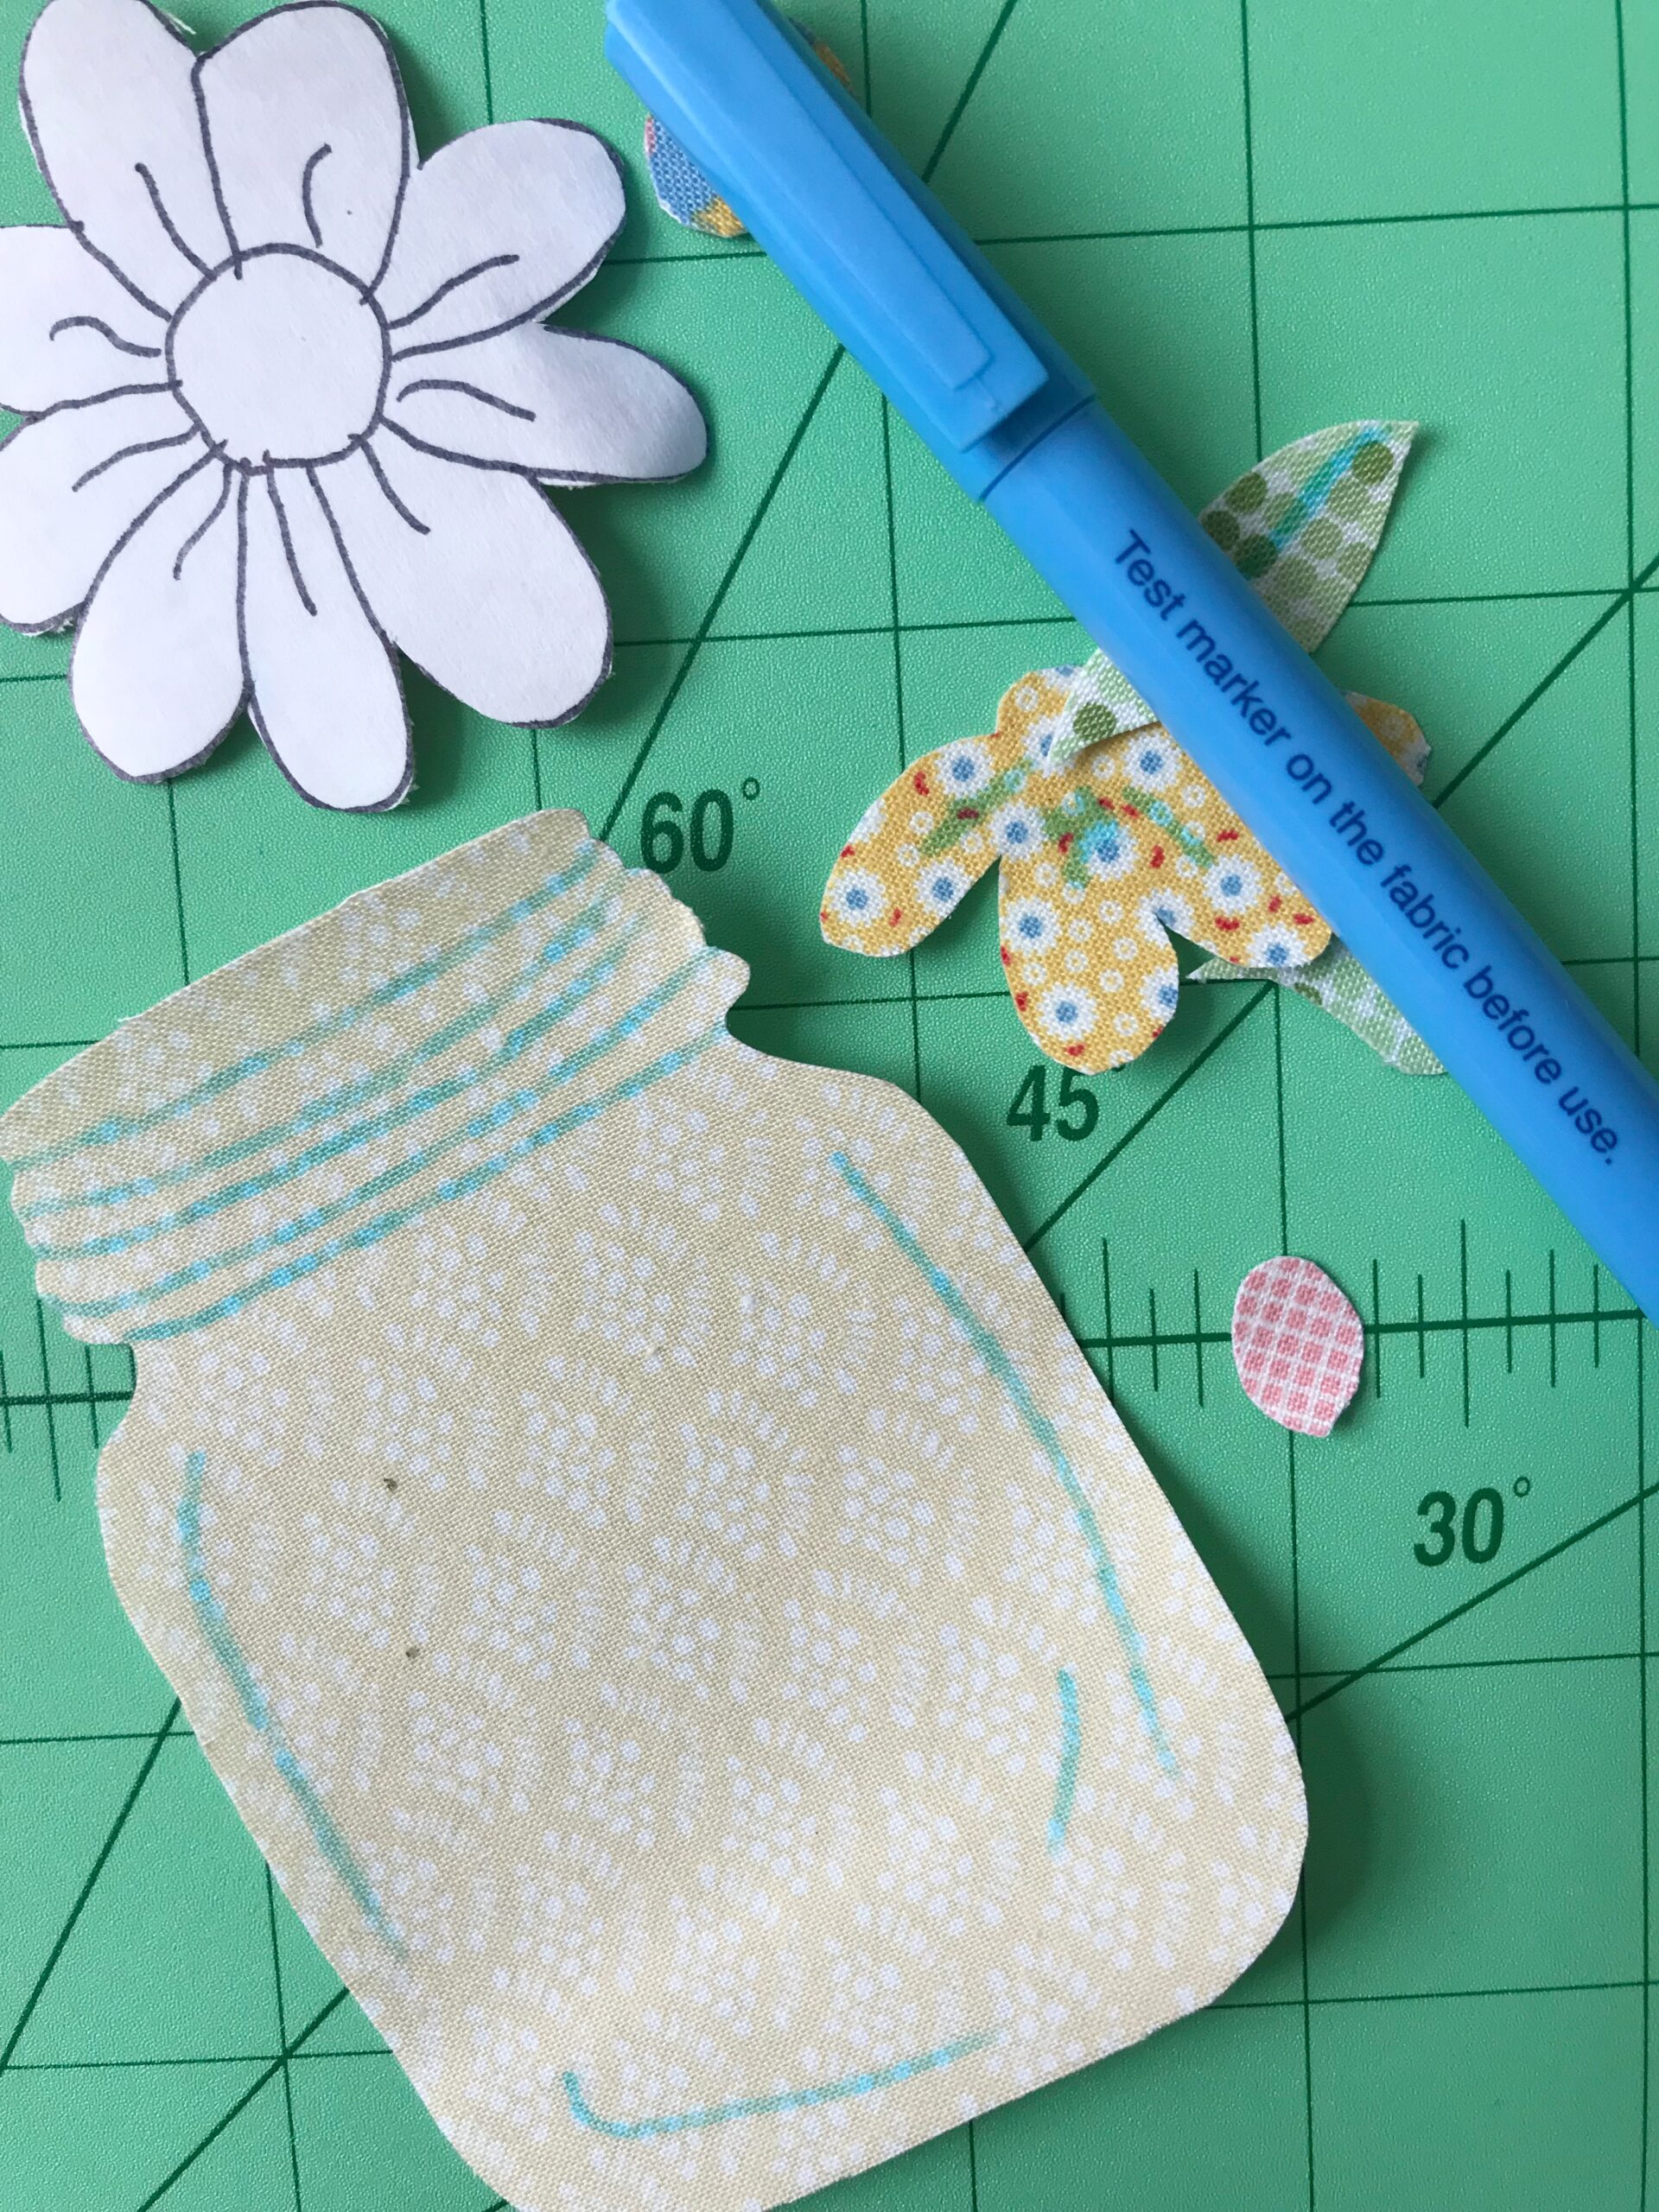
If there are any lines on your fabric elements that will need to be “drawn” with thread, use your erasable marker to mark those onto the fabric now. The dark lines should shine through from the paper backing of the fusible web.
.
.
Remove the paper backing and your little drawings have now become a perfect iron on patch! Take your base fabric and lay your fabric patches on all the appropriate spots and iron them in place. Take your time to get them placed exactly as you want them. Once they are ironed on, they are permanent. Draw, with your fabric marking pen, any areas of your illustration that will be on the background fabric. (ie: especially lettering and in my case part of the bouquet in the jar.)
.
.
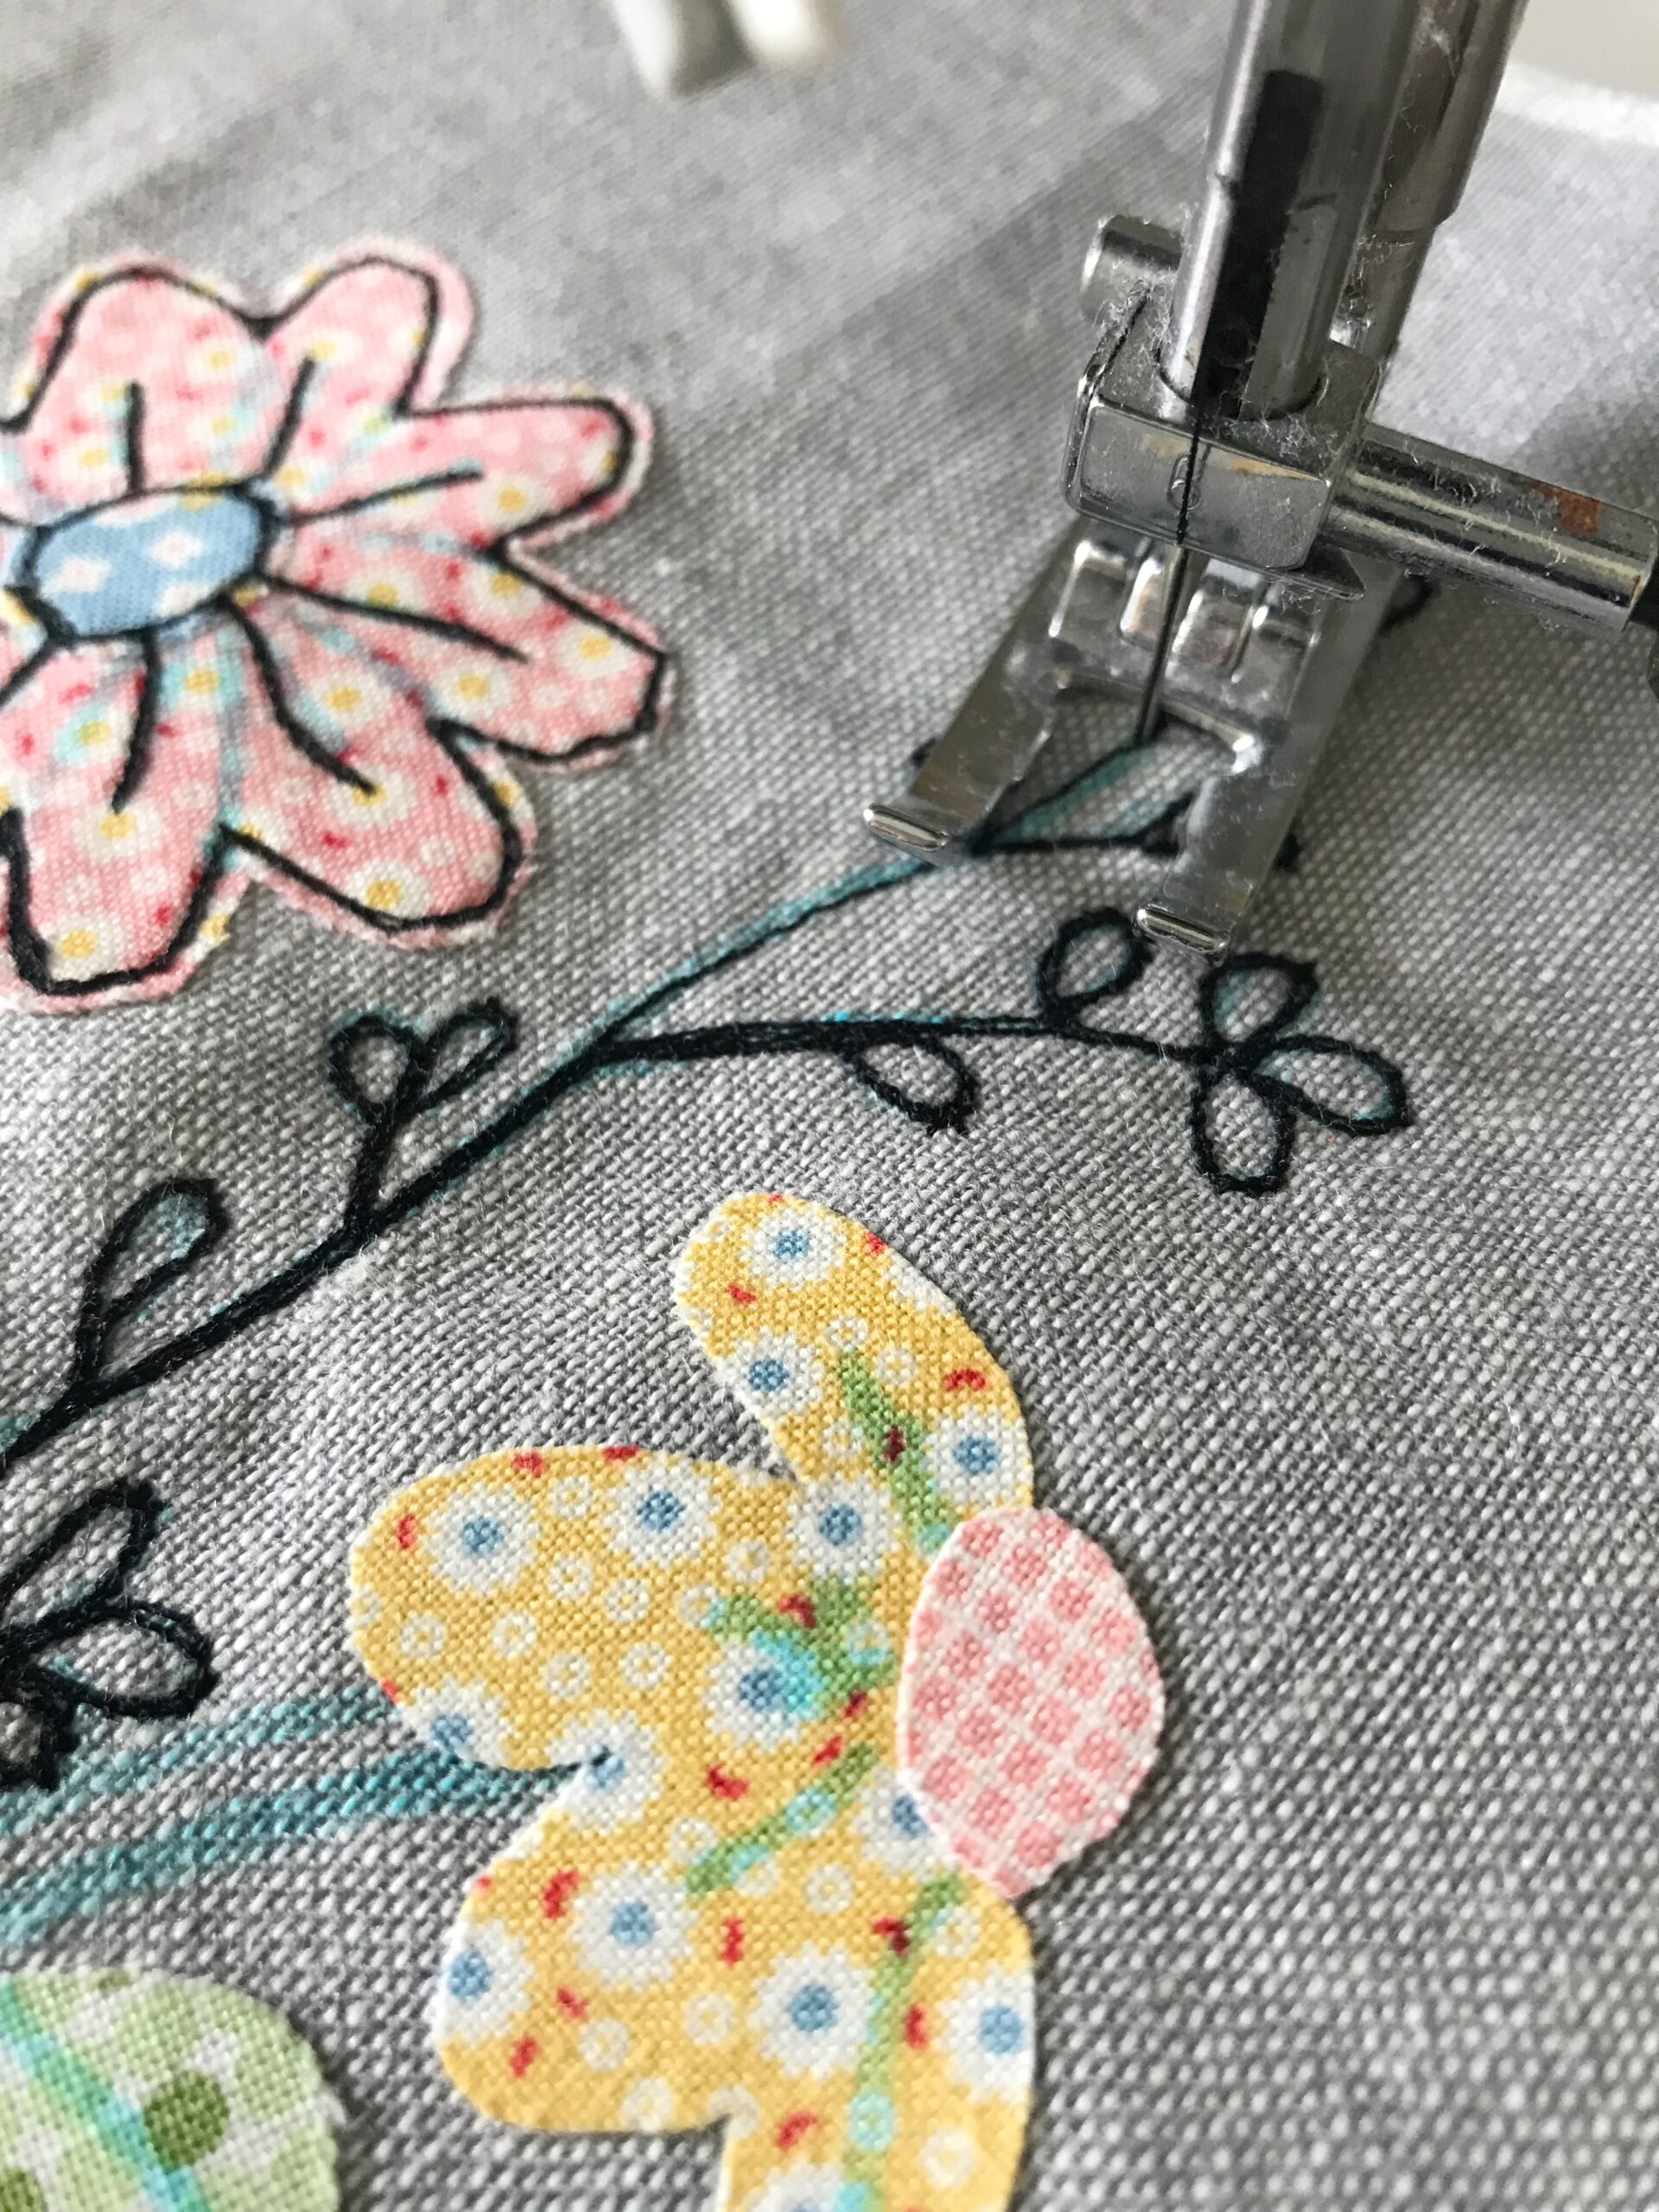
Now the fun begins! Thread your sewing machine (both top and bobbin) with black thread. This makes your drawing look like an actual drawing as you sew! Set your stitch length to 1.4 and your speed to slow! And start outlining your fabric elements. I sewed over each drawn line three times to really make the black stand out and to give it a cleaner look. It is not a difficult process; just be sure to go slow and take your time.
.
.
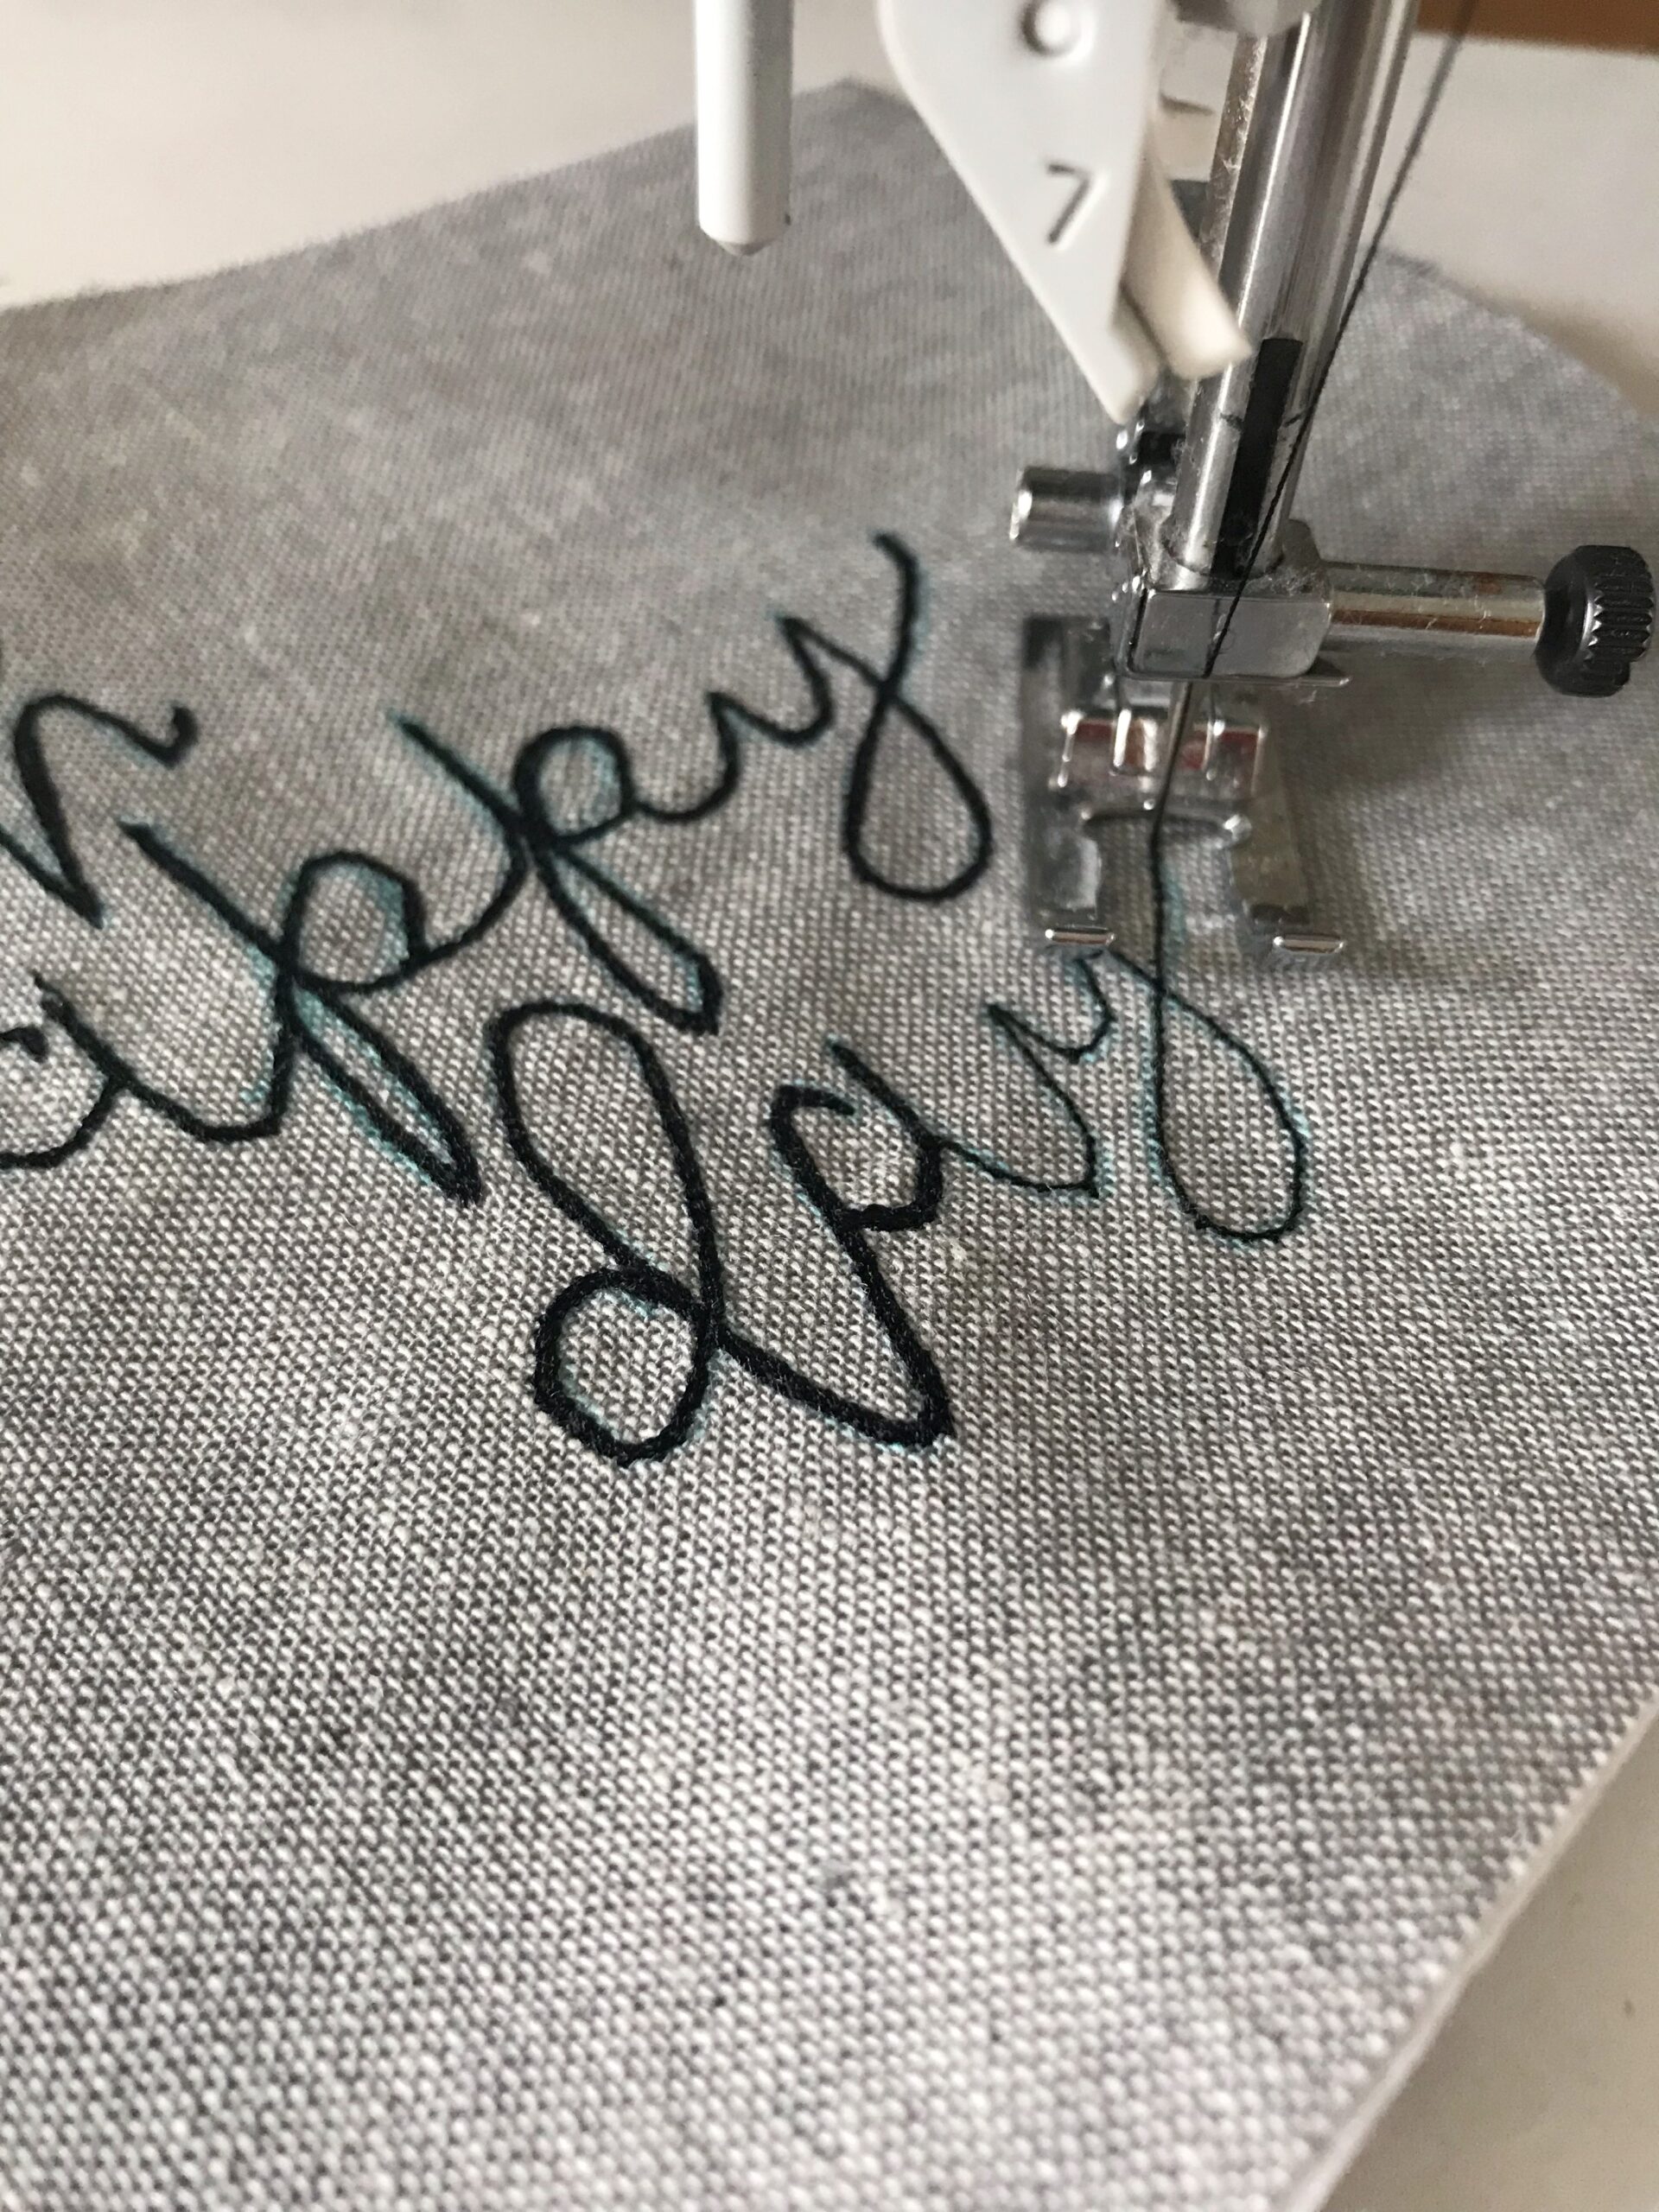
I also traced wording on my Mug Rug and carefully sewed along those lines as well. The best thing is not to expect perfection… I know that my handwriting is never perfect and you really do want this to look like your own writing and drawing! I can’t stress enough the need to go very slow! That, and short stitch length, is the key!
.
.
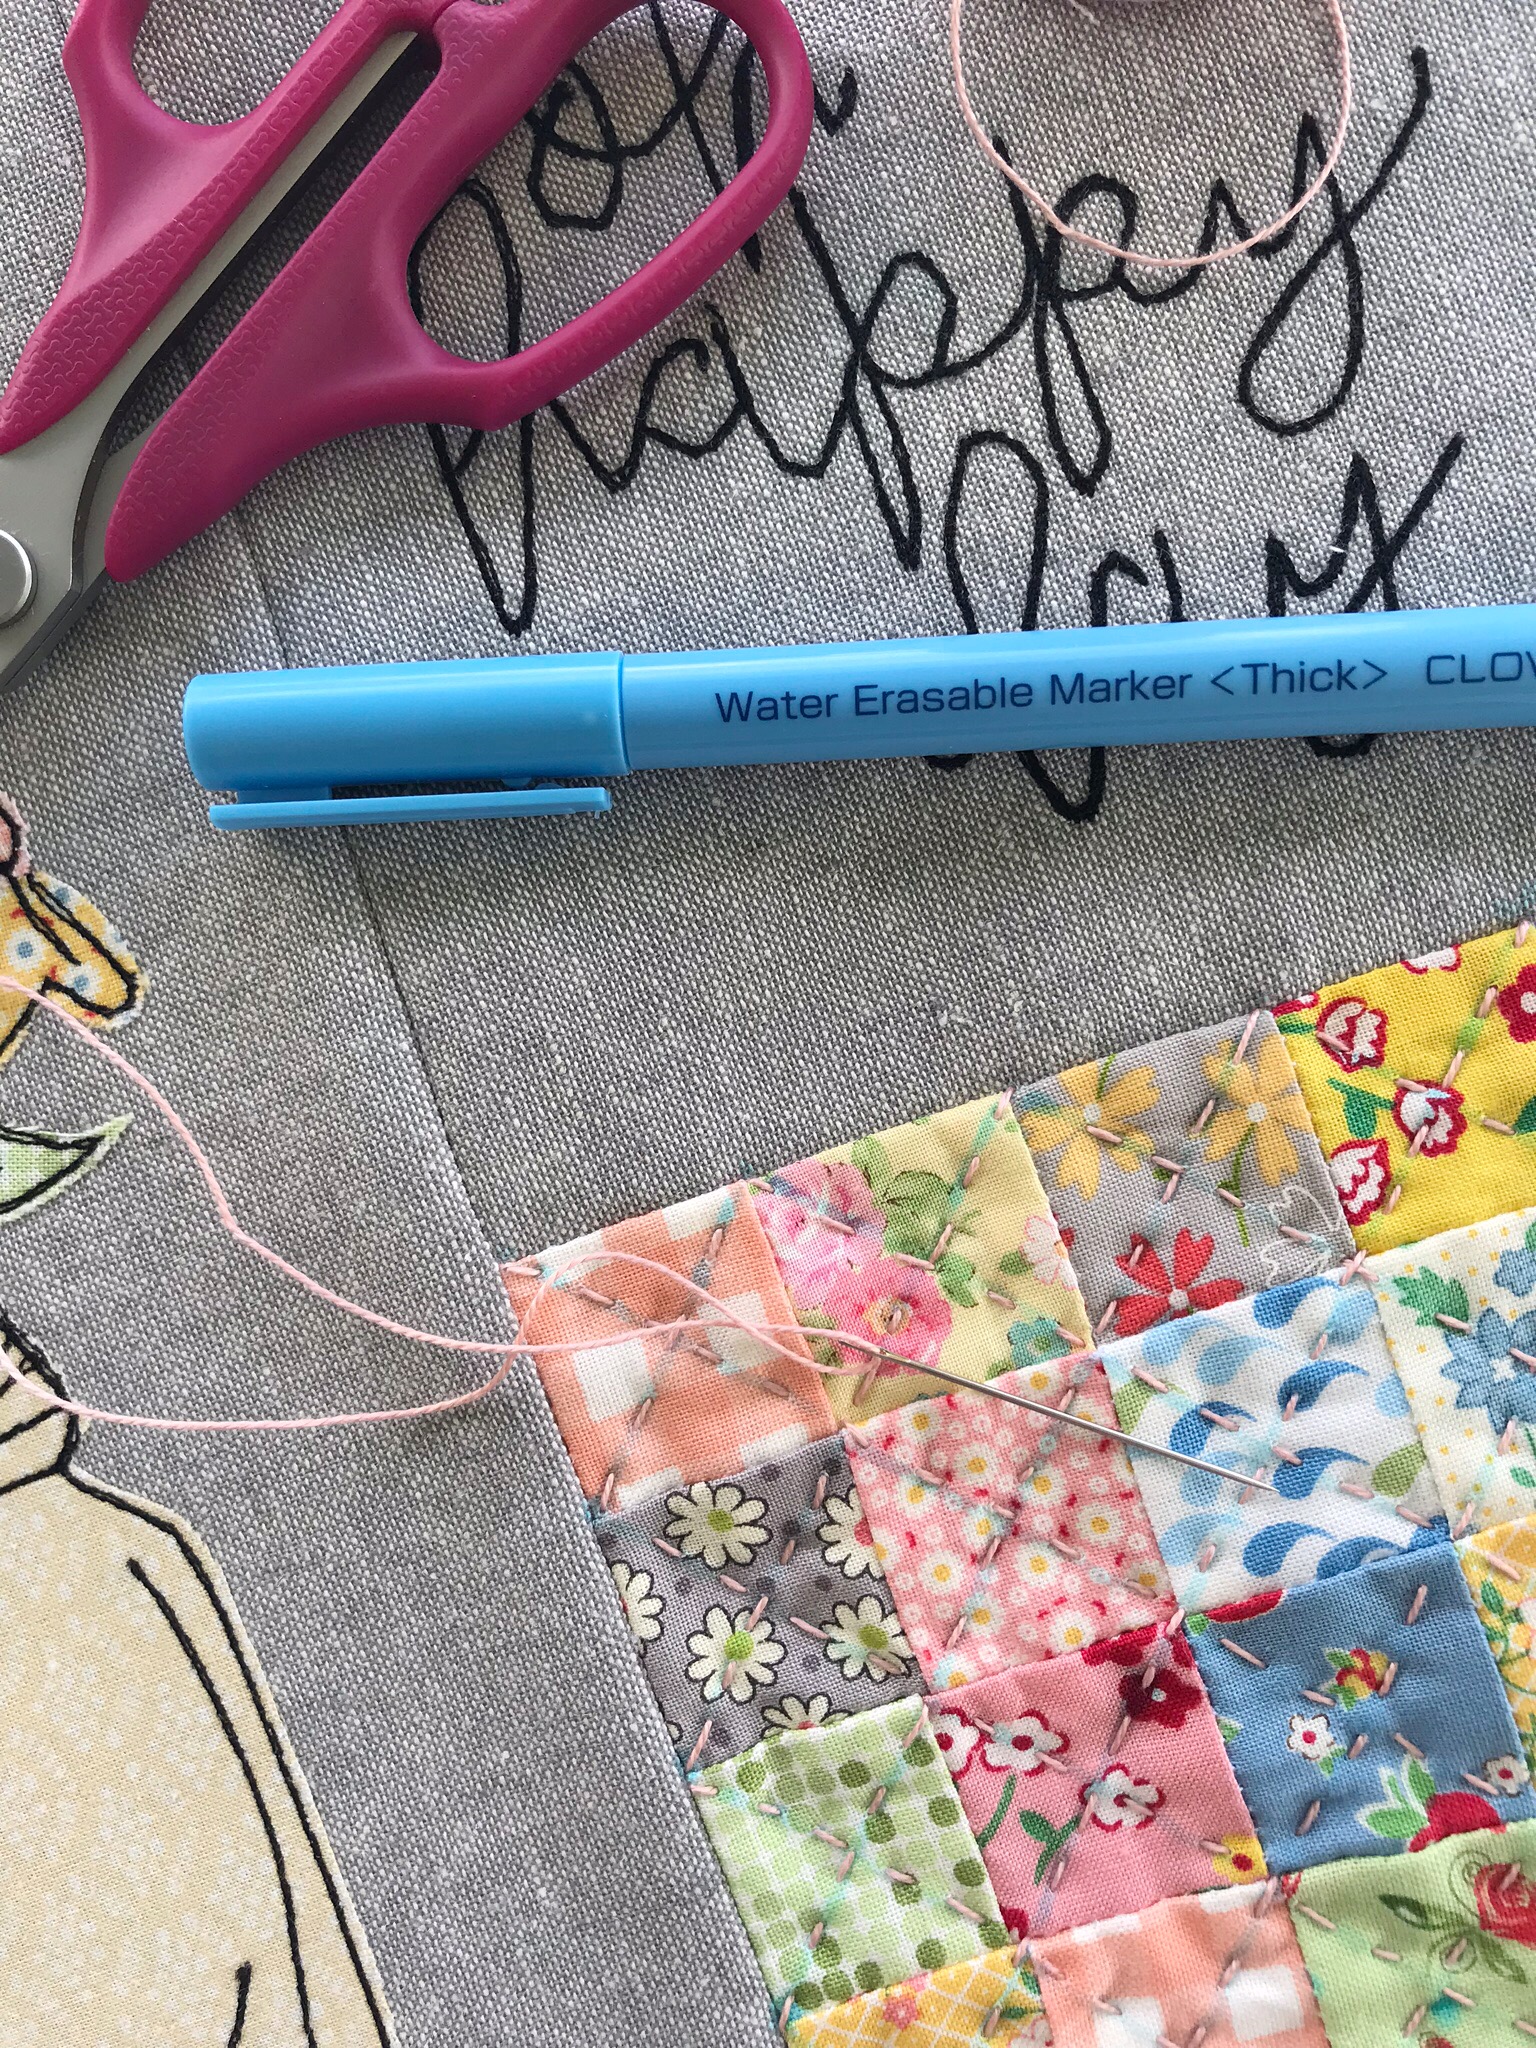
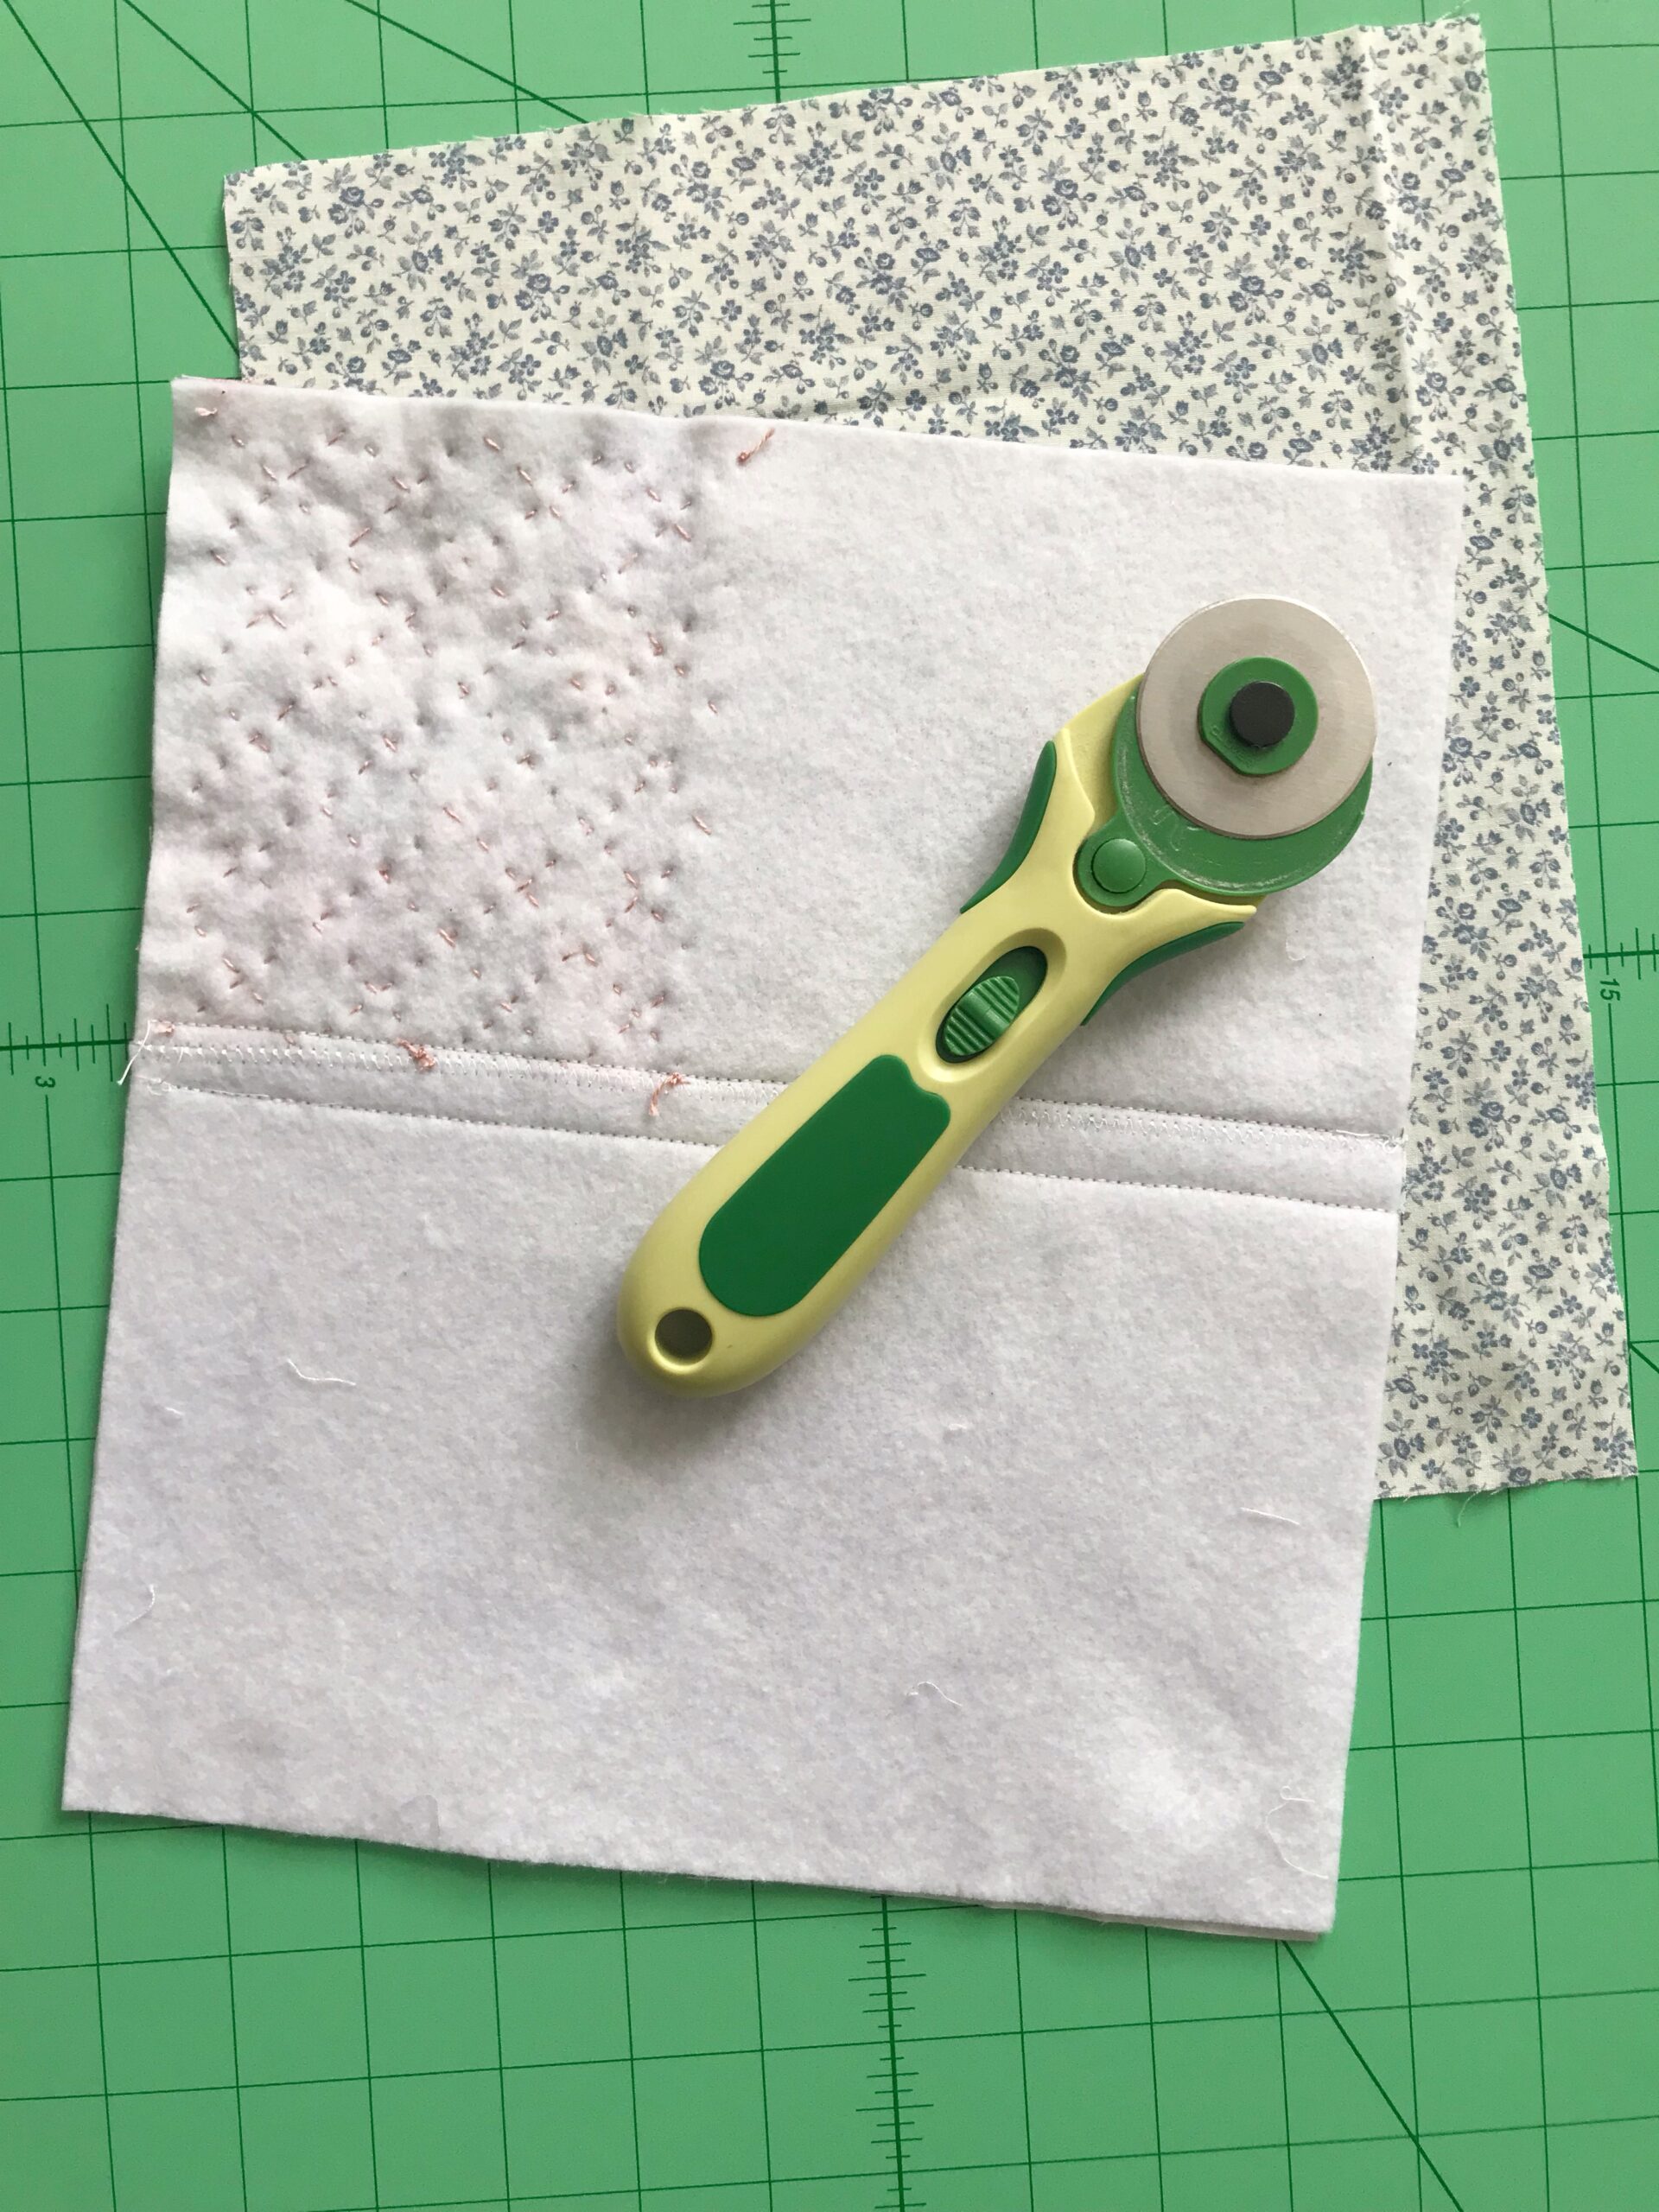
Once all your illustrations are outlined and details are sewn, it is time to get creative in how you want to embellish your mug rug. This is one of my favorite parts! I wanted to incorporate some patchwork scraps into mine because patchwork always makes me happy! After I pieced together little squares of patchwork and sewed that to the bottom of the wording block, I then sewed those to the flower jar illustration, making one long seam down the middle of the Mug Rug. Now I had a complete front panel. Take your scrap of fusible quilt batting and iron that to the back of the front panel. (If you do not have fusible batting, that is okay but I used fusible on this project just to hold it in place really firmly instead of basting it.) I also wanted to do a little hand sewing in places. So I marked X’s on each patchwork square and simply sewed some hand stitches. You know me and hand-stitching… every project I do has to have at least a little of it!
.
.
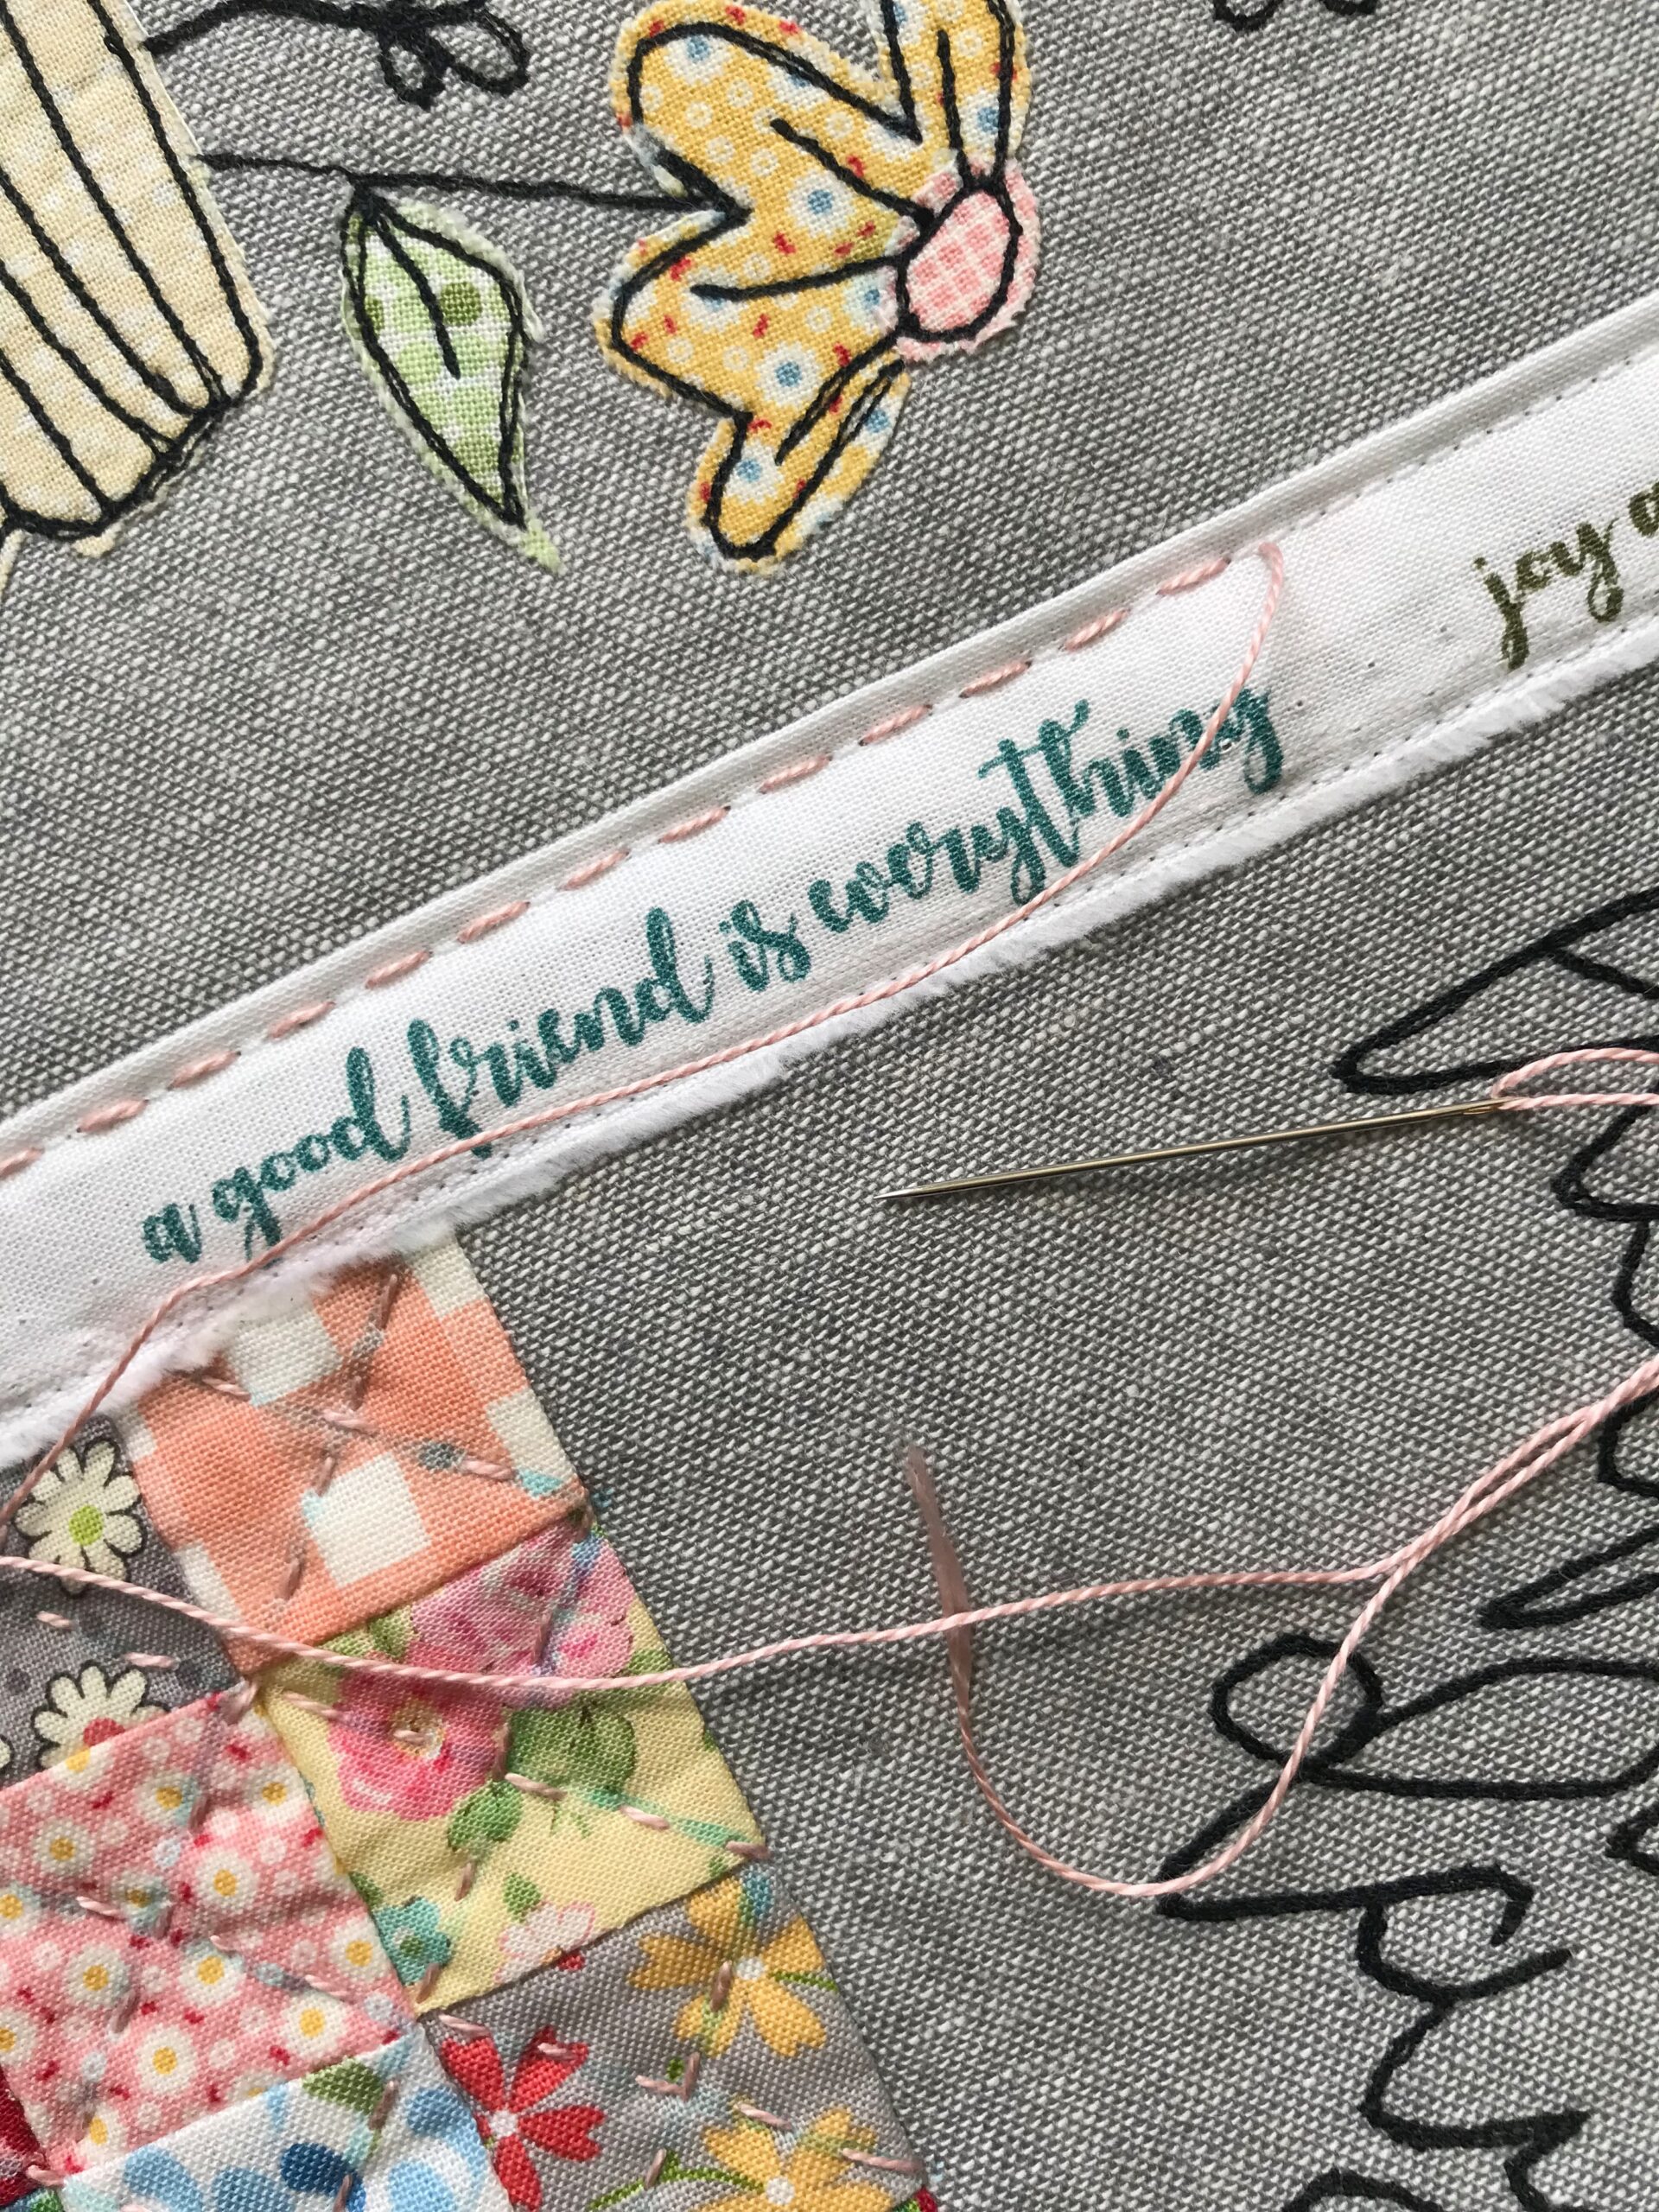
If you have any little pieces of ribbon, ric-rac, or a cute fabric selvedge those are always fun to add in places. Don’t use anything with bulk since you will be placing a mug, glass or plate on your mug rug! I had a darling fabric selvedge that I had been saving for just this project. Add all your embellishments, hand sewing, etc… to the front panel piece BEFORE attaching any backing. I used my fabric selvedge scrap to cover the middle seam on my mug rug. After I sewed it with my sewing machine, I went back over those stitches with embroidery thread just to make it jump out a little!
.
.
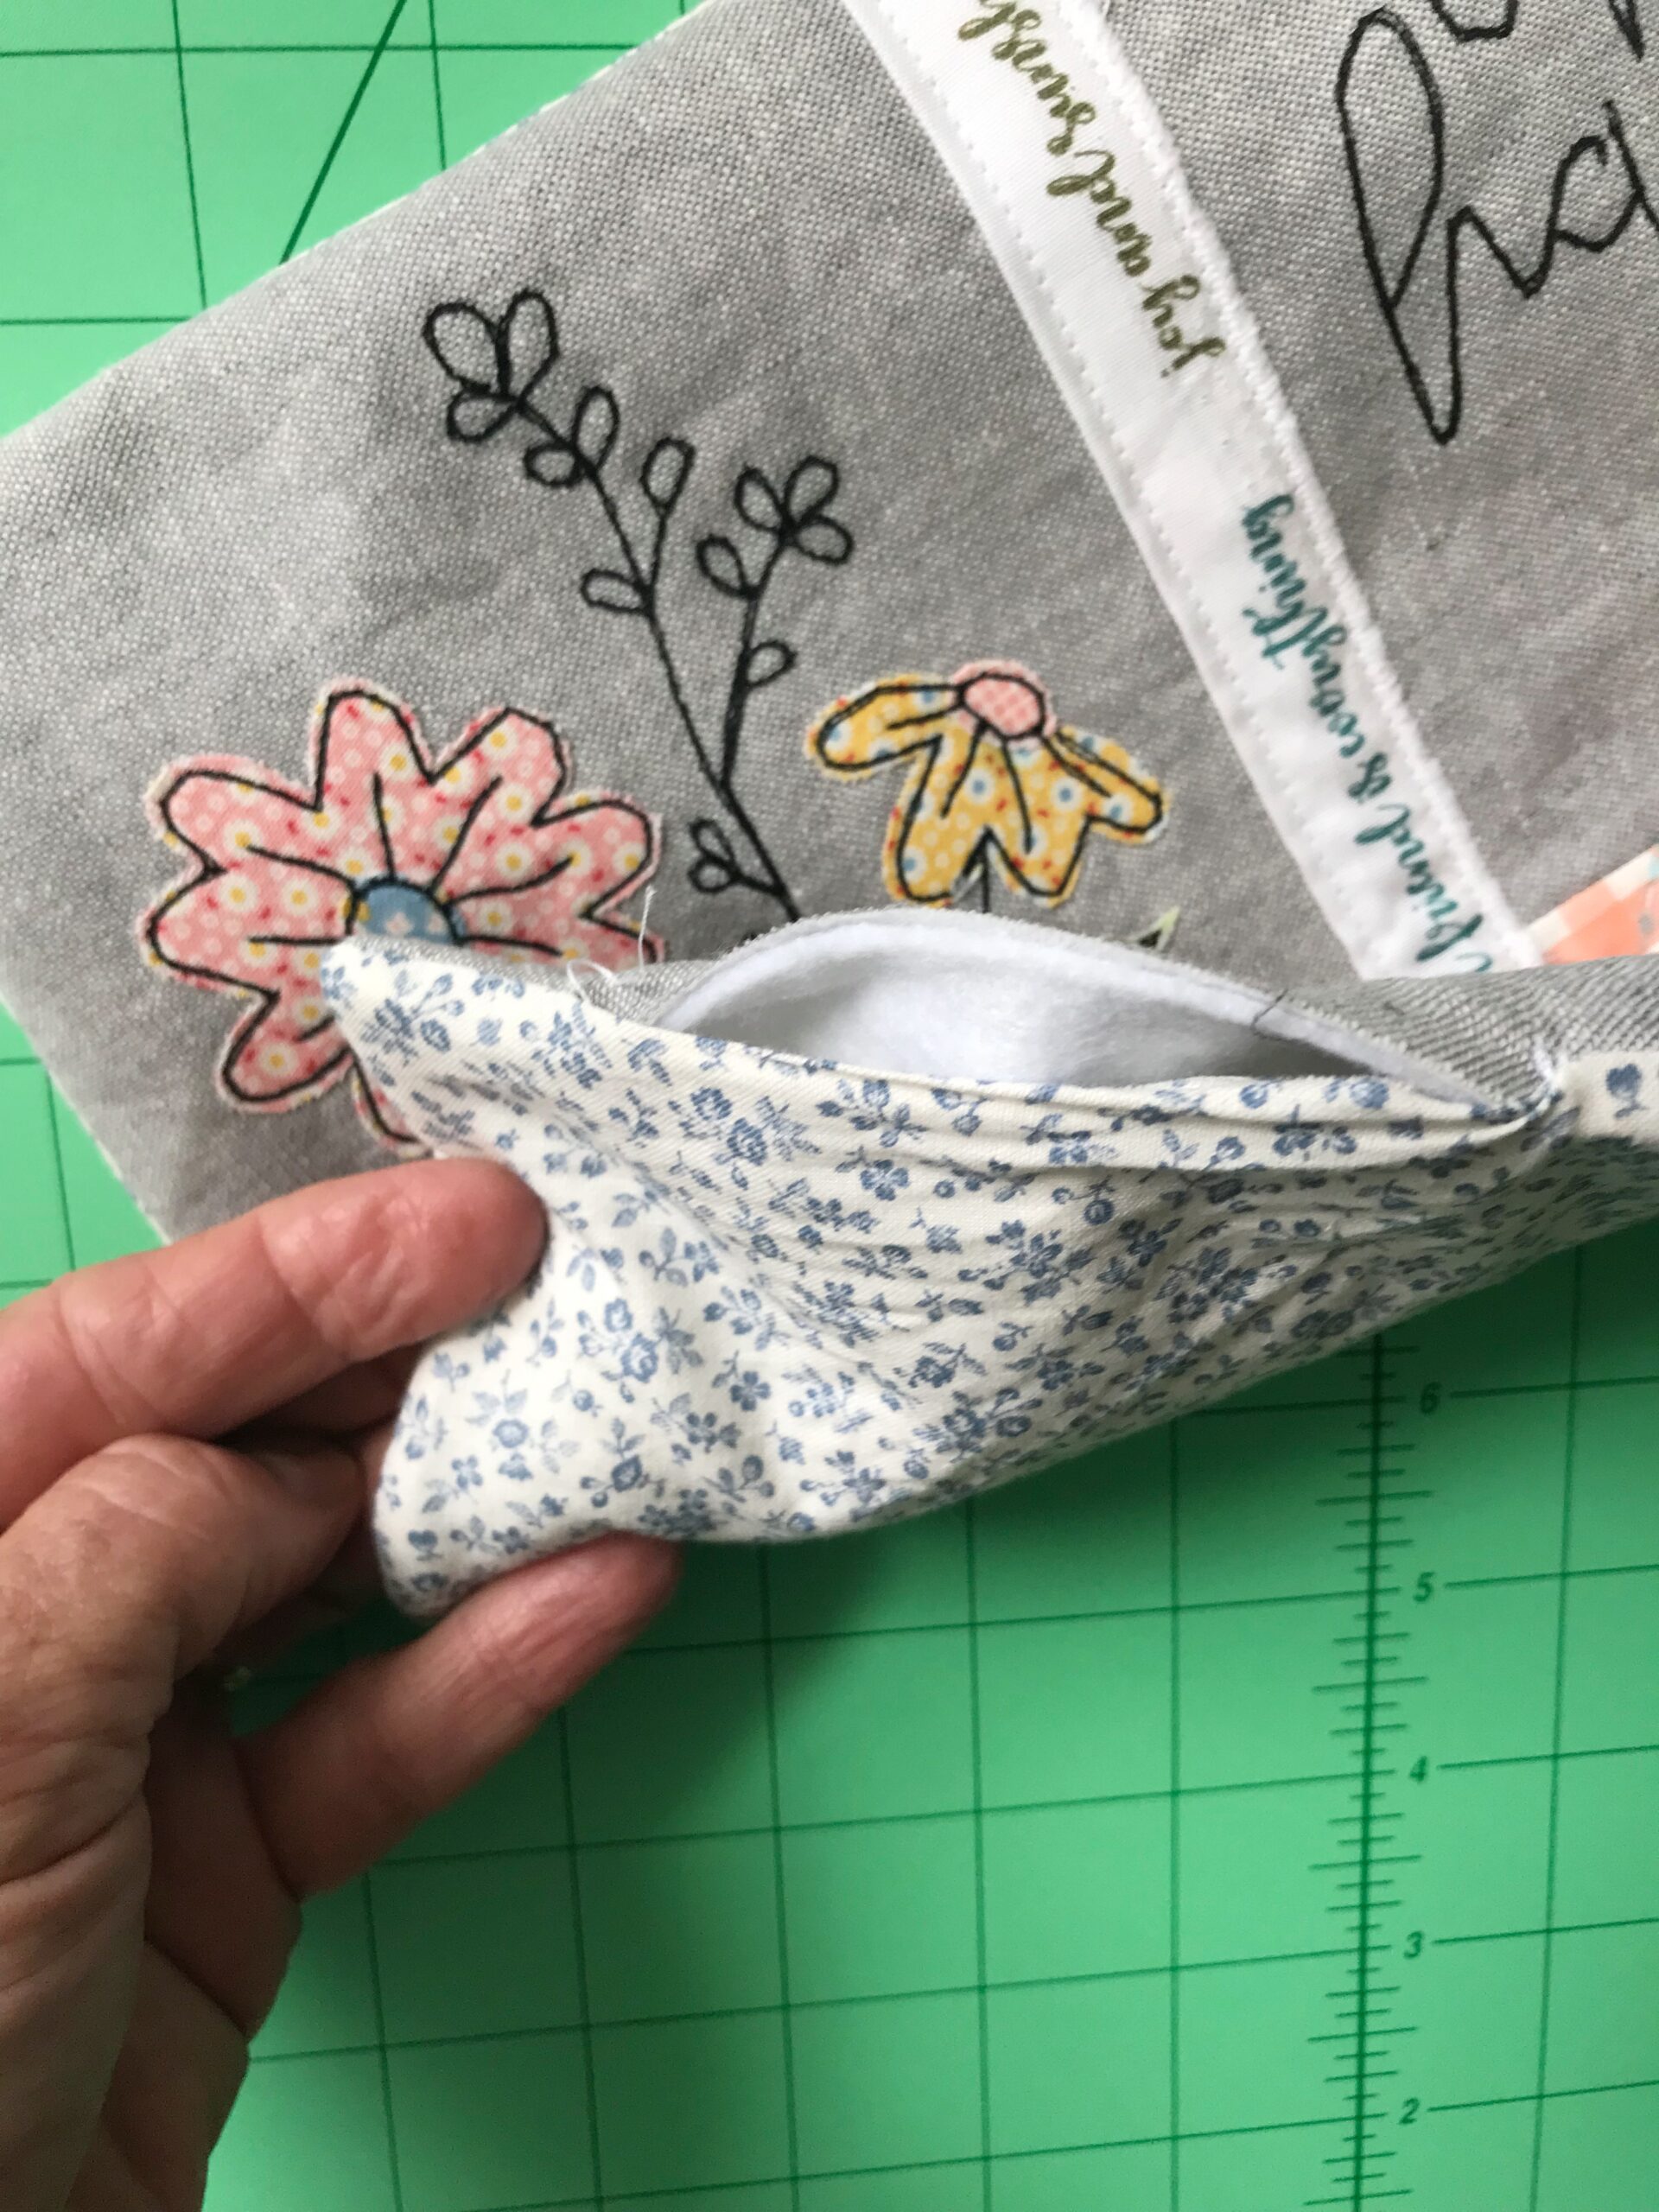
Now you will take your backing fabric and cut it to the exact size as your final front panel. Sew these right sides together, leaving a small opening for turning.
.
.
Turn your mug rug right sides out through the opening, pushing out the corners. Iron carefully and then hand sew the opening closed with matching thread.
.
.
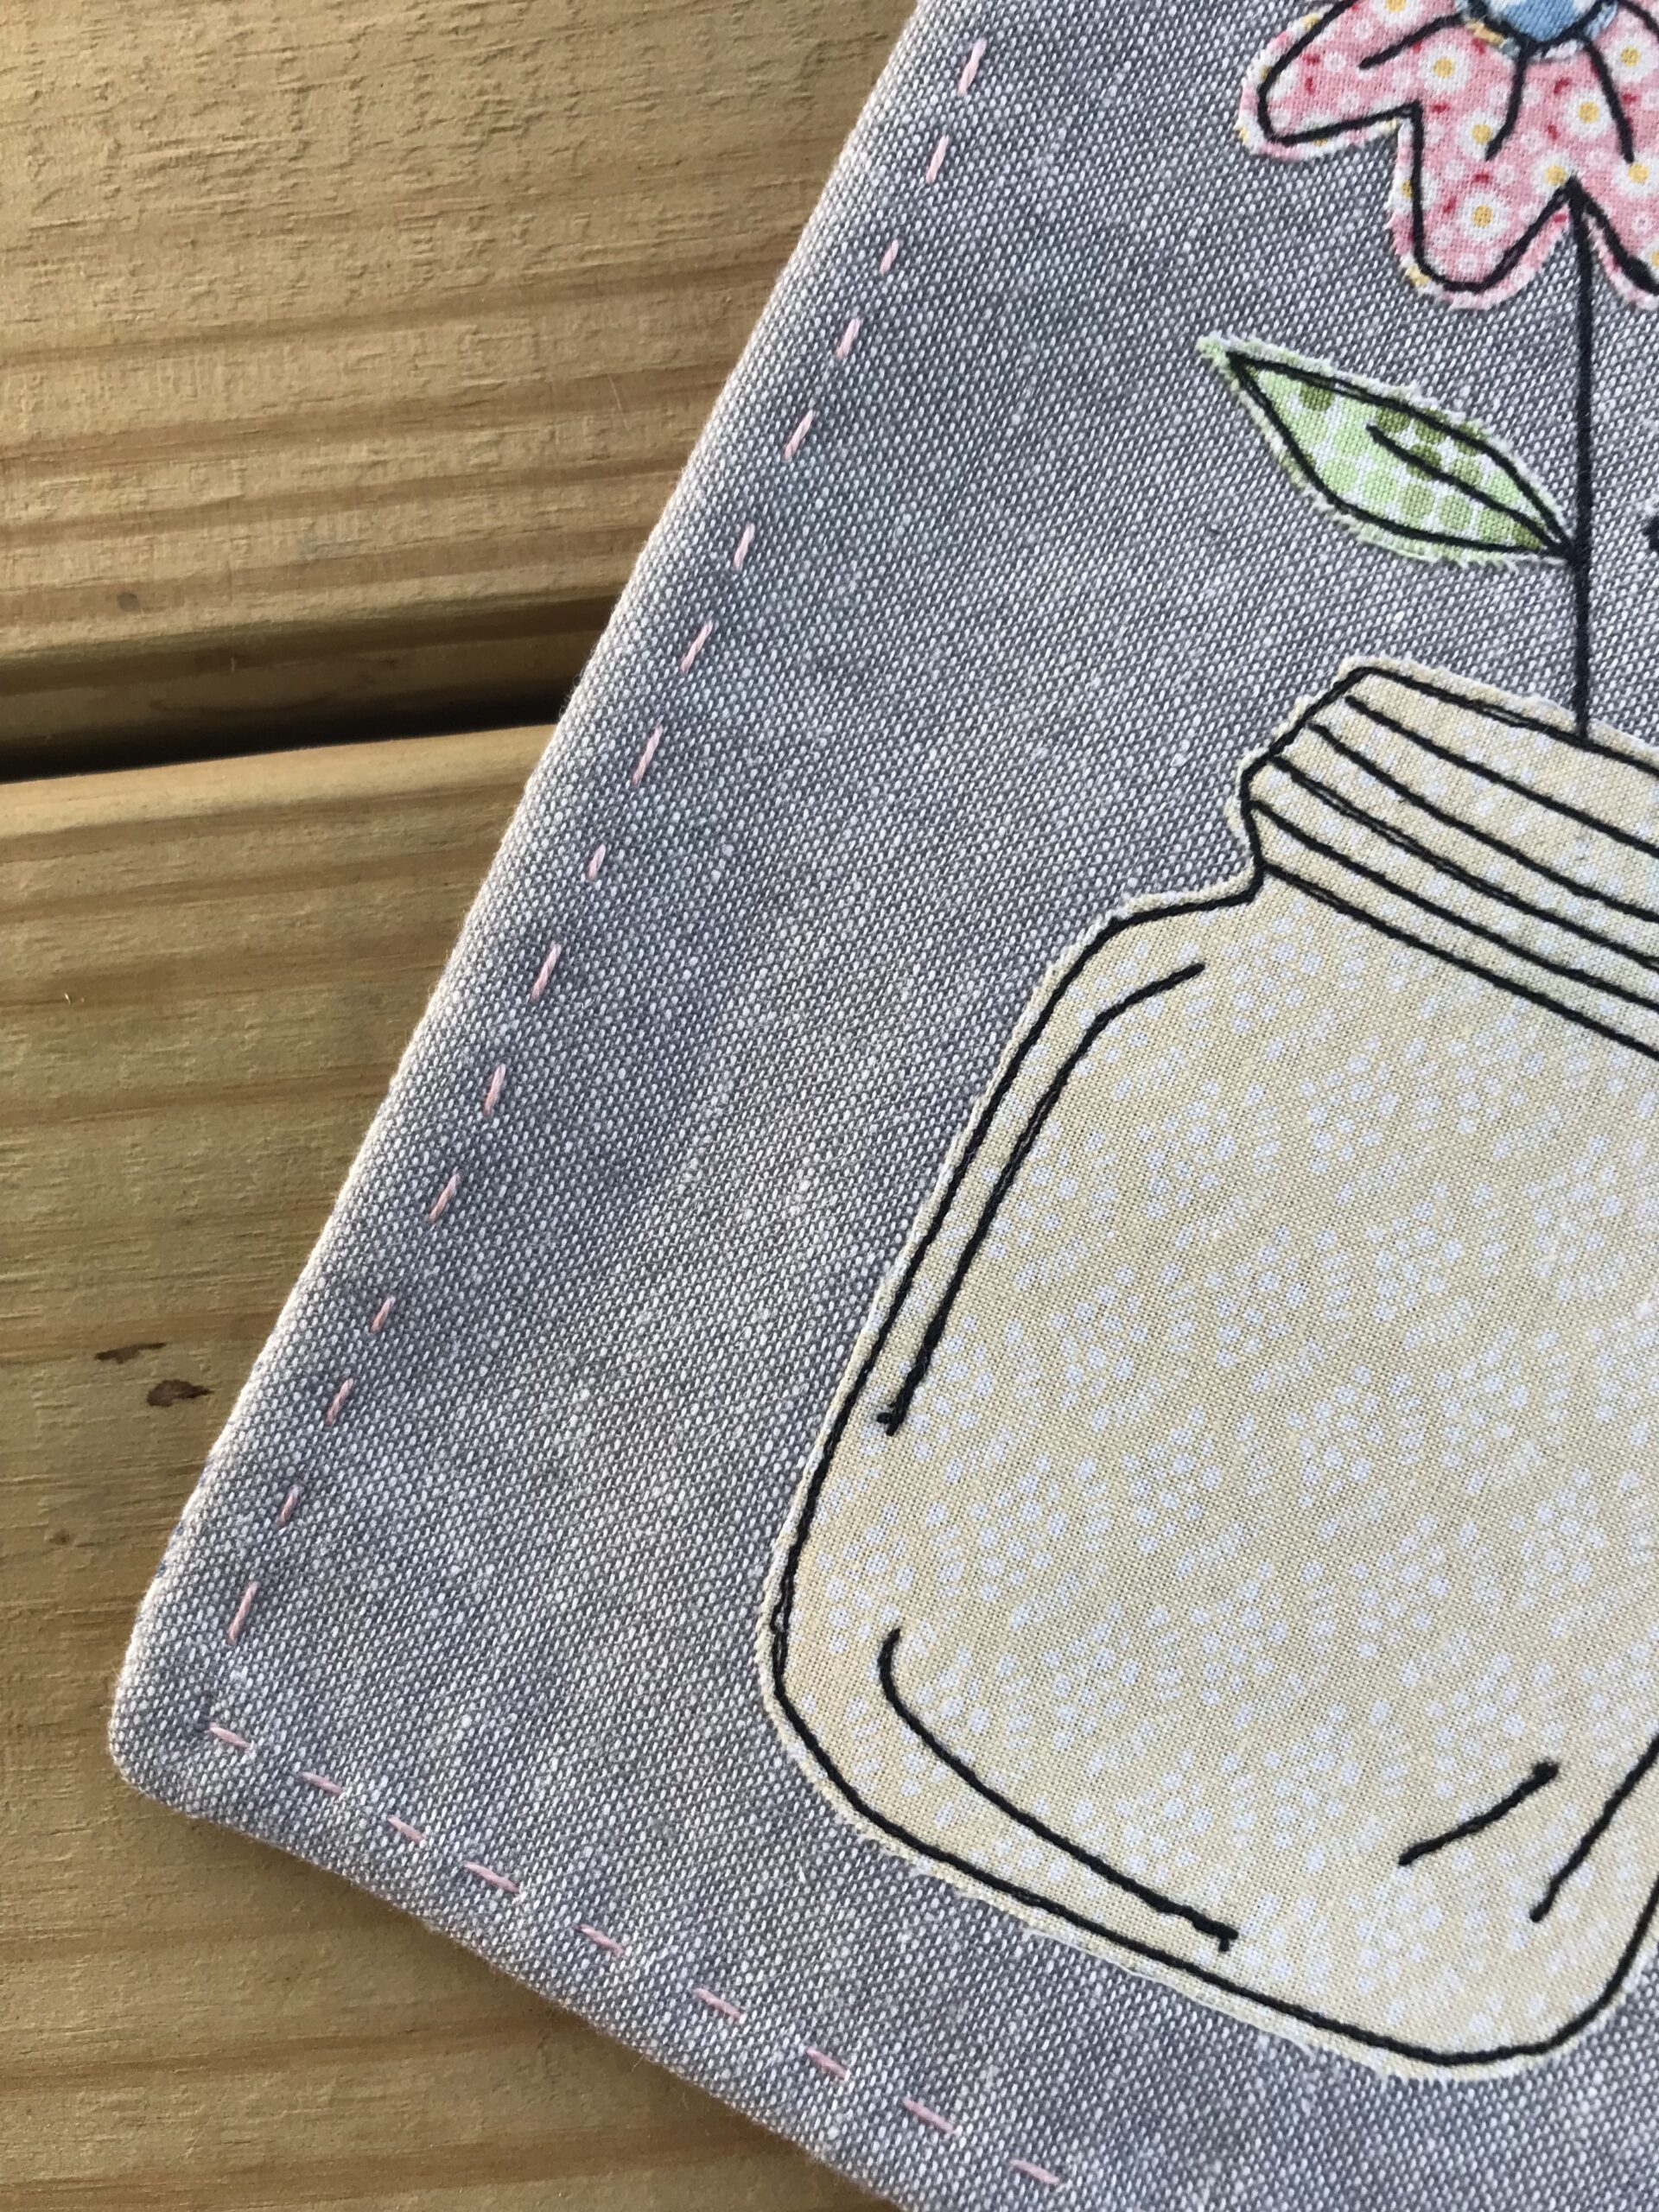
Using your water soluble marker draw lines about 1/4 inch inside the edge of the mug rug and sew a simple hand stitch all the way around. I used embroidery thread for this. You do not have to sew all the way through to the back of the mug rug… just do a simple running stitch through your top layer. It is simple and fast since you aren’t sewing through all the layers.
.
.
Use a spray bottle of water to spray all the blue marking lines on your finished mug rug. Let it sit to dry and make sure all the lines have disappeared. Give your mug rug a final press with the iron and it is ready to gift to your dearest friend! Happy sewing, my friends!
.
Until our gravel roads cross again… so long.
Dori


This is beautiful! I’m going to give it a try!!
What a wonderful project! Thank you so much for sharing. I love the flowers but I bet these would also be great with Christmas scraps and a Christmas saying. I’m adding them to my gift idea list. Now I just need some time to sit at my sewing machine 🙂
I love that Dori it is so pretty. I wish I could sew as I would love one for myself and a couple of Farmgirl Friends. You always have the greatest ideas and make the prettiest useful pieces.
Thank you for sharing and Happy Summer.
Hugs,
Debbie
So cute..Thank you
I love this project so much! What a beautiful gift! This will be an heirloom for sure! Thank you for sharing. Happy Summer!!
Sew cute!
Where are the giveaway winners announced? I don’t see that. Stay cool we are 3 weeks away from the halfway point of summer.
Hello Tori! You can find the winner post here: https://www.farmgirlbloggers.com/24240
Planning to make at least 3 to give to my tea party friends. They love things I make for them and this is the perfect project to do at do when I am between bigger projects.
What a cute idea! I am not new here, but quiet. I occasionally read blogs, but I find myself being captivated by life and other things.
I am actually living in Oro Valley, Arizona, ( northern foothills bedroom community of Tucson) and soon to be moving to New Mexico, more specifically in the north central area, near the Sandia Mountains, halfway between Santa Fe and Albuquerque. We wanted to be between both cities for medical convenience, as my husband is in remission from cancer. We now own a small ranchette of 7 acres and will live in an adobe home, which we LOVE! I wanted to simply give a shout-out and actually, and finally, introduce myself.
I am a wife, mother, grandma, and definitely a country woman, not a city lover, by ANY stretch of the imagination! If it were solely my decision, it would have been 100 acres, 100 miles from the nearest neighbor. LOL!
Wishing all a wonderful upcoming week.
I love all it! Itis very pretty!
Thank you for sharing.
These are see sweet! Beautiful work.
Lovely mug mat! I am recently retired and look forward to using up as much of my “stash” as possible. This mug mat may be my first project! Thank you for providing so many wonderful ideas!