

Hello friends!!! Here I am again… bringing you a blog post with all the deep thoughts that ended up in a “winging it” kind of project! Smile!
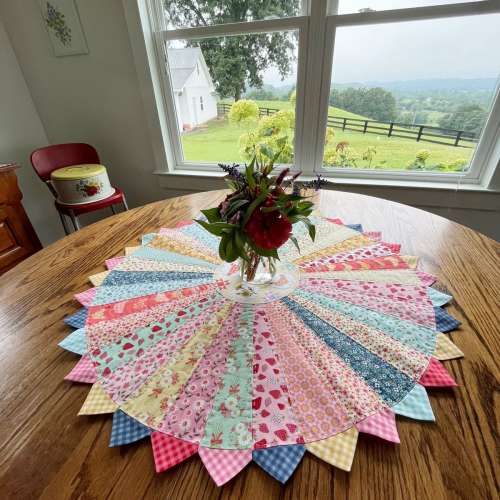
I’ve been wanting to do a little update in my little dining room (that is actually kind of part of my kitchen) and struggling with what to do. I updated my curtains to some darling yellow gingham but still needed some WOW thing. I decided to focus on my old round oak table.
.
..
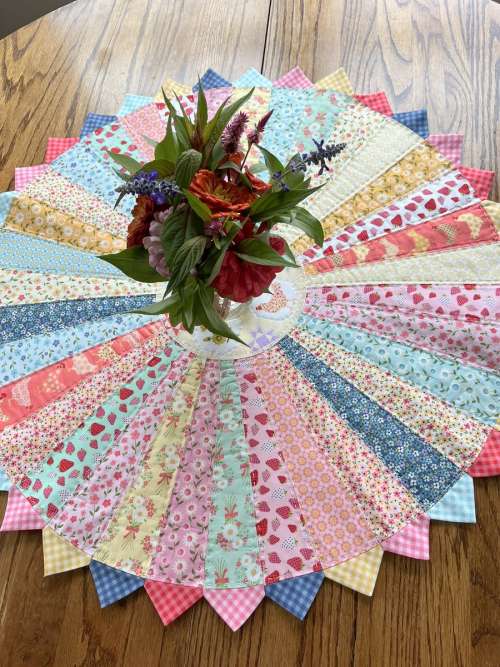
So let me tell you about today about this gorgeous table topper I made. This absolutely darling fabric line is called Prairie Sisters Homestead by Poppie Cotton. It is one of the sweetest lines of fabric that I’ve seen in a while. It was screaming DINING ROOM the minute I opened the package when it arrived in the mail!!!
.
.
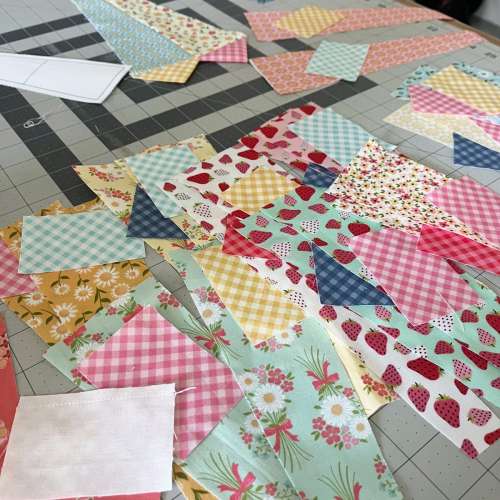
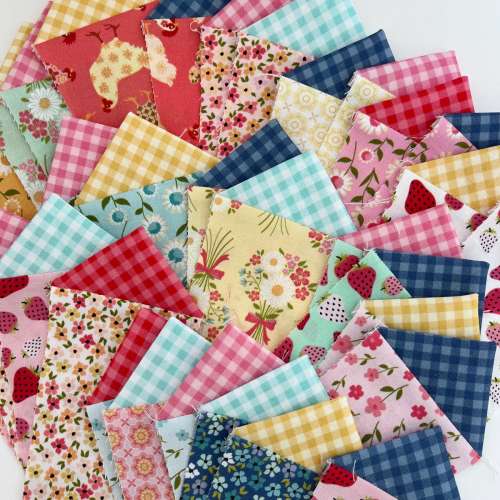
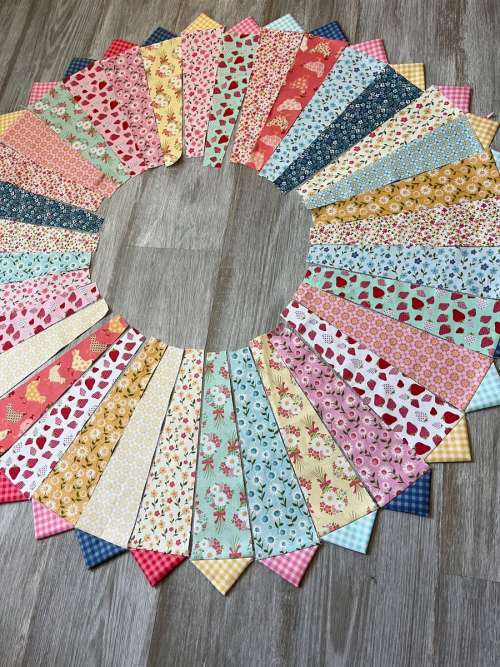
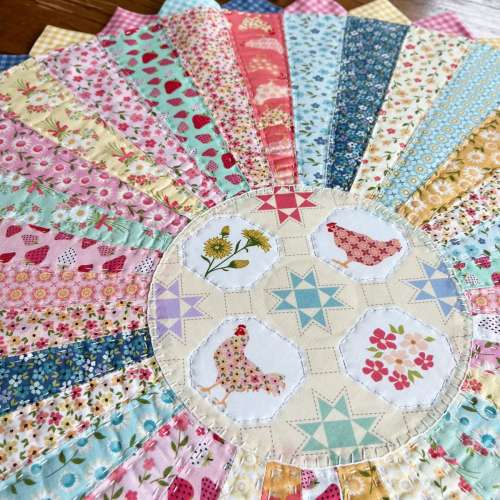
I decided a round table topper was what I would make. And I instantly thought of Dresden Plates, but I’ve never really sewn one before (other than a teeny project). I scoured Pinterest looking for patterns and tutorials and honestly I really never found exactly what I was envisioning. So of course… I jumped in and winged it! I did find a pattern for the blade part of the Dresden and I printed that up and cut one of every fabric in the line.
.
.
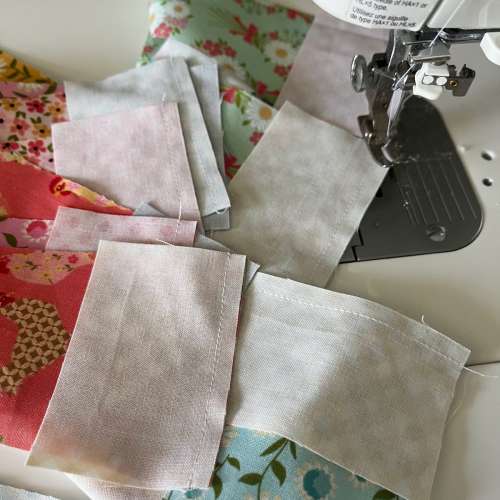
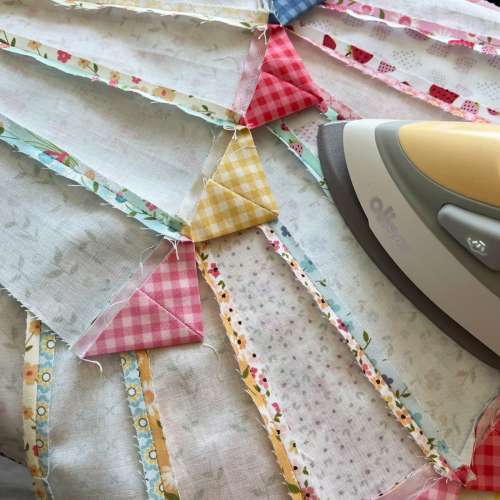
I made a different pattern for the point part of the dresden blades as I wanted to showcase the beautiful gingham fabric in the points. And I chain sewed those pieces very quickly.
.
.
I didn’t spend any time choosing what prints to put together… I just grabbed one blade and one point and sewed them together.
..
.
Then I laid them all out on the floor and began sorting and figuring the best way to lay them out. Here’s a big issue with making a Dresden Plate table topper without a pattern. How in the world do you know how many of the blades you need???? I just laid out all that I had made and they seemed perfect (???) so I sewed them together. It seemed so easy that I kept wondering if maybe there was something I was missing! I knew the center plate area seemed pretty big but I had a plan for that, so I didn’t think anything of it.
.
Turns out there is something to be aware of… too many Dresden blades sewn together may not form the perfect circle and you end up with a big round table topper that wants to pucker up!! But by the time I figured that out, it was too late. As with a lot of projects I wing… I just smiled and thought “oh well, its still beautiful”!
Incidentally, AFTER I finished this table topper I found a great website that explains the whole process of getting the correct number of blades for the perfect size plate etc… Click here to read that.
..
.
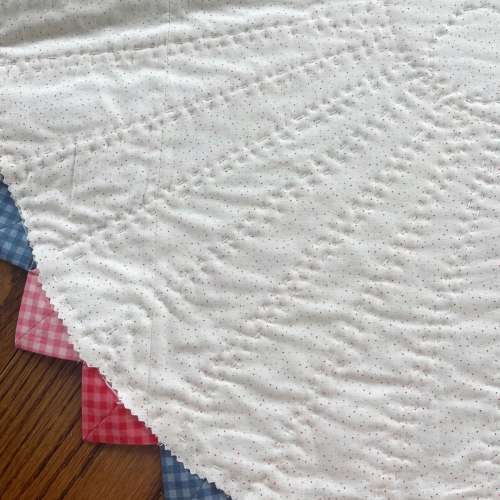
Okay… tell me I’m not the only one that loves the back of a project almost as much as the front??? Ironing all those seams to perfection on the back just made me so happy! Ha!
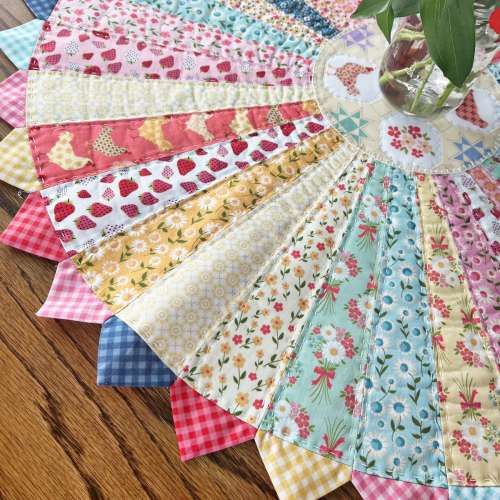
So…here’s the next big tricky thing. How in the world do you finish something like this on the back? I wanted it to be like a mini quilt, but yet the batting and backing would have to go on different due to the points. I literally stewed on that for two days. Finally I just cut a round piece of fusible fleece batting and ironed it to the back of the what I had sewn on the Dresden Plates. Once I did that, I then ironed the round piece of fabric for the Dresden Plate that I had cut for the center. It ironed on perfectly and adhered to the fusible fleece that was on the back side of the topper.
Then I cut a low volume piece of fabric for the backing and used spray baste to attach that to the fusible fleece. I still didn’t know how I would finish the raw edges of the backing but I just left it for now. (No pictures of these two steps, sorry. I think I was a little too apprehensive to want to photograph it!)
.

.
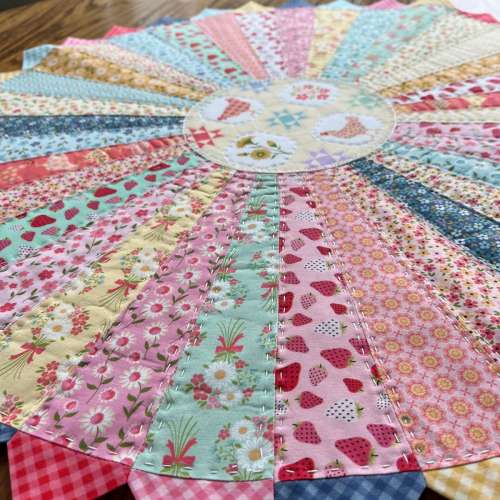
Then of course the quilting began. Because, quilting is my thing. I don’t care how busy I am, how much is going on in my life… I always, always have a little hand quilting or sewing project that I work on at night while my husband plays his banjo! I used a simple old-fashioned button hole stitch to sew the center plate on. I also quilted around some of the little designs on the center piece.
.
.
I quilted about 1/8 of an inch inside of the seams on each blade. It just got sweeter with every stitch!
.
.
Seriously friends… how fun is this??
.
.
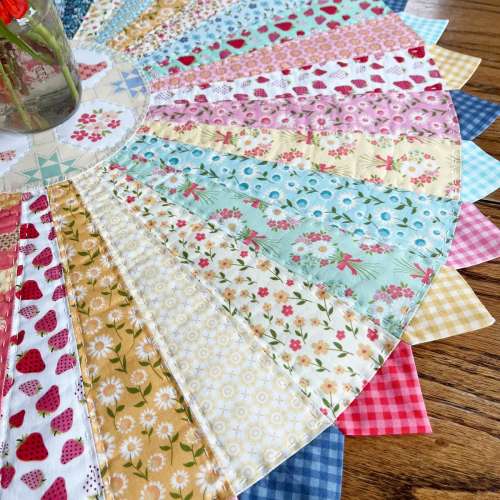
Probably one of my favorite things though are the points on each blade. The gingham is the perfect color.
.
.
I guess I must talk about the backing. Honestly, this stumped me. I am going to finish that edge with a hand sewn bias binding… but for now, I simply cut it with pinking shears until I figure out exactly how to do that. Those points make it super tricky! But its been brewing in my mind and I think I have a plan!
.
.
I absolutely love it!
.
.
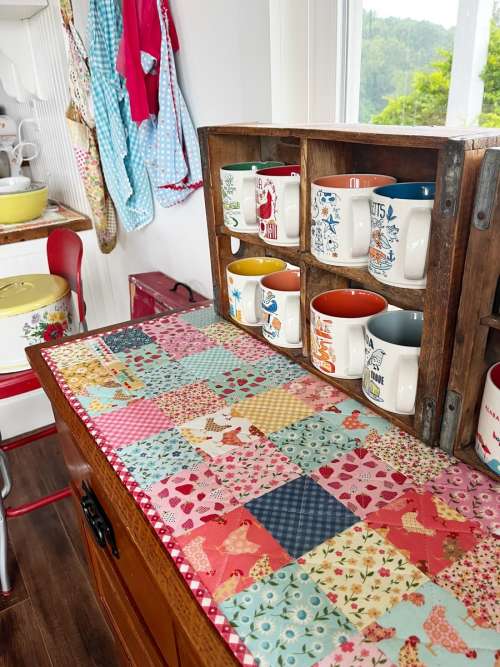
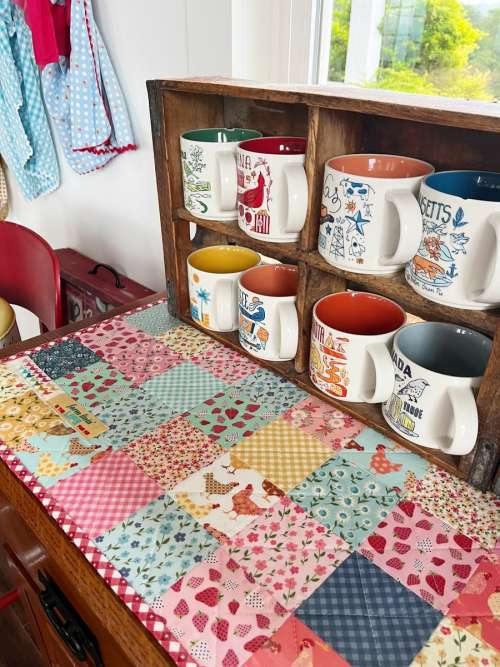
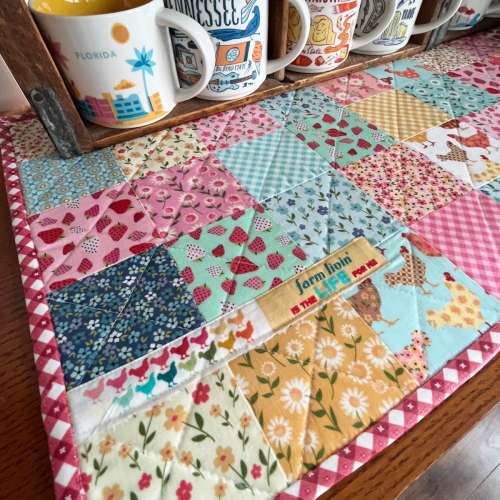
But then I realized that i really needed a topper for my little coffee station as well! So I quickly cut some 3.5 inch squares and pieced together a little runner. It was fast, easy and really tied it all together. I did not hand quilt this!
.
.
You might notice that this has a little different sheen to the fabric? I experimented with a product by Thermoweb called Liquid Vinyl. You literally use a paintbrush and paint it on your finished project. Let it dry and add another coat. I did this three times. And my final product is a water proof table runner! Which is absolutely necessary under my coffee pot! I was so impressed with the product I’m thinking of all the fabric things I want to water proof!
.
.
And there you have it my friends! A little dining room update. Oh and I love the selvedge from this fabric so much… I had to use some on the patchwork runner. “Farm Livin’ is the LIFE for me”!
So tell me… what is the latest project you’ve done to spiff up a space in your house? And do you go in with a plan, or do you wing it? I’d love to hear all about it in the comments!
.
.
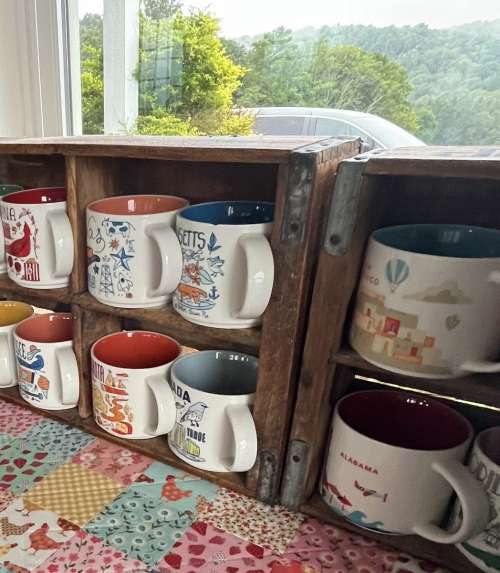
P.S. On a side note… did you now that old wooden Coca-cola boxes make amazing cup holders when they are stood up on their side? These mugs are quite big and they fit like the were made for it!
Until our gravel roads cross again… so long.
Dori


So glad to see your fun work I sewed 2 tablerunners today for my kitchen table. I used some fabric I’d been saving for whatever came my way. One side is blueberries on the stems( navy blue and light colored polka dots backgrounds). The other side is a multicolored outdoor scene of different birds and birdhouses. I used the 10 minute tablerunner pattern given to me by a friend. I added decorative stitching on the borders. Voila!!! LOVE IT ! Wish I could post a picture of it. Oh well. Going to work on fabric boxes tonight to give as gifts to friends. Blessings!
Hi Terry! Wow that sounds wonderful! I bet they are beautiful!
~ Dori ~
Beautiful job on the table toppers! WAY more hand stitching than I want to do, though.
Those cups are from Starbucks, aren’t they? I have one, from Houston, where I used to live. Maybe next trip I’ll get one that says Texas.
I would love to find one or two of those old Coke boxes, and exactly for that kind of thing.
What an eye-catching beauty this table topper is! That fabric is scrumptious! The only spiffing up I’ve done is knitting cotton dishcloths to match my dish towels. I so enjoyed choosing yarns to match the colors in the towels. Be blessed!
what a beautiful project, that will put a huge smile on your face each time you walk into the room. You have such a good eye!
I love the Dresden Plate and as always, beautiful done. your always an Inspiration. Wishing you and your family a healthy and happy Fall season.
Dear Dori, thank you for sharing your beautiful creation! I don’t think I have ever seen a cheerier “table runner/centerpiece”. I wonder if it’s possible to not smile when seeing it? I doubt it. :):) As for me, I am not a fabric artist but; I do collect vintage doilies and lace etc. which I have all over my home. Have a great rest of the Summer! Tammy
I think your projects are just adorable! I so enjoyed seeing the steps I wonder if the waterproofing product you used would help keep fabric from fading outside on my deck tables Would love to make cute table cloths for them Thank you again for sharing your talents and awesome projects!
I love Dree#den Plate design. I love what you did.
Absolutely darling!!
Great job, it is lovely.
Marilyn
Love it!!
I just love that Dresden plate table topper! It is so pretty and heartbreakingly nostalgic. Great job winging it!
Absolutely beautiful!!
Love your work and you hand quilted!!!!!